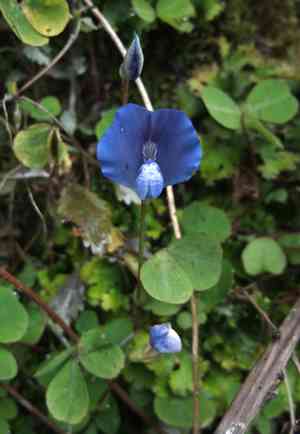
Blue-oxalis (Parochetus communis)
Also known as: Blue Oxalis, Shamrock Pea
Blue-oxalis is a popular groundcover choice due to its attractive clover-like leaves and vibrant flowers. Its dense, low-growing foliage effectively covers the ground, helping to suppress weeds. This perennial spreads quickly and is valued for its aesthetic appeal. However, it is not frost-tolerant and requires protection from very low temperatures.
In This Article
Attributes of Blue-oxalis
Lifespan
Perennial
Plant Type
Vine
Plant Height
15 cm
Spread
50 cm
Leaf Color
Green
Flower Size
2 cm
Flower Color
Purple Blue
Images of Blue-oxalis

Quickly Identify Blue-oxalis
1
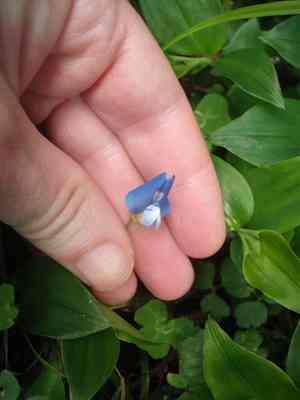
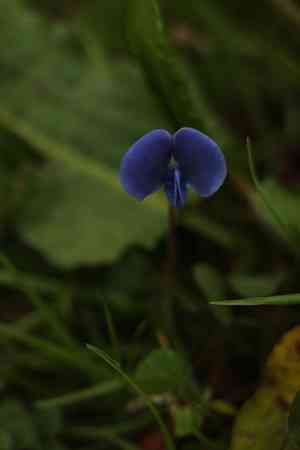
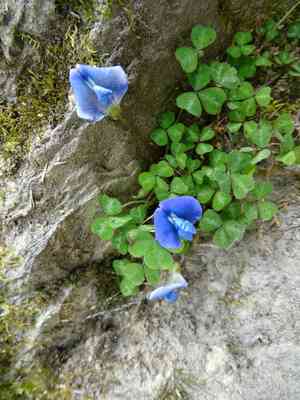
Identify Parochetus communis by its distinctive blue and pink flowers, trifoliate leaves, and creeping growth habit. The leaves resemble those of clover, making it easier to spot.
Scientific Classification of Blue-oxalis
Phylum
Vascular plants
Class
Dicotyledons
Order
Fabales
Family
Legume
Genus
blue oxalis
Species
Blue-oxalis
Planting and Growing of Blue-oxalis
Care Difficulty
Easy
Watering Schedule
Every 4 days
Sunlight Requirements
Partial sun
Sunshine Duration
4-8 hours
Ideal Temperature
60-75℉
Soil Type
Potting Mix, Peat Mix
Soil pH
6.5-7.5
Fertilizer Type
Balanced
Pruning Season
Spring, Summer
Pruning Area
Branches, Leaves
Pruning Frequency
2 times a year
Repotting Season
Spring
Pot Type
Plastic, Ceramic
 How to Water Blue-oxalis?
Parochetus communis requires about 300 ml of water per session. It's essential to maintain moist soil without overwatering. The ideal is to achieve a balance where the soil feels damp but not waterlogged. Water until you notice a slight drain from the bottom of the pot, indicating sufficient saturation.
What are the symptoms of an underwatered Blue-oxalis?
›
What should I do if my Blue-oxalis is not getting enough water?
›
What are the symptoms of an overwatered Blue-oxalis?
›
How to save an overwatered Blue-oxalis?
›
 What Are the Sunlight Requirements for Blue-oxalis?
Partial shade or dappled light promotes vibrant foliage and vigorous growth, while avoiding direct sunlight reduces leaf burn risks.
More About Sunlight Requirements Techniques→
What is the ideal location for Parochetus communis?
›
How to adjust light exposure for Parochetus communis?
›
What are the benefits of providing ideal light conditions for Parochetus communis?
›
 What Is the Ideal Temperature Range for Blue-oxalis?
For optimal growth, Parochetus communis thrives in temperatures ranging from 60°F to 75°F. This range mimics its native habitat conditions, ensuring proper metabolism and growth. Maintaining these temperatures helps in achieving the desired plant size and bloom quality.
 What Soil is Best for Blue-oxalis?
Parochetus communis thrives in soil that can retain moisture while allowing for proper drainage. This balance prevents the roots from rotting, keeping the plant healthy and vibrant. Having a rich supply of organic matter and nutrients in the soil promotes robust growth. A well-fertilized soil ensures the plant receives essential macronutrients like nitrogen, phosphorus, and potassium. The plant requires soil with excellent drainage to prevent waterlogging. Well-drained loamy soil is crucial as it eliminates excess water, reducing the risk of fungal diseases.
 How to Fertilize Blue-oxalis?
For Parochetus communis, a balanced fertilizer with a ratio of 10-10-10 is ideal. When using liquid fertilizer, dilute it to half-strength to avoid burning the roots. Apply approximately 5 ml of this solution per liter of water, ensuring the soil is evenly moist but not waterlogged.
 How to Prune Blue-oxalis?
Begin by examining the plant for any dead or diseased leaves or stems. These should be removed first to prevent any spread of disease. Sterilize your pruning shears before and after use to ensure the plant remains healthy. Trim the stems back to just above a set of leaves to promote bushier growth. Aim for a fan shape to allow light to reach the lower sections of the plant. Shaping Parochetus communis is crucial for maintaining its ornamental appeal. When pruning for shape, consider the natural growth habit of the plant and aim to enhance its unique features. Regularly remove stems that disrupt the desired form, ensuring a balanced and aesthetically pleasing appearance. This can be particularly beneficial when the plant is used as ground cover or in hanging baskets.
More About Pruning Techniques→
 How to Propagate Blue-oxalis plant?
1
To propagate through seeds, scatter the seeds onto a seed tray filled with seed-starting mix in early spring. Lightly cover with soil, water gently, and place in a sunny location.
2
Select healthy stems with several leaves for cutting propagation. Cut just below a node using sterile pruning shears, strip lower leaves and dip the cut end in rooting hormone.
3
For division propagation, gently lift the parent plant from the soil in early spring. Use a sharp knife to divide the plant into smaller sections, ensuring each has roots and shoots, then replant.
 How to Repot Blue-oxalis plant?
1
Repot Parochetus communis when you notice roots peeking out from the drainage holes or when growth appears stunted. Another clear sign is when water runs straight through the pot without being absorbed, indicating soil compaction. Keep an eye out for these signals typically during its active growing phase in spring or early summer for optimal repotting.
2
Opt for a pot that is 1-2 inches larger in diameter than the current one, with ample drainage holes to prevent waterlogging. A slightly larger pot encourages healthy root expansion without overwhelming the plant. Choosing a breathable material like terracotta can further enhance drainage and prevent root rot.
3
Select a loamy, well-draining soil mix that retains moisture without becoming soggy. This balance is crucial to protect the delicate root system from rot. An addition of perlite or coarse sand can improve aeration and drainage, mimicking the plant's natural habitat and promoting robust growth.
Learn More About Blue-oxalis Diseases
Anthracnose
Bacterial Leaf Spot
Bacterial Wilt
Black Spot
Chemical Injury
Crown Gall
Cyst Nematode
Damping-off
Downy Mildew
Drought Stress
Fusarium Wilt
Gray Mold
Leaf Curl
Leaf Spot
Mosaic
Nutrient Deficiency
Nutrient Toxicity
Powdery Mildew
Root Rot
Root-knot Nematode
Rusts
Sooty Mold
Spider Mites
Temperature Stress
Thrips Damage
White Mold



