Slimleaf drymary (Drymaria molluginea)
Also known as: Drymaria margaritacea, Buttonweed
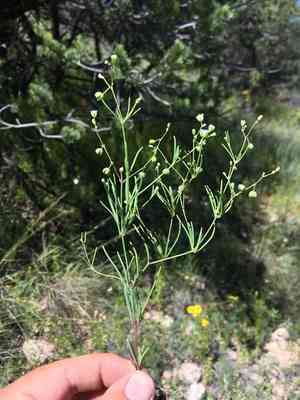
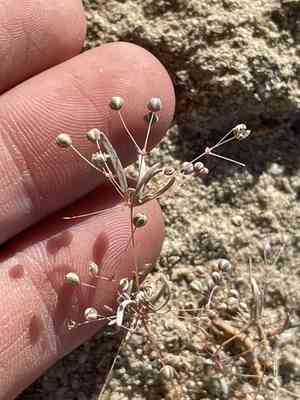
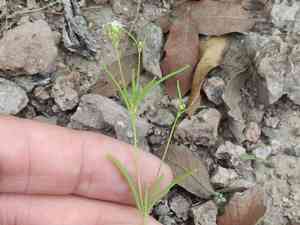
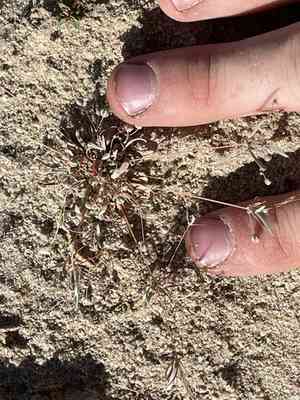
Slimleaf drymary is a hardy, low-growing herb with slender stems and narrow leaves. It typically prospers in dry, sunlit environments such as prairies, grasslands, and rocky terrains. Its small white flowers are well-suited to places with full sunlight and well-drained soil. The plant's ability to spread makes it a resilient ground cover in these open, arid habitats.
In This Article
Attributes of Slimleaf drymary
Lifespan
Annual
Plant Type
Herb
Plant Height
Up to 20 cm
Spread
Not typically measured due to its sprawling nature
Leaf Color
Green
Flower Size
0.3-0.5 cm
Flower Color
White
Images of Slimleaf drymary

Quickly Identify Slimleaf drymary
1
Identification can be done by observing the small, round, white flowers and its sprawling habit. It has slender, weak stems and opposite, ovate leaves.
Scientific Classification of Slimleaf drymary
Phylum
Vascular plants
Class
Dicotyledons
Order
Caryophyllales
Family
Pink
Genus
Drymaria
Species
Slimleaf drymary
Planting and Growing of Slimleaf drymary
Care Difficulty
Easy
Watering Schedule
Every 2 days
Sunlight Requirements
Partial sun
Sunshine Duration
6-10 hours
Ideal Temperature
60-75℉
Soil Type
Potting Mix, Peat Mix
Soil pH
6.5-7.5
Fertilizer Type
Balanced
Pruning Season
Spring, Summer
Pruning Area
Branches, Leaves
Pruning Frequency
2 times a year
Repotting Season
Spring
Pot Type
Plastic, Terracotta
 How to Water Slimleaf drymary?
Drymaria molluginea, with its delicate structure, requires a moderate watering approach. Each watering session should aim to provide approximately 200 ml of water, ensuring the soil is moist but not waterlogged. The goal is to mimic its natural environment, striking a balance between dryness and excess moisture.
What are the symptoms of an underwatered Slimleaf drymary?
›
What should I do if my Slimleaf drymary is not getting enough water?
›
What are the symptoms of an overwatered Slimleaf drymary?
›
How to save an overwatered Slimleaf drymary?
›
 What Are the Sunlight Requirements for Slimleaf drymary?
Drymaria molluginea thrives in partial sun conditions. Ideal light boosts photosynthesis, improving vigor and flowering while reducing disease susceptibility.
What is the best lighting condition for Drymaria molluginea?
›
How to achieve ideal lighting for Drymaria molluginea?
›
What are the benefits of ideal lighting for Drymaria molluginea?
›
 What Is the Ideal Temperature Range for Slimleaf drymary?
Drymaria molluginea thrives best in temperatures ranging from 60 to 75°F. These conditions mimic the plant's natural environment, promoting optimal growth and health. It ensures adequate metabolic processes and prevents stress caused by temperature fluctuations.
 What Soil is Best for Slimleaf drymary?
Drymaria molluginea thrives in well-drained soil to prevent waterlogging. This condition ensures proper aeration and root development, crucial for the plant's health and growth. This plant requires soil with moderate fertility levels. High nutrient content supports its growth without overwhelming the plant and causing excessive foliage at the expense of root growth. While it prefers a well-drained environment, Drymaria molluginea benefits from slightly moist conditions, which help in nutrient absorption and maintaining turgidity.
 How to Fertilize Slimleaf drymary?
For Drymaria molluginea, it's crucial to use a balanced fertilizer, ensuring not to overwhelm the plant. Recommended dosage is to dilute liquid fertilizer to half strength once every two weeks, aiming for an even distribution across the soil.
 How to Prune Slimleaf drymary?
Equip yourself with a pair of sharp, clean pruning shears. This ensures each cut is clean and precise, which helps the plant to heal quickly and reduces the risk of disease or damage. Look for any stems that are overgrown, damaged, or crossing over others. Target these areas for removal as they can impede the natural shape and airflow through the plant, potentially leading to decay or poor health. Cut just above a leaf node at a slight angle. This encourages new growth to flourish and directs water away from the cut, preventing any potential rot. Once you finish pruning, make sure to clean your tools thoroughly to prevent any disease transmission. Removing all cuttings from the base of the plant helps prevent fungal growth and maintains good garden hygiene.
More About Pruning Techniques→
 How to Propagate Slimleaf drymary plant?
1
Collect mature seeds from the plant and clean them thoroughly to remove any external debris or pulp. Dry the seeds well before sowing to ensure better germination rates and prevent fungal infections.
2
Select healthy roots and cut them into sections about 2-3 inches long. Treat the cut ends with a rooting hormone to promote faster and more effective root growth once planted.
3
Plant seeds or root cuttings into pre-prepared containers with suitable soil mix. Water them lightly and place them in an area with indirect sunlight. Maintain consistent moisture levels without overwatering.
 How to Repot Slimleaf drymary plant?
1
Recognizing the right time to repot Drymaria molluginea is crucial. Look for signs such as roots circling the pot or emerging from drainage holes, or when the plant appears to be struggling despite regular care. This typically means it’s time to give your plant more room to grow.
2
Choose a pot that is slightly larger than the current one, with good drainage holes. This will ensure excess water can escape, preventing root rot and promoting healthy root growth. Clay pots can be a great option as they provide good breathability.
3
Opt for a well-draining potting mix. Soils rich in organic matter with good aeration properties support root expansion and nutrient absorption, helping your Drymaria molluginea thrive in its new container.
Learn More About Slimleaf drymary Diseases
Anthracnose
Bacterial Leaf Spot
Bacterial Soft Rot
Bacterial Wilt
Chemical Injury
Damping-off
Downy Mildew
Drought Stress
Fusarium Wilt
Gray Mold
Leaf Curl
Leaf Spot
Mosaic
Nutrient Deficiency
Nutrient Toxicity
Powdery Mildew
Root Rot
Root-knot Nematode
Rusts
Sooty Mold
Spider Mites
Temperature Stress
Thrips Damage
White Mold


