How to Transplant Zotovia thomsonii?
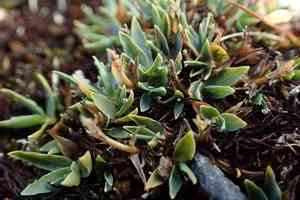
Zotovia thomsonii flourishes when transplanted in mid-spring, facilitating a robust adjustment. Select a bright, adequately drained location to foster its development. Periodically, amend the earth with compost to strengthen its rooting.
What Preparations are Needed Before Transplanting Zotovia Thomsonii?
What is the Ideal Time for Transplanting Zotovia Thomsonii?
Moving zotovia thomsonii in early to mid-spring allows for optimal root development prior to summer's heat. Cooler temperatures and increased precipitation support healthier root growth and reduce transplant stress. This timing helps zotovia thomsonii flourish as temperatures rise, boosting its overall development and vitality for the growing season.
How Much Space Should You Leave Between Zotovia Thomsonii Plants?
When relocating zotovia thomsonii, position plants 12-18 inches (30-45 cm) apart. This provides ample room for expansion and air circulation, lessening nutrient competition and lowering disease risk.
What is the Best Soil Mix for Zotovia Thomsonii Transplanting?
Prepare well-draining soil using a blend of loam, sand, and compost. Incorporate a balanced fertilizer, such as 10-10-10 (N-P-K), to supply essential nutrients for zotovia thomsonii's robust growth.
Where Should You Relocate Your Zotovia Thomsonii?
Select a sunny location for zotovia thomsonii where it will receive at least 6 hours of direct sunlight daily. Adequate sunlight is vital for the plant's vigorous growth and blooming.
What Equipments Should You Prepare Before Transplantation Zotovia Thomsonii?
Gardening Gloves
To safeguard your hands while handling soil and plants.
Garden Spade or Shovel
For excavating holes and trenches.
Hand Trowel
For smaller, more precise digging tasks.
Watering Can or Hose
To hydrate the plants before and after relocation.
Wheelbarrow or Bucket
To transport the plant along with some soil.
Mulch
To provide a protective layer over the soil post-transplant.
Stakes and Ties
To support the plant as it settles into its new spot.
How Do You Remove Zotovia Thomsonii from the Soil?
How Do You Remove Zotovia Thomsonii from the Soil?
From Ground: First, moisten the zotovia thomsonii plant's soil. Then, dig a wide perimeter around the plant with a shovel or spade, ensuring the root ball remains intact. Carefully work the spade beneath the root ball to lift the plant from its original position.From Pot: Thoroughly water the zotovia thomsonii plant. Gently tilt the pot and slide the plant out, supporting the root ball with your hand. If it resists, gently squeeze the pot's sides or use a hand trowel to loosen the soil.From Seedling Tray: Water the zotovia thomsonii seedlings. Use a hand trowel or your fingers to carefully lift the seedlings from the tray, making sure to include as much root and surrounding soil as possible.
Step-by-Step Guide for Transplanting Zotovia Thomsonii
Hole Preparation
Excavate a hole in the new site that is twice as wide and equally deep as the zotovia thomsonii plant's root ball. This ensures ample space for root expansion.
Amend Soil
Incorporate compost or organic material into the soil to supply nutrients for the plant.
Plant Positioning
Place the zotovia thomsonii plant in the hole, ensuring the top of the root ball is level with or slightly above the surrounding soil. Adjust hole depth if needed.
Backfill and Firm
Refill the hole with soil, gently pressing around the plant to remove air pockets and provide stability. Avoid excessive soil compaction.
Water Thoroughly
Provide the newly planted zotovia thomsonii with a deep watering to help settle the soil around its roots.
Apply Mulch
Add a layer of mulch around the plant's base to aid in moisture retention and soil temperature regulation.
How Do You Care For Zotovia Thomsonii After Transplanting?
Watering
Keep the soil around the zotovia thomsonii consistently damp, but not waterlogged, for the initial weeks post-transplant to encourage strong root development.
Monitoring
Regularly inspect the zotovia thomsonii for indications of stress like wilting or yellowing leaves, and address any issues promptly.
Support
Utilize stakes and ties if necessary to support the plant, especially if it is tall or in a windy location.
Pruning
Trim any damaged or dead foliage to help the plant prioritize new growth and reduce stress.
Troubleshooting Common Issues with Zotovia Thomsonii Transplantation.
When is the best time to transplant zotovia thomsonii?
The optimal periods for relocating zotovia thomsonii are mid to late spring for superior outcomes.
How much space should be between zotovia thomsonii plants?
Maintain 12-18 inches (30-45 cm) of distance between zotovia thomsonii plants for ideal growth.
What type of soil is best for zotovia thomsonii?
Zotovia thomsonii thrives in well-draining, fertile soil with a pH that is slightly acidic to neutral.
How deeply should I plant zotovia thomsonii?
Plant zotovia thomsonii at the same depth it was growing in its original container.
How often should I water zotovia thomsonii after transplanting?
Water zotovia thomsonii thoroughly after transplanting and keep the soil consistently moist for the initial few weeks.
Should I fertilize zotovia thomsonii when transplanting?
Refrain from immediate fertilization; wait until zotovia thomsonii is established, then apply a balanced, slow-release fertilizer.
What should I do if zotovia thomsonii shows transplant shock?
Lessen sunlight exposure and maintain consistently moist soil to alleviate transplant shock in zotovia thomsonii.
Can I transplant zotovia thomsonii in summer?
Relocating zotovia thomsonii in summer is not advised due to high temperatures that can stress the plant.
How can I prepare zotovia thomsonii for transplanting?
Water zotovia thomsonii well the day before digging it up to facilitate a smoother transplanting process.
How long does it take for zotovia thomsonii to establish after transplanting?
It typically takes a few weeks for zotovia thomsonii to settle and exhibit signs of new growth after being transplanted.



