How to Transplant Torrey's bulrush?
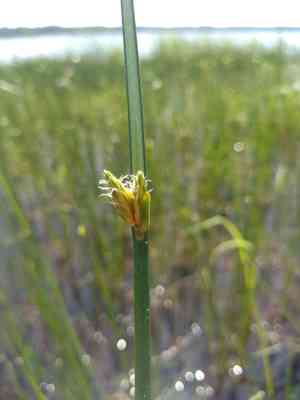
Torrey's bulrush flourishes when relocated from early to late spring, as this timeframe provides ideal growing circumstances. Select a site with full sun to partial shade and damp, adequately draining earth for successful rooting.
What Preparations are Necessary Before Relocating Torrey's Bulrush?
What is the Optimal Period for Relocating Torrey's Bulrush?
The most suitable time for moving torrey's bulrush is from the beginning to the end of spring. This timing allows the plant to benefit from ample hydration and ideal soil temperatures, fostering robust root development and vigorous growth. Relocating during this window maximizes the plant's capacity to flourish and adapt to its new setting, minimizing transplant shock.
How Much Distance Should You Maintain Between Torrey's Bulrush Plants?
Ensure torrey's bulrush are spaced approximately 12-24 inches (30-60 cm) apart to provide each plant sufficient room to expand and thrive. This promotes good air circulation and prevents overcrowding.
What is the Best Soil Mixture for Torrey's Bulrush Relocation?
Prior to moving torrey's bulrush, confirm the soil is damp, rich, and drains effectively. Incorporate a balanced, slow-release fertilizer to enrich the soil. Aim for a loamy or sandy composition, which will support healthy root growth.
Where Should You Replant Your Torrey's Bulrush?
Select a spot that receives full sun to partial shade. Torrey's bulrush flourishes with 6 hours of daily sunlight, but it can endure some shade during the warmest part of the day. This ensures optimal development.
What Equipment Should You Prepare Before Relocating Torrey's Bulrush?
Gardening Gloves
To safeguard your hands while handling soil and the plant.
Shovel or Spade
To excavate and extract the plant from its initial spot.
Garden Trowel
Useful for precise digging and planting tasks.
Watering Can
To hydrate the plant before and after its relocation.
Pruning Shears
To trim any damaged roots or foliage.
Bucket or Tray
To securely hold the plant during its transfer.
How Do You Extract Torrey's Bulrush from the Ground?
How Do You Extract Torrey's Bulrush from the Ground?
From Ground: First, water the torrey's bulrush plant to moisten the soil. Then, dig a wide trench around the plant using a shovel or spade, ensuring the plant's root ball remains intact. Carefully work the spade under the root ball to lift the plant from its original location.From Pot: Lightly water the torrey's bulrush plant to facilitate removal. Gently tap the sides of the pot to loosen the soil. Carefully invert the pot, supporting the plant with your other hand, and slide the plant out, ensuring the root ball stays intact.From Seedling Tray: Water the torrey's bulrush seedlings to dampen the soil. Use a garden trowel to gently lift the seedlings out of the tray, being careful to preserve the root ball and avoid damaging the tender roots.
Step-by-Step Guide for Relocating Torrey's Bulrush
Site Preparation
Prepare the new spot by clearing the area of any weeds or debris. Dig a hole twice as wide and just as deep as the root ball to allow for easy planting.
Planting
Place the torrey's bulrush plant into the hole at the same depth it was previously growing. Fill in around the plant with soil, gently pressing it down to remove any air pockets.
Watering
Thoroughly water the plant immediately after planting to settle the soil and help the roots acclimate to their new environment.
Mulching
Apply a layer of mulch around the base of the plant to help retain moisture and suppress weed growth.
How Do You Care For Torrey's Bulrush After Relocation?
Watering
Keep the soil around the torrey's bulrush consistently moist, but not waterlogged, for the first few weeks after relocating to help establish strong roots.
Monitoring
Regularly inspect the torrey's bulrush plant for any indications of stress or transplant shock, such as wilting or yellowing leaves, and respond accordingly with additional care like watering or shading.
Pruning
Remove any damaged or dead leaves with pruning shears to help direct the plant's energy towards establishing new roots.
Troubleshooting Common Issues with Torrey's Bulrush Relocation.
When should I relocate torrey's bulrush?
Relocate torrey's bulrush from early spring to late spring for the healthiest growth.
How much space should I leave between torrey's bulrush plants?
Space torrey's bulrush plants 12-24 inches (30-60 cm) apart for optimal growth.
What type of soil is best for relocating torrey's bulrush?
Choose moist, well-drained soil to ensure healthy growth for torrey's bulrush after relocating.
How do I prepare the soil for relocating torrey's bulrush?
Loosen the soil and mix in compost to enhance drainage and nutrient availability.
How deep should I plant torrey's bulrush?
Plant torrey's bulrush at the same depth it was growing previously to avoid stress.
What should I do if torrey's bulrush wilts after relocating?
Ensure it's watered well and protected from harsh sun for a few days post-relocation.
How much water does torrey's bulrush need after relocating?
Water torrey's bulrush thoroughly immediately after relocating and keep soil consistently moist thereafter.
Should I fertilize torrey's bulrush when relocating?
Yes, a balanced, slow-release fertilizer will support torrey's bulrush's growth after relocating.
How do I handle torrey's bulrush roots when relocating?
Handle torrey's bulrush roots gently to avoid damage, and keep them moist during the process.
Can torrey's bulrush be relocated in full sunlight?
Yes, torrey's bulrush can tolerate full sunlight, but partial shade might help reduce transplant shock.



