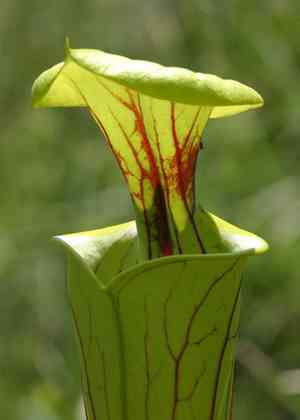
How to Transplant Yellow pitcherplant?
The ideal period for relocating yellow pitcherplant is in the spring, as this offers the best conditions for root development. Select a site that receives ample sunlight, possesses acidic soil, and retains moisture. Should it be necessary, incorporate peat to facilitate improved adaptation. Careful manipulation is crucial to safeguard its fragile root structure.
What Preparations are Needed Before Transplanting Yellow Pitcherplant?
What is the Ideal Time for Transplanting Yellow Pitcherplant?
Spring is the prime season for moving yellow pitcherplant, as it aligns with their natural growth cycle. Relocating yellow pitcherplant early in this season allows them to develop strong root systems before the hot summer. This timing not only coincides with the start of yellow pitcherplant's growth but also provides a full season for adjustment. Moving yellow pitcherplant now optimizes their health, leading to a vibrant display of their unique pitchers all season long.
How Much Space Should You Leave Between Yellow Pitcherplant Plants?
When relocating yellow pitcherplant, ensure each plant has ample room to expand. Ideally, plants should be spaced approximately 2-3 feet (60-90 cm) apart. This provides sufficient area for development without competition.
What is the Best Soil Mix for Yellow Pitcherplant Transplanting?
To prepare for transplanting yellow pitcherplant, you'll need to create the correct soil environment. The optimal soil type for this plant is sandy, slightly acidic. It's recommended to prepare the area with a low-nutrient base fertilizer.
Where Should You Relocate Your Yellow Pitcherplant?
Selecting the perfect spot for yellow pitcherplant is vital. This plant thrives in full sun. Therefore, choose a garden location where the plant can receive sunlight for most of the day.
What Equipments Should You Prepare Before Transplantation Yellow Pitcherplant?
Gardening Gloves
To safeguard your hands from harm while handling the plant and soil.
Shovel or Spade
To excavate the hole at the new site and carefully remove the yellow pitcherplant from its original spot.
Hand Trowel
To facilitate the transfer process and offer greater control when positioning the plant in the new hole.
A Watering Can
To irrigate the plant during and after the relocation process.
Gardening Scissors
To trim any dead foliage or damaged sections of the plant prior to transplanting.
How Do You Remove Yellow Pitcherplant from the Soil?
How Do You Remove Yellow Pitcherplant from the Soil?
From Ground: Begin by watering the yellow pitcherplant to make the soil easier to manage. Then, dig around the plant with your shovel or spade, being careful to keep the root ball intact. Work the spade beneath the root ball to lift the plant from the ground while minimizing root damage.From Pot: To extract the plant from a pot, water it first to moisten the soil and facilitate its removal. Tilt the pot sideways and gently ease the plant out, taking care to protect the root ball. If it's stuck, you may need to gently tap the sides or bottom of the pot.From Seedling Tray: If the yellow pitcherplant is in a seedling tray, water it then carefully lift it using a small trowel or your fingers, ensuring minimal disturbance to the delicate roots.
Step-by-Step Guide for Transplanting Yellow Pitcherplant
Preparation
After gathering all necessary items, begin by watering your yellow pitcherplant in its current location.
Digging
Excavate a hole at the new site that is twice the size of the plant's root ball.
Placement
Position the plant in the hole, ensuring it is level with the ground. The top of the root ball should sit slightly above the surrounding soil to allow for settling.
Insertion
Backfill around the roots with the soil removed during digging, gently firming it as you proceed.
Watering
Thoroughly water the plant immediately after transplanting to help it adapt to its new environment.
How Do You Care For Yellow Pitcherplant After Transplanting?
Watering
In the weeks following the transplant, ensure the yellow pitcherplant receives regular watering. The soil should remain damp, but not waterlogged.
Pruning
Remove any yellowed or dying leaves to direct the plant's energy towards new growth.
Monitoring
Observe the plant's progress. If you notice wilting or other signs of stress, it may require more water, less sunlight, or protection from wind.
Being Patient
Transplanting is a shock to the system, so it may take some time before the plant begins to show new growth. Be patient, and your yellow pitcherplant will recover.
Troubleshooting Common Issues with Yellow Pitcherplant Transplantation.
What's the ideal season for transplanting yellow pitcherplant?
The optimal periods for relocating your yellow pitcherplant are early Spring through mid-Summer, typically known as S1-S3 periods.
What is the ideal spacing for yellow pitcherplant when transplanting?
To prevent overcrowding and promote healthy growth, maintain a distance of approximately 2-3 feet (60-90 cm) between each yellow pitcherplant.
Why are the leaves of transplanted yellow pitcherplant wilting?
Wilting usually indicates water stress. Ensure your yellow pitcherplant is adequately watered but avoid saturating the roots.
How deep should be the hole for transplanting yellow pitcherplant?
The hole should be deep enough to comfortably accommodate the root ball of yellow pitcherplant, typically around 10 inches (25 cm).
What if my transplanted yellow pitcherplant doesn't show any growth?
Patience is crucial! Yellow pitcherplant may take a while to establish themselves after transplant. Continue providing proper care and allow it time.
What's the best soil for transplanting yellow pitcherplant?
Yellow pitcherplant prefers acidic, sandy soils. If your native soil isn't suitable, consider using a soil mix containing peat moss and perlite.
Is there an acclimation period for transplanted yellow pitcherplant?
Yes, newly transplanted yellow pitcherplant must adjust to the new environment. It might take several weeks before significant growth is observed.
Should I trim yellow pitcherplant before transplanting?
Trimming is not necessary unless your yellow pitcherplant has damaged or dead leaves. This allows the plant to focus energy on root establishment.
I have noticed discoloration on my transplanted yellow pitcherplant, why?
Discoloration could signal insufficient lighting, a disease, or nutrient deficiencies. Evaluate your yellow pitcherplant's conditions and make adjustments accordingly.
Can I fertilize yellow pitcherplant immediately after transplanting?
It's best to wait a few weeks before fertilizing newly transplanted yellow pitcherplant, to avoid overwhelming the plant during its adjustment period.


