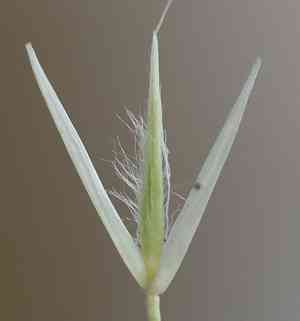
How to Transplant Psammochloa villosa?
The optimal period for relocating psammochloa villosa extends from early spring through its peak, guaranteeing vigorous development. Select a location featuring permeable earth, moderate sunlight, and protection from strong gusts. A helpful suggestion: enrich the soil with organic material for flourishing psammochloa villosa.
What Preparations are Needed Before Transplanting Psammochloa Villosa?
What is the Ideal Time for Transplanting Psammochloa Villosa?
The best period to relocate psammochloa villosa is when spring's warmth gently awakens the environment. This timing aligns with the plant's natural growth cycle, promoting strong establishment and vigor.
How Much Space Should You Leave Between Psammochloa Villosa Plants?
When planning to move your psammochloa villosa, you'll want to provide each plant ample room to thrive. Aim for a spacing of approximately 12-16 inches (30-40 cm) between them. This ensures sufficient space for growth without competition for nutrients and sunlight.
What is the Best Soil Mix for Psammochloa Villosa Transplanting?
Before placing psammochloa villosa in your garden, preparing a suitable spot is crucial. Opt for soil that drains well and enrich it with organic material such as compost. A balanced, slow-release fertilizer will give your psammochloa villosa a good start. Just apply it according to package directions before planting.
Where Should You Relocate Your Psammochloa Villosa?
Locate a sunny to partially shaded area for your psammochloa villosa, where they can receive at least 4-6 hours of sunlight daily. They are quite adaptable, but they do prefer a bright garden spot that gets a mix of sun and shade throughout the day.
What Equipments Should You Prepare Before Transplantation Psammochloa Villosa?
Gardening Gloves
To safeguard your hands while handling soil and the plant.
Spade or Shovel
To excavate the plant and prepare the new planting site.
Garden Fork
To assist in loosening soil around the root ball during plant removal.
Hand Trowel
For smaller or precise digging tasks.
Watering Can or Hose
To hydrate the plant before and after relocation.
Wheelbarrow
To move the plant and soil.
Pruning Shears
To trim any dead or excessively long roots prior to transplanting.
How Do You Remove Psammochloa Villosa from the Soil?
How Do You Remove Psammochloa Villosa from the Soil?
From Ground: First, moisten the psammochloa villosa plant to dampen the soil. Use a garden fork to loosen the soil around the plant's base, then dig a wide circle with a spade, leaving plenty of room to protect the root ball. Carefully slide the spade beneath the root ball to lift the plant, avoiding root damage.From Pot: Thoroughly water your psammochloa villosa, then turn the pot sideways and tap its bottom. Gently pull the plant by its base, supporting the root ball to prevent breakage. If stuck, use a hand trowel around the edge to loosen the soil and roots.From Seedling Tray: Dampen the soil to facilitate removal. Use a hand trowel or a dibbler to carefully lift the psammochloa villosa seedling from its cell, taking care not to harm delicate roots and shoots.
Step-by-Step Guide for Transplanting Psammochloa Villosa
Preparation
Have all tools and water readily available for an efficient transplant process. Ensure transplanting occurs during cooler parts of the day to minimize stress on psammochloa villosa.
Digging New Hole
Use the spade to create a hole in the ground that is twice the width of the root ball and equally deep. This space will allow the roots to spread easily.
Placement
Position the psammochloa villosa into the hole, adjusting its depth so the top of the root ball is level with the surrounding soil surface.
Fill In
Backfill the hole around the root ball with soil, gently firming it down to remove air pockets without over-compacting the soil, which could hinder root growth.
Watering
Water the psammochloa villosa thoroughly after transplanting to settle the soil around the roots and to hydrate the plant.
Stabilization
If the psammochloa villosa is tall or top-heavy, consider staking the plant to provide support until its roots establish and can support the plant independently.
Mulching
Apply a layer of organic mulch around the base of psammochloa villosa to help retain soil moisture and regulate soil temperature, being careful not to pile it against the stem to prevent rot.
How Do You Care For Psammochloa Villosa After Transplanting?
Monitoring
Regularly check soil moisture and water when the top inch of soil feels dry to the touch.
Stabilizing
Observe your psammochloa villosa for any signs of leaning or instability, and provide staking or adjustments as needed.
Pruning
If any dead or yellowed leaves appear, gently prune them to direct energy towards root establishment and new growth.
Protection
Keep an eye out for pests and diseases, and protect your psammochloa villosa with appropriate treatments if they emerge. Learn about common issues that could impact your plant's health.
Patience
Allow your psammochloa villosa some time to recover from transplant shock and begin new growth, which may take several weeks.
Support Group
For additional advice and assistance, consider joining a local gardening club or online forum to connect with other gardeners.
Troubleshooting Common Issues with Psammochloa Villosa Transplantation.
When's the best time to transplant psammochloa villosa?
The ideal time for transplanting psammochloa villosa is during early to late spring, when the ground is warm and workable.
How far apart should I plant psammochloa villosa?
For psammochloa villosa, ensure adequate room for growth by spacing transplants approximately 12-16 inches (30-40 cm) apart.
What soil conditions favor psammochloa villosa transplantation?
Well-draining soil with moderate fertility is optimal for psammochloa villosa. Amend with organic matter if necessary.
How deep should I dig when transplanting psammochloa villosa?
Dig a hole just large enough to accommodate the root ball, keeping it level with the soil surface.
What's the correct watering technique post-transplanting psammochloa villosa?
Water psammochloa villosa deeply after transplant, then maintain consistent moisture without saturating the soil.
Why are my transplanted psammochloa villosa's leaves wilting?
Wilting after transplant is often a sign of shock; ensure proper watering and temporarily shield from intense sunlight.
How should I prepare psammochloa villosa for transplanting?
Gradually acclimate psammochloa villosa to outdoor conditions, prune any damaged parts, and moisten the roots before planting.
Can I use fertilizer when transplanting psammochloa villosa?
Wait a few weeks before fertilizing, as psammochloa villosa needs time to settle and recover from transplant shock.
What is transplant shock in psammochloa villosa?
Transplant shock occurs when psammochloa villosa exhibits signs of stress (wilting, leaf loss) due to the transplanting process.
I live in a hot region. Can I still transplant psammochloa villosa?
Certainly, but provide shade during the hottest part of the day and ensure sufficient watering to help psammochloa villosa establish.


