How to Transplant Cape marguerite?
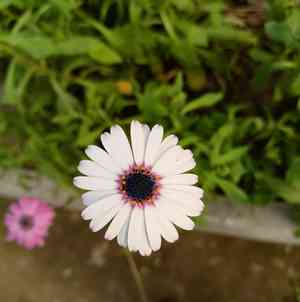
Relocate cape marguerite preferably during the peak of early to mid-spring, as climatic factors encourage robust development. Select a location offering full sunlight to partial shade and soil that drains effectively. Execute all transplanting activities during the cooler periods of the day to minimize strain on the plant. Provide sufficient hydration and attention following transplantation for optimal outcomes.
What Preparations are Needed Before Transplanting Cape Marguerite?
What is the Ideal Time for Transplanting Cape Marguerite?
The optimal period for relocating cape marguerite extends from the fresh start of early spring to the active growth phase of mid-spring. This timing allows cape marguerite to adapt to its new environment before the summer heat arrives. This beneficial step in the transplant process ensures a healthy, vigorous cape marguerite for the remainder of the year.
How Much Space Should You Leave Between Cape Marguerite Plants?
When moving cape marguerite, ensure they are spaced approximately 12-18 inches (30-46 cm) apart. This provides ample room for development and helps prevent overcrowding. Happy planting!
What is the Best Soil Mix for Cape Marguerite Transplanting?
For cape marguerite, a soil mixture that drains effectively is most suitable. Consider a loamy or sandy soil and incorporate some compost or aged manure as a foundational fertilizer. This arrangement will supply the necessary nutrients and help your plants flourish.
Where Should You Relocate Your Cape Marguerite?
To ensure cape marguerite receives adequate sunlight, select a garden spot that gets full sun to partial shade. Aiming for about 6-8 hours of daily sunlight will keep your plants thriving and blooming beautifully.
What Equipments Should You Prepare Before Transplantation Cape Marguerite?
Gardening Gloves
To protect your hands from blisters while handling the plant and prevent any minor scrapes.
Garden Trowel
A versatile implement, crucial for scooping earth and excavating small holes.
Bypass Pruners
Extremely useful for trimming cape marguerite to encourage better growth and removing any damaged or dead sections of the plant.
Watering Can
For hydrating the plant after its relocation.
Garden Spade
Required for digging deeper and wider holes for the transplanting process.
Wheelbarrow or Plant Dolly
For moving the cape marguerite if it's larger in size; also excellent for transporting garden debris or fresh soil.
Organic Mulch
To aid the soil in retaining moisture post-transplantation.
How Do You Remove Cape Marguerite from the Soil?
How Do You Remove Cape Marguerite from the Soil?
From Ground: The cape marguerite plant should be thoroughly watered before beginning this procedure. This will make the soil easier to manage and reduce stress on the roots. Using a garden spade, dig a wide circle around the plant, being careful to keep the root ball intact. Gently pry the plant from the ground, then carefully lift it out, ensuring no harm comes to the root system.From Pot: Water the plant completely, then carefully turn the pot on its side, grip the plant at its base, and slowly slide it out of the pot. If the plant is stuck, you might need to tap the bottom of the pot to loosen the root ball.From Seedling Tray: Gently push the seedling out from the tray's bottom, making sure to preserve as much of the root ball as possible. If the seedlings are too small and delicate, use a spoon or small trowel to scoop them out.
Step-by-Step Guide for Transplanting Cape Marguerite
Digging
Utilize a garden trowel or spade to excavate a hole that is twice as wide and twice as deep as the cape marguerite's root ball. Ensure the hole's sides are rough, not smooth.
Preparing The Plant
Carefully shake off loose soil from the roots before placing the cape marguerite in the hole. Position it so that the top of the root ball is level with the soil surface.
Backfilling
Fill the empty spaces around the cape marguerite with the excavated soil until the hole is half full. Then water thoroughly, allow the water to drain, and fill the remainder of the hole with the remaining soil.
Watering
Water the plant again once the transplant is complete, ensuring the soil settles around the roots.
Mulching
Spread a layer of organic mulch around the cape marguerite to assist with moisture retention and help prevent weed growth.
How Do You Care For Cape Marguerite After Transplanting?
Regular Watering
Observe the cape marguerite closely for the initial few weeks. It will require significantly more water than usual. Ensure not to overwater, but the soil should remain consistently moist.
Protection
The performance of the cape marguerite might initially decline. To aid its recovery, shield it from harsh weather conditions and watch for pests or diseases.
Pruning
Pruning is not immediately necessary for the cape marguerite, but after a couple of weeks, you can trim back any dead or wilting parts to help stimulate new growth.
Fertilizer
Approximately one month after transplanting your cape marguerite, begin a regular feeding schedule with a slow-release granular fertilizer to encourage vigorous growth.
Troubleshooting Common Issues with Cape Marguerite Transplantation.
When is the ideal time to transplant cape marguerite?
Relocating cape marguerite is most successful during the early to mid-spring period.
What is the recommended distance between each cape marguerite during transplanting?
Ideally, cape marguerite should be spaced between 12-18 inches (30-45 cm) apart, allowing for ample development.
Why are my transplanted cape marguerite plants wilting?
This could be due to transplant shock. Avoid intense sunlight immediately after planting, ensure thorough watering, and monitor soil moisture.
Is there a specific depth cape marguerite should be planted when transplanting?
Plant cape marguerite at the same depth it was growing in its previous container. This ensures the roots are adequately covered.
What kind of soil is suitable for transplanting cape marguerite?
Cape marguerite thrives in well-draining sandy or loamy soil, enriched with organic matter for optimal development.
How much sunlight does cape marguerite require after being transplanted?
Once relocated, cape marguerite needs full sunlight exposure, ideally 6-8 hours daily, for healthy growth and abundant flowering.
What is the proper watering regimen for cape marguerite post-transplantation?
Consistent watering is crucial initially until cape marguerite establishes itself. Afterward, only water when the topsoil becomes dry.
Can cape marguerite be transplanted in a pot?
Absolutely! Ensure the pot is sufficiently large to accommodate growth and has proper drainage to prevent water stagnation.
Does cape marguerite require any specific care after being transplanted?
Keep cape marguerite free from weeds and apply a slow-release fertilizer each spring for optimal growth.
Why are the leaves of my transplanted cape marguerite turning yellow?
Yellow leaves could indicate overwatering or poor drainage. Keep the soil moist, but avoid waterlogging, and ensure good drainage.



