How to Transplant Jonquil?
Relocate jonquil during mid-spring, when its development is strong. Choose brightly lit areas with soil that drains effectively for optimal health. Should it be necessary, incorporate organic material to improve the location, guaranteeing a flourishing jonquil presentation.
Essential Preparations Before Moving Jonquil
Optimal Timing for Relocating Jonquil?
The best time to move your jonquil is in mid-spring, as the weather conditions are perfectly balanced for root development. Transplanting your jonquil during this season takes advantage of moderate temperatures and ample growth time before the harshness of summer heat. This ensures a strong, vibrant bloom for the subsequent year. Performing this task in spring allows your jonquil to flourish, with a gentle reminder that good starts often lead to the most successful outcomes.
Required Spacing Between Jonquil Plants?
When moving jonquil, aim for approximately 4-6 inches (10-15 cm) of space between each plant. This spacing provides each plant sufficient room to grow and thrive, maintaining their health and vibrancy.
Ideal Soil Blend for Jonquil Transplantation?
Before moving jonquil, prepare the soil by incorporating a base of rich, well-draining compost, mixed with perlite. Remember to add slow-release granular fertilizer to ensure the soil contains the necessary nutrients for jonquil.
Where to Replant Your Jonquil?
For optimal results, replant your jonquil where it can receive full to partial sunlight daily. A spot with morning sun and afternoon shade would be perfect, offering jonquil the right light balance.
Equipment Needed Before Transplanting Jonquil
Gardening Gloves
To safeguard your hands while handling soil and jonquil.
Trowel
For digging smaller holes if moving from a pot or seedling tray.
Shovel or Spade
To excavate the jonquil plant from its original spot and dig the new hole in the ground.
Pruning Shears
To trim any damaged or diseased branches prior to transplanting.
Watering Can
This will enable you to water the plant after it has been moved.
Garden Cart or Wheelbarrow
To transport the jonquil plant from its initial location to the new planting site.
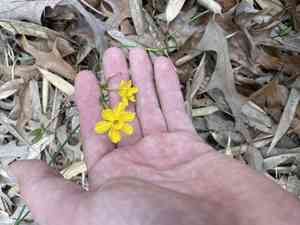
How to Extract Jonquil from the Soil?
How to Extract Jonquil from the Soil?
From Ground: First, water the jonquil plant to moisten the soil. Then, dig a wide trench around the plant using a shovel or spade, ensuring the plant's root ball stays intact. Carefully work the spade beneath the root ball to lift the plant from its original position.From Pot: Begin by watering the jonquil plant in its pot. Then gently invert the pot, holding the plant at its base. Tap the bottom of the pot to release the plant. If it doesn't come out easily, do not force it. Instead, cut the pot away with scissors.From Seedling Tray: Water the jonquil seedlings before transplanting. Using a trowel, gently loosen the soil around the base of the seedling. Carefully lift the seedling, taking care to support the root ball.
Step-by-Step Guide for Transplanting Jonquil
Dig a Hole
The hole should be wide and deep enough to comfortably accommodate the jonquil's root ball.
Positing
Place the jonquil plant in the hole. Ensure it is standing upright.
Backfill
Fill the hole with the excavated soil. If the soil quality is poor, consider adding organic matter like compost.
Watering
After transplanting, thoroughly water the jonquil plant. This will help the soil settle and reduce transplant shock.
Mulching
Apply a layer of organic mulch around the base of the jonquil plant. This will help retain moisture, suppress weeds, and add nutrients to the soil over time.
Post-Transplant Care for Jonquil
Mulching
Cover the topsoil around the jonquil with organic mulch to help retain moisture and maintain a consistent temperature around the roots.
Watering
For the initial few weeks after transplanting, keep the soil around the jonquil consistently moist but not waterlogged.
Pruning
Trim off any yellow or dead leaves to encourage new growth. The jonquil plant may need some time to adjust to its new location, so don't worry if some leaves turn yellow after transplanting.
Resolving Common Issues with Jonquil Transplantation.
What's the best season for transplanting jonquil?
The ideal time for transplanting jonquil is late summer to early autumn (S2-S3). This period promotes the plant's growth due to suitable temperature and humidity.
What space should I leave between jonquil when transplanting?
When transplanting jonquil, ensure a distance of about 4-6 inches (10-15 cm) between each plant. This spacing optimizes their growth potential.
How deep should I plant jonquil when transplanting?
You should plant jonquil at a depth of approximately 2-3 inches (5-8 cm) in the soil. Planting too deep or too shallow can impede its growth.
How should I prepare the soil before transplanting jonquil?
Before transplanting jonquil, it's crucial to prepare the soil. Use well-draining soil and add compost for nutrients. This aids in better growth.
Does the size of the pot affect the growth of jonquil when transplanting?
Absolutely, the pot's size is significant. It should be spacious enough for jonquil to spread roots for robust growth, but not excessively large.
How often should I water jonquil after transplanting?
After transplanting, keep the jonquil's soil mildly moist. Water it deeply but infrequently as overwatering can lead to root rot.
How do I ensure jonquil receives appropriate sunlight post-transplant?
Jonquil thrives in full to partial sunlight, so place it in a location that receives ample light. However, they also require some time in the shade.
Will jonquil survive if I transplant it in seasons other than S2-S3?
Although jonquil may survive if transplanted in other seasons, it might not flourish. Late summer to early autumn (S2-S3) is the best time to transplant.
How long does it take for jonquil to adapt after transplanting?
Jonquil typically takes a few weeks to adjust to its new location. Providing the plant with appropriate care will help it adapt faster.
What should I do if jonquil appears wilted after transplanting?
If jonquil appears wilted post-transplant, it indicates transplant shock. Regular watering, placing it in appropriate sunlight, and providing nutrients through fertilizers can aid its recovery.


