How to Transplant Green adder's-mouth orchid?
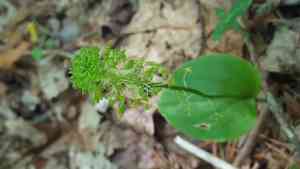
To introduce green adder's-mouth orchid into your landscape, the ideal period spans from the mild conditions of late spring through the peak of summer, facilitating root development. Provide a shaded spot that replicates green adder's-mouth orchid's native forest habitat, featuring damp, nutrient-rich earth for optimal growth. Extreme care is essential during relocation to safeguard its delicate root system.
What Preparations are Needed Before Transplanting Green Adder's-mouth Orchid?
What is the Ideal Time for Transplanting Green Adder's-mouth Orchid?
The optimal period for relocating green adder's-mouth orchid falls within the mild embrace of the early to peak growing season, typically spanning from late spring to mid-summer. This timeframe provides an excellent balance of warmer soil and moderate temperatures, promoting more effective root establishment. By selecting this window, you offer green adder's-mouth orchid the greatest potential for recovery and vigorous development post-transplant, enabling it to flourish in its new setting. The favorable weather and nurturing climate of this season offer a natural advantage, ensuring a smooth transition for green adder's-mouth orchid.
How Much Space Should You Leave Between Green Adder's-mouth Orchid Plants?
When preparing to introduce green adder's-mouth orchid to your garden, remember to provide ample room for their development! Position them approximately 6-8 inches (15-20 cm) apart. This spacing allows each green adder's-mouth orchid sufficient area to grow beautifully.
What is the Best Soil Mix for Green Adder's-mouth Orchid Transplanting?
Give your green adder's-mouth orchid the best start by preparing a comfortable home. Select a well-draining soil blend and gently incorporate some balanced slow-release fertilizer. Your green adder's-mouth orchid will appreciate the nourishing foundation!
Where Should You Relocate Your Green Adder's-mouth Orchid?
Locate a suitable spot for your green adder's-mouth orchid that receives filtered sunlight or partial shade. They enjoy light but prefer not to be exposed to direct sun all day. This way, green adder's-mouth orchid receives just the right amount of illumination without excessive heat.
What Equipments Should You Prepare Before Transplantation Green Adder's-mouth Orchid?
Gardening Gloves
To safeguard your hands while handling soil and plants.
Trowel
For excavating small holes and moving soil.
Watering Can or Hose with a Gentle Spray Setting
For hydrating the green adder's-mouth orchid before and after relocation.
Pruning Shears
To carefully trim any damaged roots or foliage.
Wheelbarrow
To transport the green adder's-mouth orchid and soil without causing harm.
Rooting Hormone (Optional)
To stimulate root development after transplanting.
How Do You Remove Green Adder's-mouth Orchid from the Soil?
How Do You Remove Green Adder's-mouth Orchid from the Soil?
From Ground: First, moisten the green adder's-mouth orchid to soften the soil, facilitating plant removal without root damage. Use a trowel to dig a wide perimeter around the plant, accounting for the root system's spread. Gently pry beneath the plant to loosen roots from the soil, then lift the green adder's-mouth orchid, preserving as much of the root ball as possible.From Pot: To begin, water the green adder's-mouth orchid to help the roots and soil cohere. Turn the pot sideways and tap it to dislodge the soil's grip. Carefully extract the green adder's-mouth orchid by grasping the stem's base, supporting the root ball. If the plant is root-bound, gently separate the roots to encourage spreading in the new location.From Seedling Tray: Water the tray to make the soil pliable. Use a tool, such as a wooden stick or your fingers, to push from below and carefully lift the plant from its cell. Avoid pulling on the stem, as this can harm the young plant. Hold the green adder's-mouth orchid by the root ball during transfer.
Step-by-Step Guide for Transplanting Green Adder's-mouth Orchid
Dig Holes
Start by excavating a hole in the ground that is twice the width and equal to the depth of the green adder's-mouth orchid's root ball. This will provide ample space for root expansion and growth after planting.
Inspect Roots
Prior to planting, examine the root ball for any signs of circling (wrapping around itself) or damage, and gently prune if necessary using pruning shears.
Place the Plant
Carefully position green adder's-mouth orchid in the center of the hole, ensuring it is at the same depth it was previously growing. Backfill the hole with soil, gently patting down around the roots to eliminate air pockets.
Water Deeply
Once planted, thoroughly water the green adder's-mouth orchid to help settle the soil and provide moisture for the roots. This also aids in removing any air pockets that may have formed during planting.
Add Support
If the green adder's-mouth orchid is tall or the area is windy, consider adding a stake for support. Secure the plant to the stake loosely with soft plant ties.
Mulch
Apply a layer of mulch around the base of green adder's-mouth orchid to assist in retaining soil moisture and regulating soil temperature.
How Do You Care For Green Adder's-mouth Orchid After Transplanting?
Monitoring
Closely observe the green adder's-mouth orchid for the initial few weeks, looking for indications of transplant shock, such as wilting or discolored leaves. If these symptoms appear, ensure the plant receives adequate water and is not stressed by pests or disease.
Staking
If you've provided a stake for support, check it regularly to confirm it's firmly in place and not harming the plant. Adjust the ties as the plant grows to prevent cutting into the stem.
First Fertilization
Allow a few weeks before applying any fertilizer to give the green adder's-mouth orchid time to adapt to its new surroundings and begin forming new roots.
Pruning
Remove any dead or dying foliage to direct the green adder's-mouth orchid's energy towards the healthy parts of the plant. This will encourage new growth and facilitate quicker recovery.
Long-Term Care
As the green adder's-mouth orchid establishes itself, transition to the care regimen recommended for its specific requirements, such as watering frequency and pruning schedule to maintain a healthy and thriving plant.
Pest Management
Regularly inspect for pests and diseases. Early detection of any issues can significantly impact the success of the transplant.
Troubleshooting Common Issues with Green Adder's-mouth Orchid Transplantation.
What's the best time to transplant green adder's-mouth orchid for optimal growth?
Relocate green adder's-mouth orchid during the ideal period between late spring and mid-summer for superior establishment.
How far apart should I space green adder's-mouth orchid when transplanting?
Aim for generous spacing, approximately 6-8 inches (15-20 cm) between each green adder's-mouth orchid to ensure proper development.
How do I prepare the soil before transplanting green adder's-mouth orchid?
Enrich the soil with organic material and ensure good drainage to welcome your green adder's-mouth orchid's new roots.
Should I water green adder's-mouth orchid immediately after transplanting?
Yes, provide green adder's-mouth orchid with a gentle soaking to settle the soil and hydrate the roots in their new location.
Why are my transplanted green adder's-mouth orchid's leaves wilting?
Wilting may indicate transplant shock. Keep the soil moist and shield green adder's-mouth orchid from direct sunlight.
How deep should the planting hole be for green adder's-mouth orchid?
Excavate a hole slightly deeper than the root ball to provide green adder's-mouth orchid's roots with a snug fit.
Can I use fertilizer when transplanting green adder's-mouth orchid?
Wait a few weeks before fertilizing to allow green adder's-mouth orchid to acclimate, then apply a balanced orchid fertilizer.
How do I know if green adder's-mouth orchid is getting enough light after transplanting?
Position green adder's-mouth orchid in bright, indirect light where it can thrive without the intensity of direct sun.
How to protect green adder's-mouth orchid during cold spells after transplanting?
If unexpected cold weather occurs, cover green adder's-mouth orchid with frost cloth or move it to a warmer spot if it's in a pot.
Can I transplant green adder's-mouth orchid in a container?
Certainly! Just ensure the pot has drainage holes and is filled with an appropriate orchid mix for a healthy green adder's-mouth orchid.



