How to Transplant Baker's Goldfields?
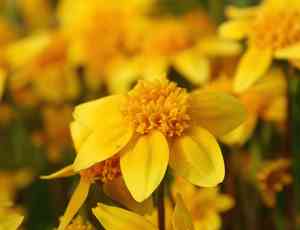
The ideal period for relocating baker's Goldfields spans from the revitalizing early spring through the more robust late spring. Select a brightly lit spot featuring soil that drains effectively. Should relocation be necessary, proceed gently to prevent upsetting the root system.
What Preparations are Needed Before Transplanting Baker's Goldfields?
What is the Ideal Time for Transplanting Baker's Goldfields?
The optimal period for relocating baker's Goldfields spans from the beginning of spring warmth through the full bloom of the vernal season. Moving baker's Goldfields during this growth phase promotes robust root development and aids the plant in adapting with minimal stress, ensuring a smooth transition to its new spot.
How Much Space Should You Leave Between Baker's Goldfields Plants?
When preparing to rehome baker's Goldfields, remember they appreciate personal space. Aim for a comfortable distance of 6-12 inches (15-30 cm) between each plant. This allows them to thrive without feeling cramped!
What is the Best Soil Mix for Baker's Goldfields Transplanting?
To nurture your baker's Goldfields, blend well-draining soil with a gentle addition of compost before planting. This combination offers the perfect cozy bed and a nutritious boost to help them grow strong!
Where Should You Relocate Your Baker's Goldfields?
Position your baker's Goldfields where they can receive ample sunlight, in full sun exposure. They love to bask in these rays all day, so select the brightest location in your garden to keep them happy!
What Equipments Should You Prepare Before Transplantation Baker's Goldfields?
Gardening Gloves
To safeguard your hands while handling soil and plants.
Hand Trowel
For excavating and moving the baker's Goldfields to its new planting spot.
Garden Spade or Shovel
For larger specimens or digging the transplant hole.
Watering Can or Hose
To hydrate the baker's Goldfields prior to and following transplantation.
Pruning Shears
To trim any damaged roots or foliage.
Garden Fork
To help loosen the soil around the plant's roots when extracting from the ground or container.
Wheelbarrow or Plant Cart
For transporting the baker's Goldfields if it is large or moving multiple plants.
Measuring Tape
To ensure correct spacing between newly transplanted plants.
How Do You Remove Baker's Goldfields from the Soil?
How Do You Remove Baker's Goldfields from the Soil?
From Ground: First, water the baker's Goldfields to moisten the soil. Then, use a garden fork or spade to carefully dig around the plant, ensuring you are far enough from the stem to avoid damaging the root ball. Gently lift the plant from the ground while keeping the soil around the roots intact.From Pot: Water the baker's Goldfields, allowing the soil to become damp. Turn the pot on its side and gently tap the edges to loosen the soil. Support the plant by its base and carefully slide it out of the pot, keeping the root ball undisturbed.From Seedling Tray: Moisten the soil to facilitate seedling removal. Use a hand trowel or similar tool to gently lift the seedling, supporting the root ball to keep it together during transfer.
Step-by-Step Guide for Transplanting Baker's Goldfields
Digging the Hole
Excavate a hole that is twice as wide and the same depth as the root ball of the baker's Goldfields, using a hand trowel or garden spade.
Preparing the Plant
Gently untangle any circling roots to encourage outward growth. Trim away any dead or excessively long roots with pruning shears.
Placement
Position the baker's Goldfields in the center of the hole. Ensure the top of the root ball is level with the surrounding soil surface.
Refilling the Hole
Backfill the hole with the excavated soil, gently tamping down the soil to eliminate air pockets without over-compacting it.
Watering
Water the baker's Goldfields thoroughly after planting to settle the soil around the roots, using a watering can or hose.
Supporting the Plant
If the plant is tall or top-heavy, stake it to provide support and prevent it from being dislodged by winds or weather.
Labeling
Place a plant label or marker to identify the baker's Goldfields, especially if you are planting multiple species in the same area.
How Do You Care For Baker's Goldfields After Transplanting?
Watering
Maintain consistent moisture in the soil around the baker's Goldfields for the initial few weeks post-transplant. This aids root establishment in their new location. Gradually reduce watering as the plant adapts.
Mulching
Apply a layer of mulch around the base of the baker's Goldfields to help retain soil moisture and regulate soil temperature.
Observation
Regularly inspect the baker's Goldfields for signs of stress, such as wilting or discoloration. Early detection of issues can lead to more effective intervention.
Weeding
Keep the area around the baker's Goldfields free of weeds that can compete for resources like water and nutrients.
Pruning
Remove any yellow or brown leaves to direct the plant's energy towards developing strong new growth.
Troubleshooting Common Issues with Baker's Goldfields Transplantation.
What's the ideal timing for transplanting baker's Goldfields?
The perfect window for transplanting baker's Goldfields is from early spring to late spring, once the soil has warmed.
How far apart should baker's Goldfields be spaced out when transplanting?
When transplanting baker's Goldfields, ensure they're spaced approximately 6-12 inches (15-30 cm) apart to allow for growth.
How deep should the hole be for transplanting baker's Goldfields?
Dig a hole just deep enough for the root ball of baker's Goldfields to sit flush with the soil surface.
What should I do if the leaves wilt after transplanting baker's Goldfields?
Ensure baker's Goldfields is adequately watered and protected from direct sunlight for a few days. Consistent moisture is crucial after transplanting.
What soil conditions are best for transplanting baker's Goldfields?
Well-draining soil rich in organic matter provides an ideal bed for baker's Goldfields to flourish after transplanting.
How can I tell if baker's Goldfields is ready to be transplanted?
Once baker's Goldfields has developed a robust root system and has outgrown its current container, it's prepared for transplanting.
How should I water baker's Goldfields after transplanting?
After transplanting, water baker's Goldfields gently but thoroughly to help settle the soil around its roots.
Can I transplant baker's Goldfields on a hot, sunny day?
Transplanting baker's Goldfields is best done on a cooler, overcast day to minimize transplant shock and moisture loss.
Why are my transplanted baker's Goldfields's leaves turning yellow?
Yellowing may indicate transplant shock. Keep the soil moist and avoid fertilizers until baker's Goldfields shows signs of recovery.
How do I protect baker's Goldfields from transplant shock?
Gradually acclimate baker's Goldfields to outdoor conditions over several days and transplant on a mild day to reduce shock.



