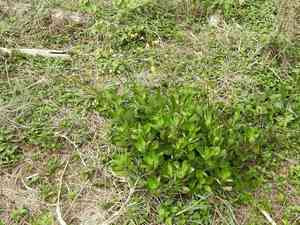
How to Transplant Gynura divaricata?
The ideal period for transplanting Gynura divaricata is during the spring, as its growth phase recommences. Select a location offering filtered light and sufficient moisture in the air. During the transfer process, exercise caution to preserve the root system's structure.
Preparations Required Before Relocating Gynura Divaricata
Optimal Period for Relocating Gynura Divaricata?
The ideal time to move gynura divaricata is during the spring season, as the mild weather promotes strong root development. Transplanting gynura divaricata in spring's gentle warmth ensures a smooth transition, while increasing daylight hours stimulate healthy growth. This is when gynura divaricata can truly flourish, with soil temperatures encouraging root expansion, establishing a solid base for future seasons. By choosing this time for the move, you're setting gynura divaricata up for success, allowing it to settle and thrive with the natural seasonal rhythms.
Recommended Spacing Between Gynura Divaricata Plants?
Planning to move your lovely gynura divaricata? It's best to position each plant 1-2 feet (30-60 cm) apart. This will ensure each plant has ample room to expand, as they tend to spread. Enjoy your gardening!
Ideal Soil Mixture for Gynura Divaricata Relocation?
For gynura divaricata, a well-draining soil with slightly acidic pH levels is preferred. You can prepare a mix of loamy soil and organic matter as a foundational fertilizer. This type of soil will offer a nutrient-rich base for your young plants to establish roots.
Optimal Location for Your Gynura Divaricata?
Selecting a spot for your gynura divaricata to grow? An area receiving at least 6 hours of partial to full sunlight daily would be perfect. It's the ideal combination of sun and shade to allow your gynura divaricata to thrive. Best of luck, green thumb!
Equipment to Prepare Before Transplanting Gynura Divaricata
Gardening gloves
To safeguard your hands during the task.
Trowel or small spade
For digging around and lifting the gynura divaricata plant.
New planting pot or patch
The destination for the gynura divaricata.
Watering Can
To hydrate the plant before and after relocation.
Garden Pruners
To trim any damaged roots or shoots, if necessary.
A Wheelbarrow or Bucket
To transport soil or compost.
How to Extract Gynura Divaricata from the Soil?
How to Extract Gynura Divaricata from the Soil?
From Ground: Hydrate the gynura divaricata plant to moisten the surrounding soil. Dig a wide circle around the plant with your trowel or small spade, ensuring sufficient distance to protect the root ball from harm. Once done, carefully lift the plant from the ground.From Pot: Begin by watering the gynura divaricata plant. Gently turn the pot sideways, place your hand over the soil surface, and lightly shake the pot to loosen the root ball. If the plant doesn't slide out easily, tap the bottom of the pot gently to dislodge it.From Seedling Tray: Carefully squeeze the base of the seedling cell to push the gynura divaricata plant upwards. Be careful not to harm or disturb the delicate roots.
Step-by-Step Guide for Relocating Gynura Divaricata
Preparation
Prepare the new planting area or container by filling it with high-quality soil, leaving adequate space for the root ball of your gynura divaricata.
Placement
Position the gynura divaricata plant in the hole, ensuring the top of the root ball is level with the soil surface.
Settling
Backfill the hole with soil, gently firming it around the base of the gynura divaricata.
Watering
Provide the gynura divaricata with a thorough watering, but avoid overwatering. Allow the water to soak in, then add more soil if necessary.
Post-Transplant Care for Gynura Divaricata
Regular Inspection
Closely monitor your gynura divaricata plant during the weeks following the transplant. Look for new growth as an indicator that the plant is adapting to its new environment.
Pruning
If you observe any dead or dying leaves, remove them to prevent disease and allow the plant to direct its energy towards new growth.
Rotation
If only one side of your plant is receiving sunlight, consider rotating your plant every few days for balanced development.
Addressing Common Issues with Gynura Divaricata Transplantation.
What is the optimal season to transplant gynura divaricata?
The ideal period for planting gynura divaricata spans from late winter through spring and into summer (S1-S3). A friendly reminder that proper timing can significantly enhance growth.
What is the appropriate spacing between each gynura divaricata when transplanting?
Ensure to maintain an adequate distance - approximately 1-2 feet (30.5-61 cm) - between each gynura divaricata during transplanting. This provides ample room for growth.
Is it necessary to water gynura divaricata before transplanting?
Absolutely! It's best to water gynura divaricata a few hours prior to transplanting. This helps minimize the shock the plant may experience during the process.
What actions can I take if the transplanted gynura divaricata wilts after relocation?
Don't worry! Wilted gynura divaricata often recover with consistent watering and reduced sun exposure. Keep them moist but be careful not to overwater.
Which soil type is best for transplanting gynura divaricata?
Gynura divaricata thrives in well-drained soil with a slightly acidic to neutral pH. If your soil doesn't meet these conditions, consider amending it before transplanting.
How deep should I plant gynura divaricata during transplantation?
When transplanting gynura divaricata, dig a hole as deep as its root ball and twice as wide. This ensures the roots will have plenty of space to grow.
How should I care for gynura divaricata immediately after transplantation?
After transplanting, keep gynura divaricata in a partially shaded location for the first week. Gradually expose it to more light to help it acclimate to its new home.
Is partial sunlight beneficial for transplanted gynura divaricata?
Indeed! Partial sunlight is advantageous for gynura divaricata. However, it's crucial to gradually increase light exposure after transplantation to avoid overwhelming the plant.
Should I transplant gynura divaricata into a large pot right away?
Not necessarily. This could lead to excessive water retention, which is detrimental to gynura divaricata. Start with a pot slightly larger than the root ball and upgrade as it grows.
How to manage any pests on gynura divaricata after transplantation?
Common pests can be controlled with regular applications of mild, organic insecticidal soap. Always remember to be gentle with your newly transplanted gynura divaricata.


