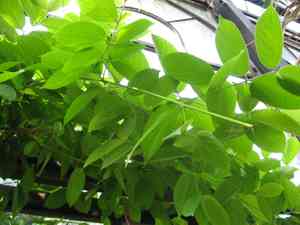
How to Transplant Rangoon creeper?
The most favorable period for relocating rangoon creeper is during the mild conditions of late summer through early autumn, which provides moderate temperatures conducive to root development. Choose a bright spot with soil that drains effectively to foster vigorous development.
What Preparations are Needed Before Transplanting Rangoon Creeper?
What is the Ideal Time for Transplanting Rangoon Creeper?
The perfect time for moving rangoon creeper is from late summer to early autumn. Mild temperatures and reduced heat stress ensure optimal root establishment before winter dormancy. This timing sets the stage for spring vigor, giving rangoon creeper a strong start to the next growing season. Furthermore, the soil remains warm, aiding root development, while cooler air temperatures are less demanding on the plant's foliage. Transplanting rangoon creeper during this period is a strategic choice to encourage robust growth, providing a rewarding experience for both gardener and plant.
How Much Space Should You Leave Between Rangoon Creeper Plants?
When relocating your rangoon creeper, ensure an optimal spacing of 3-4 feet (0.9-1.2 meters). This provides ample room for your plant to grow and spread comfortably. Avoid overcrowding; they appreciate their personal space!
What is the Best Soil Mix for Rangoon Creeper Transplanting?
Rangoon creeper thrives best in well-draining sandy or clay soil. Enhance your garden soil with organic compost as a foundational fertilizer. This will make your rangoon creepers feel perfectly at home and supply them with the nutrients needed for vigorous growth.
Where Should You Relocate Your Rangoon Creeper?
Place your rangoon creeper in a spot where it will receive full or partial sunlight daily. An east or west-facing location is ideal. They love to soak up the sun; catching those golden morning or afternoon rays will help them flourish beautifully.
What Equipments Should You Prepare Before Transplantation Rangoon Creeper?
Gardening gloves
To safeguard your hands while handling soil and the plant
Shovel or garden spade
Used for excavating the hole for the rangoon creeper and for extracting the plant from its original spot
A Garden Trowel
Helpful for gently removing the plant from a pot or seedling tray without harming its root system
Pruning Shears
In case any branches sustain damage during the relocation process
Watering Can
To hydrate the plant at both its initial and new locations
A wheelbarrow or a Garden Cart
For transporting the plant from its initial position to its new spot
Compost
To enrich the new site where rangoon creeper will be replanted
How Do You Remove Rangoon Creeper from the Soil?
How Do You Remove Rangoon Creeper from the Soil?
From Ground: First, water the rangoon creeper plant to moisten the soil; this facilitates digging and reduces stress on the plant. Next, dig a wide trench around the plant using a shovel or spade, ensuring the plant's root ball remains intact. Carefully work the spade beneath the root ball to lift the plant from its original location. From a Pot: If you are extracting the rangoon creeper from a pot, first water the plant. This makes the root ball less fragile during the transplanting process. Then, invert the pot while supporting the plant with your other hand. Gently tap the bottom of the pot until the plant slides out. From a Seedling Tray: The procedure is delicate. First, water the seedlings to loosen the soil. Then, using a garden trowel, gently scoop out each rangoon creeper plant, taking care not to cut or snag the plant's roots.
Step-by-Step Guide for Transplanting Rangoon Creeper
Preparation
First, thoroughly water the rangoon creeper plant at its current location. This helps alleviate transplantation stress. Then, in the chosen spot, dig a hole twice as wide and equally deep as the rangoon creeper's root ball.
Transplanting
Take the rangoon creeper plant and position it in the center of the hole. Ensure the top of the root ball is level with the soil surface. Then, begin backfilling the hole and firm the soil around the plant. Make sure there are no air pockets.
Watering
After planting the rangoon creeper, water it thoroughly to help the soil settle. Be sure to water the plant on the day of planting, preferably in the evening.
How Do You Care For Rangoon Creeper After Transplanting?
Watering
Water the rangoon creeper plant consistently and keep the surrounding soil uniformly moist. Reduce watering once new growth is observed.
Protection
Shield the newly transplanted plant from strong winds and intense sun during the initial week. You might also need to protect it from pests, using organic pesticides if necessary.
Pruning
Trim back any weak or damaged branches to encourage new growth. Always prune in a manner that preserves the plant's natural shape.
Mulching
Apply mulch around the base of the plant after transplanting. This helps retain moisture and suppress weeds.
Troubleshooting Common Issues with Rangoon Creeper Transplantation.
When is the best time to transplant rangoon creeper?
The optimal period to transplant rangoon creeper is during S6-S7. This offers the best conditions for root establishment and development.
How much space does rangoon creeper need when transplanting?
Rangoon creeper requires a minimum of 3-4 feet (0.9-1.2 meters) of spacing between each plant. This provides them with ample room to grow and flourish.
How deep should I plant rangoon creeper during transplantation?
The hole should be just deep enough so that the top of the root ball is at or slightly below ground level. Typically, around 10 inches (25 cm).
Should I water rangoon creeper immediately after transplantation?
Yes, it is crucial to water rangoon creeper generously right after transplanting. This aids root settlement and eliminates air pockets in the soil.
What type of soil is best for transplanting rangoon creeper?
Rangoon creeper thrives best in well-drained soil. Additionally, incorporating enriching organic matter or compost can boost soil nutrients for optimal growth.
Do I have to prune rangoon creeper during transplantation?
While not mandatory, pruning rangoon creeper during transplantation can be advantageous. It minimizes water loss and allows the plant to allocate more energy to root growth.
How can I ensure a successful transplant of rangoon creeper if the weather turns cold?
If the weather unexpectedly turns cold, protect your recently transplanted rangoon creeper with a layer of mulch or move it indoors if it's in a pot.
Can I fertilize rangoon creeper shortly after transplanting?
Avoid fertilizing rangoon creeper immediately after transplanting to prevent root damage. However, you can begin using a balanced fertilizer after 3-4 weeks.
Is it necessary to stake rangoon creeper after transplantation?
Staking rangoon creeper after transplantation is generally not required unless the plant is large and potentially unstable. Staking can provide necessary support.
What should I do if rangoon creeper shows signs of transplant shock?
If rangoon creeper exhibits signs of transplant shock, such as wilting or leaf drop, maintain consistent watering and avoid any stressors like excessive sunlight or fertilization.


