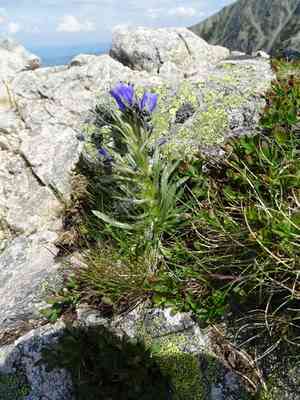
How to Transplant Alpine bellflower?
Alpine bellflower flourishes when relocated from mid-spring to early summer, as these intervals promote superior root development. Provide a site with full sun to partial shade and soil that drains effectively. Perform the transplant during the cooler parts of the day to lessen stress.
Necessary Preparations Before Relocating Alpine Bellflower?
Optimal Period for Relocating Alpine Bellflower?
Relocating alpine bellflower during mid to late spring or early summer is perfect due to milder weather and prime soil conditions. This timing allows alpine bellflower to establish roots before summer's extreme heat, promoting superior growth and blooming. Proper timing ensures a stronger plant and vibrant flowers.
Required Spacing Between Alpine Bellflower Plants?
Position alpine bellflower plants approximately 12-18 inches (30-45 cm) apart. This provides ample room for development and ensures good air circulation, which helps prevent diseases.
Best Soil Blend for Alpine Bellflower Relocation?
Prepare a well-draining soil mixture enriched with organic material such as compost. A slightly alkaline soil is ideal for alpine bellflower. Incorporate a balanced base fertilizer to nourish the roots and support healthy development.
Where to Replant Your Alpine Bellflower?
Select a spot that receives full to partial sunlight, ideally 4-6 hours daily. The alpine bellflower thrives in bright conditions, but can also tolerate partial shade.
Equipment to Prepare Before Transplanting Alpine Bellflower?
Gardening Gloves
To safeguard your hands while handling soil and plants.
Shovel or Spade
For excavating holes and trenches.
Trowel
Perfect for more precise digging and lifting tasks.
Watering Can or Hose
To maintain soil moisture throughout the process.
Pruning Shears
To trim any damaged root sections.
Wheelbarrow
Useful for transporting larger plants.
Mulch
To aid in retaining soil moisture after transplanting.
How to Extract Alpine Bellflower from the Soil?
How to Extract Alpine Bellflower from the Soil?
From Ground: First, hydrate the alpine bellflower plant to moisten the soil. Then, excavate a wide trench around the plant using a shovel or spade, ensuring the plant's root ball remains intact. Carefully work the spade beneath the root ball to lift the plant from its original spot.From Pot: Thoroughly water the alpine bellflower plant. Gently tap the pot's sides to loosen the soil. Invert the pot, supporting the plant with your other hand, and tap the bottom to release the plant.From Seedling Tray: Lightly water the alpine bellflower seedling. Use a trowel or your fingers to gently loosen the soil surrounding the seedling. Carefully lift the seedling from the tray, ensuring the root ball stays intact.
Step-by-Step Guide for Relocating Alpine Bellflower
Site Preparation
Prepare the new planting location by digging a hole twice the width of the alpine bellflower's root ball and of equal depth.
Transplanting
Position the alpine bellflower in the center of the hole and backfill with soil, ensuring the plant is at the same depth as its previous growth.
Settling the Soil
Gently press the soil around the alpine bellflower to eliminate air pockets but avoid excessive compaction.
Watering
Thoroughly water the alpine bellflower to help settle the soil around its roots.
Mulching
Apply a layer of mulch around the base of the alpine bellflower to retain moisture and suppress weeds.
Post-Transplant Care for Alpine Bellflower?
Watering
Keep the soil around the alpine bellflower consistently moist, but not waterlogged, for the initial weeks after transplanting to encourage strong root establishment.
Monitoring
Regularly inspect the alpine bellflower for signs of stress like wilting or yellowing leaves, and adjust watering as needed.
Support
If the alpine bellflower appears unstable, consider using a stake or plant support to keep it upright until its roots are more firmly established.
Resolving Common Issues with Alpine Bellflower Transplantation.
When is the optimal time to transplant alpine bellflower?
Transplant in mid to late spring or early summer for the best outcomes.
How should I prepare the soil for transplanting alpine bellflower?
Ensure soil is well-drained and rich in organic matter for optimal growth.
What is the ideal spacing for alpine bellflower plants?
Space the plants 12-18 inches (30-45 cm) apart for proper growth and airflow.
How do I prevent transplant shock in alpine bellflower?
Water thoroughly before and after transplanting, and avoid disturbing the root ball excessively.
What should I do if the leaves wilt after transplanting alpine bellflower?
Provide shade and keep the soil consistently moist until the plant recovers.
How deep should I plant alpine bellflower during transplanting?
Plant at the same depth as it was in its original container to avoid stem rot.
What kind of fertilizer is best for alpine bellflower after transplanting?
Use a balanced, all-purpose fertilizer to help the plant establish in its new location.
How can I ensure alpine bellflower has enough sunlight after transplanting?
Choose a location with full sun to partial shade, avoiding deeply shaded areas.
How frequently should I water alpine bellflower after transplanting?
Water regularly, keeping the soil evenly moist but not waterlogged, more frequently in hot weather.
What should I do if pests appear after transplanting alpine bellflower?
Inspect plants regularly and use appropriate organic pest control methods as needed to manage infestations.


