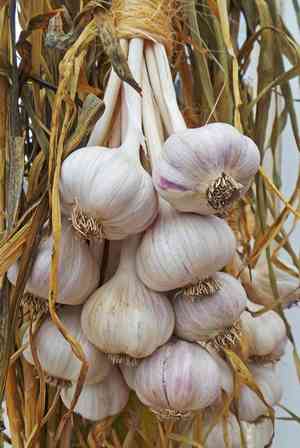
How to Transplant Garlic?
The perfect period for relocating garlic is in the cool grasp of late autumn, as this schedule facilitates prime root establishment. Confirm the garlic is positioned in a brightly lit spot with soil that drains effectively, and carefully untangle any matted roots if required. Enjoy your planting!
What Preparations are Necessary Before Relocating Garlic?
What is the Perfect Period for Moving Garlic?
The ideal season to move garlic is during late autumn. The cool temperatures of fall allow garlic to develop its root system sufficiently before the onset of frost. Shifting garlic at this time provides it with an advantage for spring growth. Furthermore, it gets ample time to mature, leading to a plentiful harvest. Giving garlic this beneficial head start is always worthwhile for optimal development!
How Much Space Should You Provide Between Garlic Plants?
When relocating your garlic, aim to position them about 6 inches (15 cm) apart. This will provide them with adequate room to grow and flourish, preventing overcrowding and competition for nutrients.
What is the Optimal Soil Mixture for Garlic Relocation?
Prepare your soil by incorporating organic material, such as compost or well-decomposed manure, to establish a fertile and well-draining foundation. Additionally, use a balanced slow-release fertilizer to ensure your garlic receives the essential nutrients it requires.
Where Should You Replant Your Garlic?
Select a location in your garden for garlic that receives full sun to partial shade. These plants thrive with at least 6-8 hours of daily sunlight, so ensure they are not overshadowed by taller plants or structures.
What Equipment Should You Prepare Before Relocating Garlic?
Hoe or Spade
This tool is essential for excavating the existing soil where garlic will be replanted.
Gardening Gloves
To safeguard your hands while handling the soil and plant.
Garden Trowel
To scoop and accurately position garlic in its new spot.
Watering Can
To adequately hydrate garlic after relocation.
Mulch
To safeguard and nourish the relocated garlic.
How Do You Extract Garlic from the Soil?
How Do You Extract Garlic from the Soil?
From Ground: First, moisten the garlic plant to soften the soil, which makes removing the plant much simpler. Use a garden trowel or hoe to carefully dig around the plant, ensuring you go deep enough to avoid damaging the roots. Gently lift the plant from the ground, preserving as much of the root system as possible.From Pot: Before extracting garlic from a pot, ensure the soil is moist but not saturated. Tip the pot on its side and gently ease the plant out, being careful not to pull on the stem or leaves of the plant.From Seedling Tray: Firmly grasp the base of the garlic plant and gently pull it from the tray, ensuring the root ball remains intact. Be sure to minimize root exposure to light and air to prevent harming the plant.
Step-by-Step Guide for Relocating Garlic
Plant Extraction
Carefully remove the garlic from its original position following the instructions provided above.
Plot Preparation
Prepare the ground or container where garlic will be moved. The hole should be deep and wide enough to accommodate the plant's root system without constricting it.
Relocation
Gently place the root ball of the garlic into the hole and carefully surround it with soil. Ensure the garlic is planted at the same depth it was in its initial location.
Watering
Water the plant immediately after relocating. This helps to settle the soil around the roots and to overcome the initial shock of being moved.
Mulching
Apply a layer of mulch around the plant to retain moisture and regulate soil temperature.
How Do You Care For Garlic After Relocation?
Watering
Consistent watering is crucial in the initial weeks post-relocation to help garlic establish robust roots. Avoid excessive watering as this may lead to root rot.
Observation
Monitor garlic closely for any indications of relocation shock such as wilted, yellowing, or drooping leaves, and take necessary action as required.
Weeding
Keep the area around garlic free from weeds which may compete with the plant for nutrients.
Pruning
As garlic grows, occasional trimming may be necessary to remove dead or damaged parts and maintain healthy development.
Troubleshooting Common Issues with Garlic Relocation.
When is the best time to relocate garlic?
The optimal moment to relocate garlic is in late fall. This provides them with a good head start before winter.
What is the ideal spacing for garlic when relocating?
To ensure optimal growth, each garlic should be planted approximately 6 inches (15 cm) apart from one another.
My garlic leaves are yellowing after relocating, what should I do?
Yellowing leaves can often indicate overwatering. Try reducing your watering frequency and ensure the soil drains well.
Why isn't my relocated garlic growing?
Garlic might take some time to establish after being relocated. Make sure they're receiving enough sunlight and water.
Can I relocate garlic in the spring?
While it's best to relocate garlic in late fall, they can also be moved in spring if necessary.
Why are my relocated garlic wilting?
Wilting can be a sign of relocation shock. Try placing garlic in diffused light and keep the soil consistently moist.
What kind of soil does garlic need when relocating?
Garlic prefers well-drained soil that’s rich in organic matter. It doesn’t tolerate soggy soil so avoid waterlogged areas.
How soon after relocating garlic can I expect to harvest?
Typically, garlic is ready to harvest 7 to 8 months after relocating, often in late summer.
How deep should I plant garlic when relocating?
When relocating garlic, plant them approximately 2 inches (5 cm) into the soil, with the pointed end facing up.
How to prevent garlic from disease when relocating?
Regular crop rotation and proper distancing can prevent pests and disease. Also, it's best to avoid relocating diseased or weak plants.


