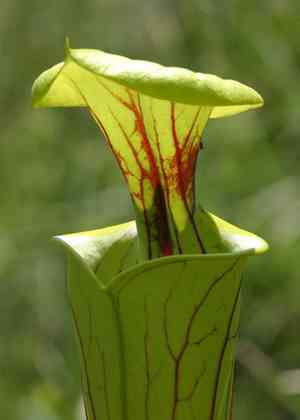
Boost Growth: How and When to Repot Your Yellow pitcherplant Plant
1
The best time for repotting is during spring or late winter, allowing the plant to adjust.
2
Confirm your new container includes drainage openings to avoid excessive moisture.
3
Always utilize a substrate formulated specifically for carnivorous species.
Why Replant Your Yellow pitcherplant?
Understanding the Yellow pitcherplant's growth cycle
The Yellow pitcherplant experiences active and dormant periods. During its vigorous growth phase in spring and summer, you'll observe vibrant new foliage and pitchers. Conversely, in winter, the plant typically enters dormancy. Grasping this cycle aids in determining optimal repotting timesâearly spring or winter.
Indicators that signal it's time for repotting
Several signs suggest your Yellow pitcherplant needs repotting: stunted growth, roots emerging from drainage holes, and the potting medium becoming dense or drying out too quickly. These cues indicate the plant has outgrown its container and requires more room and fresh substrate.
Advantages of regular repotting
Repotting offers numerous benefits, including fostering healthier development by supplying new nutrients, preventing root congestion, and lowering disease risk. It also permits a thorough inspection of the root system, ensuring your Yellow pitcherplant remains robust and thriving.
Selecting the Appropriate Container and Substrate
What to consider when choosing a new pot
When choosing a new container for your Yellow pitcherplant, select one that is 5-10 cm (2-4 inches) wider in diameter than the current pot. This provides ample space for growth without overwhelming the plant. Ensure the pot has multiple drainage openings to prevent water accumulation at the bottom.
Choosing the ideal soil mixture for Yellow pitcherplant
The Yellow pitcherplant thrives in an acidic, low-nutrient soil blend. A common mix includes sphagnum peat moss and perlite or sand, in a 1:1 ratio. Avoid standard potting soil as it often contains fertilizers and nutrients that can harm the plant.
Importance of drainage in pot selection
Effective drainage is vital for your Yellow pitcherplant's well-being. Standing water can lead to root rot and other problems. Ensure the new pot has sufficient drainage holes and consider placing a layer of small stones or broken pottery pieces at the base to improve water flow.
Step-by-Step Repotting Guide
Gathering your materials
Before you begin, collect all necessary items: a new pot, suitable soil mix, a watering can, and possibly gloves to protect your hands from the plant's sharp edges. Having everything prepared will make the process smoother and more efficient.
Gently removing the plant from its current container
Carefully extract the Yellow pitcherplant from its present pot. Gently loosen the soil around the roots and tilt the pot sideways to ease the plant out. Avoid pulling the plant forcefully, as this can damage the delicate root system.
Inspecting and trimming roots if necessary
Once the plant is out, examine the roots. Trim any dead or decayed roots using sterilized shears. This not only helps remove undesirable parts but also encourages healthier root development.
Positioning the plant in the new container
Place a small amount of the soil mix at the bottom of the new pot. Center the Yellow pitcherplant, ensuring the roots have ample room to spread. Gently add soil around the roots, avoiding compaction.
Final steps: adding soil and watering
After positioning, fill the pot with more soil mix, up to about 2 cm (1 inch) below the rim. Gently firm the soil around the plant and water it thoroughly. Keep the soil consistently moist but not waterlogged.
Post-Repotting Care Advice
Correct watering methods after repotting
After repotting, it's crucial to maintain the appropriate moisture level. Water your Yellow pitcherplant using distilled water or rainwater, as tap water can contain minerals detrimental to carnivorous plants. Keep the soil consistently damp but avoid over-saturating.
Adjusting light and temperature for recovery
Position the repotted plant in a location with bright, indirect illumination. Avoid direct sunlight immediately after repotting to prevent stress. Maintain a temperature range of 15-21°C (60-70°F) to help the plant acclimate and recover smoothly.
When to fertilize after repotting
Typically, Yellow pitcherplants do not require fertilization as they obtain nutrients from the insects they capture. However, if needed, wait at least one month after repotting before introducing any diluted, specialized carnivorous plant fertilizers.


