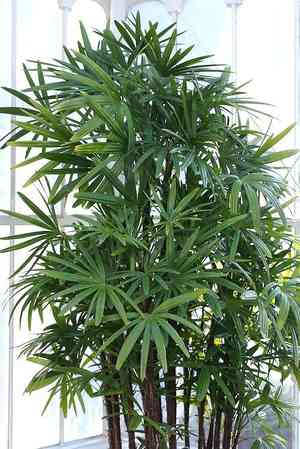
Boost Growth: How and When to Repot Your Lady Palm Plant
1
The best period to repot your Lady Palm is during the Spring.
2
Lady Palms thrive in containers that offer excellent water drainage.
3
A blend of peat, pine bark, and perlite creates the perfect soil environment for Lady Palm.
Why Your Lady Palm Needs a New Home
Indicators Your Lady Palm Has Outgrown Its Container
Your Lady Palm needs a larger pot when roots emerge from drainage holes or coil within. Other signs include slowed growth, wilting despite adequate watering, and overall plant decline. These suggest roots lack space and nutrients.
Advantages of Prompt Repotting for Lady Palm
Prompt repotting of your Lady Palm ensures ample space for development, fostering healthier root systems and robust above-ground growth. Repotting also allows for fresh soil, supplying new nutrients for vigorous development.
Selecting the Right Container and Substrate for Lady Palm
Choosing the Optimal Pot Size and Material
When rehousing your Lady Palm, select a pot 5-7 cm (2-3 inches) wider in diameter than its current one. A pot with drainage holes is essential to prevent water accumulation. Terracotta pots are excellent for their breathability, aiding root health.
The Ideal Growing Medium for Lady Palm
A well-draining, nutrient-rich substrate is perfect for Lady Palm. A blend of peat, pine bark, and perlite offers the necessary balance of moisture retention and drainage. This mixture mimics the Lady Palm's natural habitat, ensuring optimal development.
Step-by-Step Guide to Rehousing Lady Palm
When to Repot: Seasonal Advice for Lady Palm
Spring is the prime time to repot your Lady Palm. During this period, the plant exits dormancy and enters its active growth phase, enabling it to quickly recover from repotting stress and flourish in its new vessel.
Step 1: Preparing Your New Container and Soil
Start by selecting a new pot with sufficient drainage. Fill the bottom with a fresh soil mix suitable for Lady Palm. You might consider adding a layer of gravel or small stones at the base to improve drainage.
Step 2: Gently Removing Lady Palm from Its Old Pot
Carefully tilt the pot on its side and lightly tap the edges to loosen the root ball. Hold the Lady Palm at its base, and gently extract it, ensuring no root damage. If stuck, you may need to slide a knife around the pot's rim to free it.
Step 3: Inspecting and Trimming the Roots
Examine the roots for any signs of disease or damage. Healthy roots should be white and firm. Trim away any brown, mushy, or excessively long roots using sterilized pruning shears. This step helps minimize transplant shock and root rot.
Step 4: Positioning and Planting in the New Pot
Center the Lady Palm in the new pot and add soil around the root ball, pressing gently to remove air pockets. Ensure the plant's base sits at the same level as in the old pot to avoid burying the stem.
Step 5: Post-repotting Care
After repotting, thoroughly water the Lady Palm until water drains from the bottom. Place it in a spot with indirect sunlight and allow it to acclimate to its new surroundings. Avoid immediate fertilization as the fresh soil mix provides ample nutrients.
Common Repotting Errors to Avoid with Lady Palm
Overpotting: Choosing an Excessively Large Container
Avoid selecting a pot that is too big for your Lady Palm. Oversized containers can lead to waterlogging and root rot as the extra soil retains more moisture than the plant requires. Stick to a pot only slightly larger than the current one.
Incorrect Soil Type Affecting Drainage and Nutrient Availability
Using the wrong type of soil mix can severely impact the drainage and nutrient access for your Lady Palm. Ensure the soil mix is well-draining and rich in organic matter to support healthy plant growth.
Damaging Roots During the Rehousing Process
Be gentle when handling your Lady Palm's roots. Avoid pulling or tearing the roots, and always use sterilized tools for trimming. Damaged roots can lead to stress and impede the plant's development.


