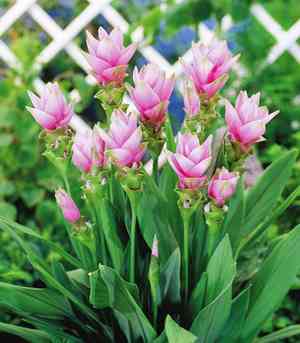
Boost Growth: How and When to Repot Your Siam tulip Plant
1
The best period to transplant a Siam tulip is in Spring and Winter.
2
An adequately draining substrate is essential for the robust development of Siam tulip.
3
Appropriate care following transplantation guarantees a flourishing Siam tulip.
Knowing When to Replant Your Siam Tulip
Recognizing indications of root congestion in Siam tulip
A primary reason to contemplate replanting your Siam tulip is root congestion. You might observe roots emerging from the pot's drainage openings or the plant's development becoming stunted. These signals suggest the roots require more room to spread, making replanting crucial for the plant's well-being.
The influence of seasons on replanting periods
Selecting the correct season for replanting is vital. The best times for replanting your Siam tulip are Spring and Winter. During these periods, the plant is either exiting dormancy or in a less active growth phase, facilitating its recovery from the stress of replanting.
Selecting the Ideal Container and Substrate for Siam Tulip
Choosing a pot size and material suitable for Siam tulip
When picking a container for your Siam tulip, opt for one slightly larger than its current pot to accommodate growth. An excessively large pot can lead to too much soil moisture and root rot. Regarding material, both plastic and terracotta pots function well, but ensure they have sufficient drainage holes to prevent waterlogging.
The optimal soil mixture for robust Siam tulip development
A well-draining soil blend is essential for the healthy development of your Siam tulip. An ideal mix incorporates potting soil with added sand or perlite to enhance aeration and drainage. This prevents roots from sitting in water, which can cause decay and other issues.
Detailed Instructions for Replanting Siam Tulip
Preparing the new container and soil before planting
Before moving your Siam tulip to a new pot, ensure the new pot is clean and fill it approximately one-third full with fresh soil mix. This initial layer provides a stable foundation for the plant and encourages healthy root development.
Carefully extracting your Siam tulip from its previous pot
Gently remove your Siam tulip from its old pot by tilting the pot sideways and lightly tapping the base. Carefully loosen the root ball with your fingers, being careful not to harm the roots during the process.
Ensuring root vitality during planting
Inspect the roots for signs of health, such as being white and firm. Trim any dead or damaged roots using sterilized shears. This aids in preventing diseases and promotes the growth of healthy roots.
Positioning and backfilling soil for stability and growth
Place the Siam tulip in the new pot and position it so the top of the root ball sits about 2-3 cm (1 inch) below the pot's rim. Gently fill in around the root ball with fresh soil, ensuring the plant is stable. Lightly press the soil to eliminate air pockets and provide support to the plant.
Post-Repotting Care: Ensuring Your Newly Replanted Siam Tulip Thrives
Appropriate watering practices after replanting
After replanting, water the Siam tulip thoroughly until water drains from the bottom. Subsequently, maintain a consistent watering schedule, allowing the top 2-3 cm (1 inch) of soil to dry out between waterings. This balance prevents both insufficient and excessive watering.
Sunlight and location considerations for optimal health
Ensure your Siam tulip receives bright, indirect light. Direct sun can scorch the leaves, while too little light can hinder growth. Ideal spots include areas near windows with filtered light or locations with partial shade.


