Boost Growth: How and When to Repot Your Bear's paw Plant
1
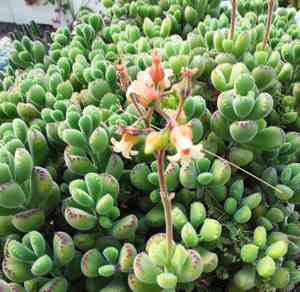
The Bear's paw plant originates from South Africa and is recognized by its soft, paw-shaped foliage.
2
The best times to transplant Bear's paw are during the Spring and Winter months.
3
Let the growing medium become arid between waterings to avoid root decay, a common issue for Bear's paw.
The Importance of Repotting Your Bear's Paw
Understanding the growth requirements of Bear's paw
Bear's paw is a succulent that flourishes in well-drained soil and needs ample sunlight. Eventually, the plant can outgrow its container, leading to stunted development and poor health. Repotting ensures the plant has adequate room to expand, supporting its natural growth patterns and maintaining its vitality.
Indicators that your Bear's paw requires a new container
Several clear signs suggest your Bear's paw needs to be repotted. If you observe roots emerging from the drainage holes, the plant appears top-heavy, or if its growth has significantly slowed, it's time to consider a larger pot. Additionally, if the soil loses its ability to drain effectively, repotting can revitalize the plant's growing medium.
Selecting the Appropriate Pot and Soil
Choosing the optimal pot size and material
When relocating your Bear's paw, choose a pot that is 2.5-5 cm (1-2 inches) wider in diameter than its current one. Terracotta pots are ideal as they encourage air circulation and prevent moisture retention. Ensure the pot has drainage holes to prevent waterlogging, which can lead to root decay.
Ideal soil mixture for Bear's paw
Selecting the correct soil blend is vital for your Bear's paw's well-being. Opt for a fast-draining succulent or cactus potting mix. You can improve drainage by incorporating perlite or pumice. This helps mimic the plant's native arid environment and prevents root rot.
Detailed Guide to Repotting Bear's Paw
Preparing your work area and tools
Before starting, gather all necessary equipment, including fresh potting mix, a new pot, protective gloves, and a small hand trowel. Lay down newspapers or an old sheet to catch any spills, and wear gloves to shield your hands from any sharp parts of the plant.
Safely removing Bear's paw from its old pot
Begin by gently tilting the pot to extract the plant. If the Bear's paw is stuck, carefully run a knife along the pot's inner edge to loosen the soil. Lift the plant out, ensuring you support its base. Remove excess soil from the roots and inspect for any damaged or decaying roots, trimming them with sanitized scissors if needed.
Transplanting and initial care
Place a layer of fresh soil mix at the bottom of the new pot. Position your Bear's paw in the center, and carefully fill in around the roots with more soil, pressing gently to remove air pockets. Water the plant lightly to help it settle. Place the repotted Bear's paw in a bright spot but avoid direct sunlight for a few days to minimize transplant shock.
Post-Repotting Care for Bear's Paw
Watering requirements after repotting
Following repotting, it's essential to adjust your watering schedule. Allow the soil to completely dry out between watering sessions. Excessive watering can cause root rot, a common problem with Bear's paw. Water sparingly and ensure surplus water can drain freely.
Adjusting light and temperature
Bear's paw thrives in bright, indirect sunlight. After repotting, gradually reintroduce the plant to its usual light exposure to prevent stress. Maintain a consistent temperature range of 18-24°C (65-75°F) to encourage optimal growth.


