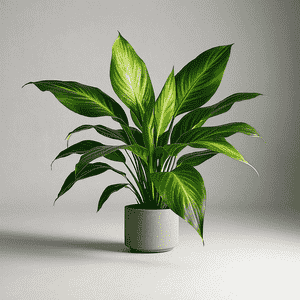
Boost Growth: How and When to Repot Your Cast-iron plant Plant
1
The best periods to transfer a Cast-iron plant to a new container are during spring or winter.
2
The fresh container ought to be roughly 5 cm (2 inches) broader in diameter than its predecessor.
3
Employ a soil blend that drains effectively to avoid excessive moisture and root decay.
The Importance of Repotting Your Cast-iron Plant
Understanding the growth pattern of your Cast-iron plant.
Relocating your Cast-iron plant to a larger container is crucial for its development and continued health. These robust plants typically grow slowly but can eventually become root-bound. Recognizing their growth cycle helps you determine the optimal time for repotting before the plant experiences distress. The Cast-iron plant's growth accelerates during warmer periods, making spring an ideal season for this task.
Recognizing indicators that your Cast-iron plant requires a new container.
Several clear signs suggest your Cast-iron plant may need a larger pot. These include roots emerging from drainage openings, stunted growth despite proper care, and the plant appearing top-heavy or unstable. Furthermore, if the soil dries out very quickly after watering, it could indicate an overly dense root system.
Selecting the Appropriate Pot and Growing Medium
Choosing the optimal pot size and material for robust growth.
When selecting a new container for your Cast-iron plant, opt for one approximately 5 cm (2 inches) wider in diameter than its current pot. This provides ample room for root expansion without overwhelming the plant. Pots made from breathable materials like terra cotta are excellent choices as they help prevent water accumulation and reduce the risk of root decay. Ensure the pot has adequate drainage holes for excess water to escape.
The perfect soil blend for your Cast-iron plant.
The Cast-iron plant thrives in a growing medium that drains efficiently. A mixture of standard potting soil combined with perlite or coarse sand works well to ensure good drainage. This blend helps maintain the correct balance of moisture and air, preventing roots from sitting in water and developing rot. Maintaining appropriate soil pH levels between 6.0 and 6.5 also aids the plant's nutrient uptake.
A Step-by-Step Guide to Repotting
Preparing your work area and gathering necessary supplies.
Begin by collecting all required items: a new pot, fresh potting mix, gardening gloves, a small hand trowel, and shears or pruning scissors. Select a clean, spacious location for your work, such as a patio or a sheltered garden spot. Lay down newspapers or a tarp to catch any spilled soil, simplifying cleanup.
Safely extracting your Cast-iron plant from its current container.
To remove your Cast-iron plant from its existing pot, gently turn the pot on its side and carefully slide the plant out, supporting its base with your hands. If it resists, tap the pot's sides and bottom to loosen the soil. Avoid pulling on the plant's stems to prevent damage.
Root trimming: When and how to effectively prune roots.
Once the plant is free from its old pot, examine the root ball. Trim away any excessively long, tangled, or dead roots using clean, sharp scissors or pruning shears. Root pruning should be minimal; remove no more than one-third of the root system to encourage healthy development.
Placing your Cast-iron plant into its new container.
Add a layer of fresh soil to the bottom of the new pot. Position the plant in the center, ensuring it sits at the same depth as before. Fill in the sides with soil, gently firming it with your fingers to eliminate air pockets. Lightly water the plant to help the soil settle.
Post-repotting care tips for a smooth adjustment.
After repotting, place your Cast-iron plant in a spot with indirect light and maintain consistent moisture. Ensure the soil remains slightly damp but not waterlogged. Monitor the plant over the next few weeks for signs of stress, such as yellowing foliage or wilting, and adjust care as needed.
Common Errors to Avoid During Repotting
Excessive watering immediately after repotting your Cast-iron plant.
A frequent error is overwatering your Cast-iron plant right after repotting. As the roots are adapting to their new surroundings, they are more susceptible to rot. Only water the plant when the top 2-3 cm (1 inch) of soil feels dry to the touch.
Utilizing unsuitable soil types that lack proper drainage.
Using dense garden soil or soil that retains too much moisture can lead to issues, including root rot. Always use a well-draining potting mix specifically formulated for houseplants or create your own blend to ensure appropriate moisture levels for your Cast-iron plant.


