Boost Growth: How and When to Repot Your Giant taro Plant
1
Giant taro flourishes in soil that drains effectively and is rich in organic material.
2
The ideal period for transplanting your Giant taro is in the Spring or Fall.
3
Employing a pot that is a single size bigger aids in managing the rapid development of Giant taro.
The Importance of Repotting Your Giant Taro
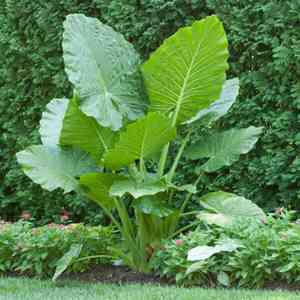
Understanding Giant Taro's Growth Habits
Giant taro, known for its impressive foliage and rapid development, needs ample room for its root system to spread. This tropical plant can achieve considerable size under optimal conditions, with leaves reaching up to 1.5 meters (5 feet) in length, necessitating periodic repotting to ensure continued health and expansion. Repotting Giant taro is not just for appearance; it's vital for the plant's overall vitality and progression.
Indicators for Repotting
Several cues suggest your Giant taro requires a new container: the most obvious is roots emerging from the drainage holes. Another clear sign is significantly slowed growth, which may indicate root overcrowding. Additionally, if the soil dries out very quickly after watering, it signals the plant is root-bound and needs more space.
Selecting the Right Container and Substrate for Giant Taro
Choosing the Optimal Pot Size and Material
When choosing a new pot for your Giant taro, select one that is 5-7 centimeters (2-3 inches) wider in diameter than its current pot. This provides sufficient root expansion space without being excessively large, which can lead to waterlogging. Terracotta pots are excellent due to their porosity and superior aeration, but plastic pots are lighter and retain moisture better, which can be advantageous depending on your climate.
Ideal Soil Mixture for Giant Taro Health
Giant taro thrives in a well-draining soil blend rich in organic matter. A suitable mix can be created by combining equal parts potting soil, perlite, and compost. The compost supplies nutrients, while perlite ensures good drainage, preventing the soil from becoming waterlogged. Correct soil composition is crucial for preventing root rot, a common problem in overly moist conditions.
Detailed Guide to Repotting Giant Taro
Preparing Your Giant Taro for Repotting
Begin by thoroughly watering your Giant taro the day before repotting. This aids in easily removing the plant from its current pot and minimizes stress. Gather all necessary items, including the new pot, fresh soil mix, and tools like gloves and a trowel.
Steps for the Repotting Procedure
Gently remove the Giant taro from its current pot by carefully tilting it and sliding the plant out. If it's stuck, you can tap the pot's sides or use a trowel to loosen it.Inspect the roots and trim any damaged or decaying sections with clean shears.Place a layer of fresh soil mix at the bottom of the new pot.Center the Giant taro in the pot, ensuring it sits at the same level as it did previously.Fill in around the roots with the soil mix, gently pressing down to remove air pockets.Water the plant thoroughly to help the soil settle around the roots.
Post-Repotting Care for Giant Taro
Immediate Care Instructions After Repotting
After repotting, position your Giant taro in a spot with bright, indirect light. Direct sunlight can stress the plant following the disturbance of repotting. Keep the soil consistently moist but avoid overwatering. Typically, a gentle watering once a week should suffice, depending on your environment's humidity and temperature.
Long-term Care Strategies
Long-term, Giant taro benefits from regular fertilization during the growing season (spring and summer) with a balanced liquid fertilizer every 4-6 weeks. Monitor the plant for any signs of distress or pests. Regularly wipe dust from the leaves to facilitate efficient photosynthesis and maintain humidity levels by misting the leaves or using a pebble tray.


