How to Prune Yellow pitcherplant?
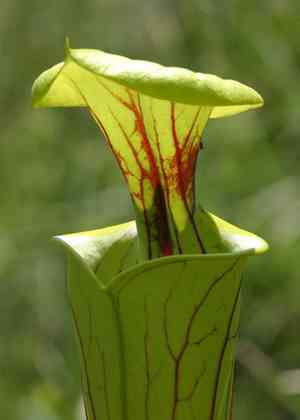
This insectivorous perennial is celebrated for its vivid, tubular traps that lure and consume insects. For Sarracenia flava, eliminate withered or compromised pitchers and spent blossoms after flowering to improve development and aesthetic. The best time for pruning is in early spring prior to new development, or in summer following the bloom period. Pruning diminishes the likelihood of fungal issues and facilitates the reallocation of energy to robust pitchers. Sanitize implements to avert the dissemination of pathogens. Excising faded pitchers additionally stimulates the emergence of fresh, robust growth for the subsequent year.
Advantages of Trimming Yellow Pitcherplant
Advantages of Trimming Yellow Pitcherplant
Trimming yellow pitcherplant encourages robust development and helps maintain its distinctive pitcher shape for effective insect capture, ensuring a strong and visually appealing specimen.
Optimal Time for Pruning Yellow Pitcherplant
Optimal Time for Pruning Yellow Pitcherplant
In Early Spring, as yellow pitcherplant emerges from dormancy, pruning is beneficial for removing any dead or damaged pitchers from the prior year. This helps redirect yellow pitcherplant's energy toward new growth and prevents potential fungal or pest issues from decaying material. Late Fall is another suitable time, after yellow pitcherplant has entered dormancy and ceased new growth. Removing old pitchers then can tidy the plant, allowing for easier emergence of new growth the following spring. These periods are chosen to avoid disturbing the plant during its active growth and flowering phase in summer, which could stress yellow pitcherplant and reduce its vigor.
Necessary Tools for Pruning Yellow Pitcherplant
Fine-tip Pruning Shears
Perfect for precise cuts of dead or yellowing pitchers without harming adjacent healthy growth. Fine-tip shears allow careful snipping, ensuring only intended parts of yellow pitcherplant are removed.
Tool Sterilizing Agent
Yellow pitcherplant can be susceptible to infections. Sterilizing pruning tools before use helps prevent disease transmission. A common agent like isopropyl alcohol or a 10% bleach solution can be used for sterilization.
Gloves
Wearing gloves while pruning protects hands from potential irritants on yellow pitcherplant's surface and ensures safe handling of sharp tools.
How to Prune Yellow Pitcherplant
Sanitize Tools
Start by sterilizing your pruning shears or scissors to prevent disease spread. Use rubbing alcohol or a 10% bleach solution to clean blades before pruning yellow pitcherplant.
Identify Sections
Thoroughly inspect yellow pitcherplant for any diseased leaves, withered leaves, and diseased stems. These are the parts of yellow pitcherplant that will require pruning.
Cut Diseased Leaves
Carefully trim off diseased leaves at their base where they attach to the rhizome, without harming healthy parts. Make each cut clean and smooth to avoid jagged edges that might harbor pests or disease.
Remove Withered Leaves
Cut back withered leaves to the point where they are still green or to the base if completely brown and dry. This will encourage yellow pitcherplant's growth by directing its energy to producing new, healthy growth.
Trim Diseased Stems
Prune any diseased stems by cutting them down to the stem's base or to the point of healthy tissue, ensuring you remove the entire affected area to prevent further infection.
Common Pruning Errors with Yellow Pitcherplant
Excessive Pruning
Removing too much foliage at once can stress yellow pitcherplant, leading to poor health and reduced pitcher production. Aim to remove only dead or damaged pitchers to avoid weakening the plant.
Pruning Healthy Pitchers
It's a mistake to prune healthy pitchers, as they are vital for yellow pitcherplant's photosynthesis and nutrient capture. Only prune pitchers that are brown or damaged.
Incorrect Tools
Using dirty or blunt tools can introduce diseases to yellow pitcherplant or cause jagged cuts that don't heal well. Always use sterile, sharp tools for clean cuts.
Overwatering Post-Pruning
After pruning, gardeners sometimes over-water yellow pitcherplant thinking it needs more water to recover. However, yellow pitcherplant prefers wet but well-drained conditions, and excessive water can be detrimental.
General Pruning Advice for Yellow Pitcherplant
Hygiene
Before pruning, sterilize tools with alcohol or a bleach solution to prevent disease spread to yellow pitcherplant. This is crucial for both plant health and infection control.
Clean Cuts
Ensure you use sharp scissors or pruning shears to make clean cuts on yellow pitcherplant, as this helps the plant heal faster and reduces stress.
Dead Pitcher Removal
Only remove brown, dead, or damaged pitchers from yellow pitcherplant; doing so will not only tidy the plant but also redirect energy to producing new healthy pitchers.
Protective Glove Use
Although yellow pitcherplant is not known to be toxic, it's still good practice, especially for sensitive skin, to wear gloves when pruning to protect against sharp edges or any potential skin irritants.
Gradual Pruning
For yellow pitcherplant, gradual pruning is key. If extensive pruning is necessary, spread it out over a period to allow yellow pitcherplant to recover between sessions.


