How to Prune Lady Palm?
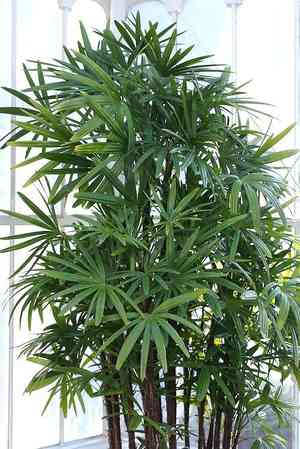
Recognized for its abundant, fan-like fronds, lady Palm flourishes in diffused illumination, establishing it as a favored houseplant. Periodically detach discolored or fading leaves from the bottom to foster robust development. Cut back impaired or excessively dense stalks at the ground level, preferably in the initial part of spring or the latter part of winter when the plant is inactive. This targeted cutting enhances air movement and fresh shoots without altering the plant's inherent clustered shape. Refrain from excessive trimming, as lady Palm's gradual development implies a lengthy recuperation period.
Advantages of Trimming Lady Palm
Advantages of Trimming Lady Palm
Trimming lady Palm promotes vigor and maintains its desired shape. Strategic cuts encourage healthy new growth tailored to the space and aesthetic needs.
Optimal Time for Trimming Lady Palm
Optimal Time for Trimming Lady Palm
Late winter and early spring are considered ideal for trimming lady Palm because this timing aligns with the plant's dormant phase. Trimming during this period of minimal growth reduces stress on the plant and prevents the loss of vital sap. Additionally, removing dead or excess foliage before the onset of the vigorous growth period in spring allows lady Palm to direct its energy to developing new, healthy growth. This timing also minimizes the risk of disease transmission, as the wounds from cuts can heal quickly in the upcoming growth season, and pathogens are less active in cooler temperatures.
Tools Required for Trimming Lady Palm
Sharp Bypass Pruners
Perfect for making clean cuts on the thin, fibrous fronds of lady Palm. These pruners create a smooth cut that promotes better healing.
Long-Handled Loppers
Useful for reaching into the denser parts of lady Palm without harming the plant's base. They provide the necessary leverage for thicker stalks.
Pruning Saw
Essential for removing mature fronds or stems that are too thick for pruners or loppers. Ensures a swift, clean cut without excessive damage to the plant.
Gardening Gloves
Protects the gardener's hands from the rough texture of lady Palm's fronds and potential skin irritation, as well as ensuring a better grip on the pruning tools.
Disinfectant
Used to clean the tools before and after trimming lady Palm to prevent the spread of disease. Clean cuts also heal more efficiently, which is vital for plant health.
How to Trim Lady Palm
Step1: Tool Sterilization
Sterilize your trimming tools. Before trimming lady Palm, always clean your shears with rubbing alcohol or a household cleaner to prevent the transfer of diseases.
Step2: Hand Protection
Wear gloves to protect your hands. Lady Palm has sturdy fan-like leaves that might be rough on the skin during the trimming process.
Step3: Dead Leaf Identification
Identify dead leaves on lady Palm by looking for completely brown, dry leaves that are no longer alive. These are typically older leaves found toward the bottom of the plant.
Step4: Dead Leaf Trimming
Trim dead leaves at the base where they emerge from the soil or from the main stem. Cut close to the base using your sterile trimming shears, avoiding damage to nearby healthy tissue.
Step5: Assessing Stem Damage
For damaged stems on lady Palm, assess the extent of the damage. If it is just a damaged leaf, follow the method used for dead leaves. If the stem is damaged, continue to the next step.
Step6: Damaged Stem Removal
If the entire stem is damaged, cut it at the base without harming the neighboring stems. Make a clean cut to facilitate healing and avoid the development of rot.
Step7: Density Reduction Trimming
Thin out the clumps if lady Palm is too dense. Remove whole stems to improve air circulation. Selectively trim stems that are crowding others, especially if they show signs of poor health or are less vigorous.
Step8: Trimmed Material Disposal
Dispose of the trimmed material properly. Do not compost diseased material as it could spread pathogens to other parts of your garden.
Step9: Post-trimming Care
After trimming, water lady Palm thoroughly and continue to provide care according to its regular needs for light and humidity.
Post-Trimming Care for Lady Palm
Post-Trimming Care for Lady Palm
Immediately after trimming lady Palm, water the plant lightly to reduce stress. Maintain moderate light exposure; avoid direct sunlight to prevent leaf burn. Maintain indoor temperatures between 60-80°F and high humidity. Initiate a half-strength balanced fertilizer regimen a month post-trimming to encourage healthy regrowth. Regularly inspect lady Palm for yellowing or wilting leaves, which could indicate stress or disease. If such symptoms occur, adjust care conditions and consult a horticulturist for potential treatments.
Common Trimming Mistakes with Lady Palm
Over-trimming reduces photosynthesis and plant health
Over-trimming which can stress lady Palm and lead to poor growth or plant health issues. Removing too many fronds, especially green, healthy ones can impair the plant's ability to photosynthesize.
Unsterilized trimming tools may spread diseases
Trimming without sterilizing tools which might transfer diseases to lady Palm. Contaminated pruners can spread pathogens, harming the plant.
Tearing fronds damages trunk and increases disease risk
Tearing or ripping fronds instead of making clean cuts. This can damage lady Palm's trunk and other parts of the plant, leading to unsightly fronds and potential for disease.
Common Trimming Tips for Lady Palm
Use sharp, clean shears for precise, healthy cuts
Use sharp, clean trimming shears to make precise cuts on lady Palm, as this helps prevent disease and damage to the plant.
Remove only dead or dying fronds to boost growth
Focus on removing only brown, yellow, or otherwise dead or dying fronds to ensure lady Palm can direct energy towards new growth and maintain its aesthetic.
Trim close to the base, avoiding damage to the main stalk
When trimming lady Palm, cut the fronds as close to the base as possible without damaging the main stalk, to promote a tidy appearance and avoid leaving stubs that can rot.


