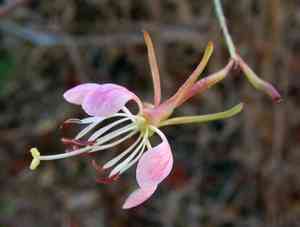
How to Prune Wavy-leaved gaura?
This perennial herb, recognized for its fine, undulating leaves and elegant spires of pinkish-white blossoms, thrives with yearly trimming. The most suitable periods for pruning are in late winter or early spring, prior to the emergence of new shoots. Eliminate any deceased or compromised stems and faded blooms to stimulate robust development and improve flowering. Routine trimming additionally aids in preserving a neat, dense form and averts excessive elongation. Consistent pruning leads to more resilient plants and a greater abundance of flowers.
What Are the Advantages of Trimming Wavy-leaved Gaura?
What Are the Advantages of Trimming Wavy-leaved Gaura?
Wavy-leaved gaura benefits from trimming by encouraging robust development and preserving its form. Pruning aids in managing its size, enhancing bloom production, and preventing illness spread. Regular trimming fosters a healthier, more visually appealing specimen.
When Is the Optimal Time for Trimming Wavy-leaved Gaura?
When Is the Optimal Time for Trimming Wavy-leaved Gaura?
Trimming in early spring or late winter is ideal for wavy-leaved gaura as it aligns with the plant's dormant phase, minimizing stress. This timing promotes vigorous growth as wavy-leaved gaura enters its active development period and supports abundant flowering. Pruning during these seasons before new growth starts helps maintain the plant's health and shape without disrupting its bloom cycle.
What Equipment Is Necessary to Trim Wavy-leaved Gaura?
Bypass Pruners
These are perfect for precise cuts on living stems and branches, which helps maintain plant vitality.
Hand Shears
Useful for snipping small branches and removing spent flowers, encouraging more blooms.
Pruning Saw
Generally not required for wavy-leaved gaura unless dealing with unusually thick stems.
Gloves
Crucial for protecting hands from thorns or sharp edges during trimming.
Sanitizing Agent
Important for cleaning tools before and after use to prevent disease transmission.
How to Trim Wavy-leaved Gaura
Identification
Carefully examine wavy-leaved gaura for any diseased or withered foliage. Diseased leaves typically show discoloration, spots, or a soft texture, while withered leaves are dry and brittle.
Disinfection
Before trimming, sanitize your pruning tools using rubbing alcohol or a bleach solution to prevent the spread of disease.
Removal
Using sharp, disinfected pruning shears, cut away the diseased or withered leaves. Make sure to cut at the base of the leaf stem, close to the main stem, for a clean removal.
Disposal
Immediately discard the removed leaves in a sealed bag and place them in the trash. Do not compost diseased leaves, as this can spread pathogens to your compost and garden.
Follow up
After trimming, monitor wavy-leaved gaura regularly for new signs of disease or wilting. Promptly remove any affected leaves to maintain plant health.
Common Trimming Errors with Wavy-leaved Gaura
Over-trimming
Cutting back too much of wavy-leaved gaura can stress the plant and hinder its growth and flowering potential. It's vital to avoid removing more than one-third of the plant at a time.
Incorrect technique
Using dull or dirty pruning tools can harm the plant's stems and increase the risk of disease. Improper angle cuts can also lead to unattractive growth and poor healing.
Trimming at the wrong growth stage
Pruning without understanding the plant's growth cycle can result in reduced blooming. For example, cutting back stems that are about to flower will lead to fewer blossoms.
General Trimming Advice for Wavy-leaved Gaura
Use sharp, clean tools
Always use pruning shears that are sharp and sterilized. This ensures clean cuts, reducing the risk of infection and promoting faster healing.
Trim selectively and gradually
Focus on removing dead or diseased stems first. Then, trim back by no more than one-third of the plant's overall growth to maintain its health and encourage dense foliage.
Maintain a natural shape
Avoid shearing wavy-leaved gaura into unnatural forms. Instead, follow the natural growth pattern of the plant, cutting just above a leaf node to encourage healthy and aesthetically pleasing growth.
Focus on airflow and light penetration
Ensure that the center of the plant isn't too dense by selectively thinning out stems. This promotes better air circulation and light availability, reducing the risk of disease.


