How to Prune Moringa?
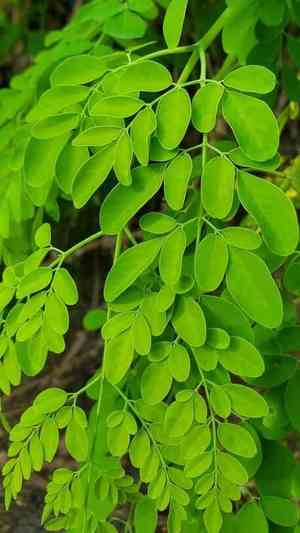
This rapidly developing, arid-tolerant tree is recognized for its nourishing foliage and seed pods. For moringa, effective trimming strategies involve reducing crowded branches and shortening limbs to foster a more compact form. Trimming should occur from early to late spring, coinciding with its natural growth period. Pruning enhances air movement, light exposure, and productivity. A key consideration is to refrain from incising the primary trunk to safeguard its structural soundness.
What Are the Benefits of Pruning Moringa?
What Are the Benefits of Pruning Moringa?
Trimming moringa promotes a more plentiful yield, supports robust development, and maintains a manageable form. It enhances well-being by eliminating dead or ailing branches, stimulating fresh growth, and improving sun exposure and air movement within the foliage.
What Is the Best Time for Pruning Moringa?
What Is the Best Time for Pruning Moringa?
These periods are considered ideal for trimming moringa as the plant is in its initial growth phase and is starting to recover from winter dormancy. Pruning in early spring encourages new shoots, enhances sunlight penetration, and allows for better air circulation within the leaves. Late spring pruning aligns with post-flowering upkeep, facilitating improved distribution of the plant's resources, which is crucial for fostering healthy leaves and pod development. This timing also helps prevent the stress that summer heat might impose on recently pruned plants. Furthermore, pruning before the rainy season can reduce the potential for disease spread in humid conditions, thereby safeguarding the overall health of moringa.
What Tools Do I Need to Prune Moringa?
Hand Pruners
Perfect for trimming and shaping young and smaller moringa branches due to their ease of use and precise cuts.
Lopping Shears
Effective for cutting thicker moringa branches up to 1.5 inches in diameter, offering increased leverage and cutting power.
Pruning Saw
Essential for larger moringa limbs exceeding 1.5 inches in thickness, enabling clean cuts without harming the plant.
Pole Pruner
Useful for reaching higher moringa branches without needing a ladder, improving safety and efficiency.
Gloves
Protect hands from moringa's wood splinters and potential sap irritation.
Safety Goggles
Guard eyes from flying debris during the moringa pruning process.
How to Prune Moringa
Step1: Timing Pruning for Dormancy
Determine the optimal time for moringa pruning. This is typically just before the start of the growing season, often in late winter or early spring when the tree is still inactive.
Step2: Tool Sterilization
Sanitize all pruning tools using a solution of one part bleach to nine parts water to prevent disease transmission.
Step3: Damaged Limb Removal
Inspect moringa for damaged limbs. These are usually broken, scraped, or physically harmed, and should be removed to prevent further injury to the tree.
Step4: Proper Cutting Technique
Trim damaged limbs by making clean cuts with sharp pruning shears or a saw. Cuts should be made just above a bud or branch junction without leaving a stub, which can allow pests and diseases to enter.
Step5: Disease Branch Identification
Check for diseased branches, which may show discolored leaves, cankers, or other signs of plant illness. Isolate and remove these immediately to prevent spread.
Step6: Diseased Limb Cutting
Cut diseased branches well below the affected area, ideally back to a main limb or trunk. Disinfect pruning tools after cutting diseased material.
Step7: Pest Infestation Pruning
Look for areas with evidence of pest infestation such as holes, sawdust, wilting, or die-back. Prune these areas back to healthy tissue or remove the entire branch.
Step8: Non-Productive Branch Pruning
Examine older branches that may be unproductive and can be pruned to stimulate new growth and a more desirable tree shape. Remove these older branches at their point of origin or to a strong lateral branch.
Step9: Canopy Shaping for Health
Shape moringa by selectively pruning to maintain airflow and sunlight penetration throughout the canopy. This will aid the tree's health and productivity.
Step10: Debris Disposal
Gather all pruned material and dispose of it properly to prevent reinfestation of pests or diseases.
Step11: Post-Pruning Care
Water and care for moringa after pruning to support recovery and new growth.
Step12: Monitor for Stress
Observe moringa for any signs of stress after pruning and respond accordingly by providing necessary care, such as mulching, watering, or protection from pests and diseases.
Post-Pruning Care for Moringa
Post-Pruning Care for Moringa
Immediately after trimming moringa, ensure it receives adequate light but avoid direct, intense sun exposure. Maintain moderate humidity and stable temperatures, preventing drastic changes that can stress the plant. Applying a balanced fertilizer can aid in recovery, encouraging new growth. Monitor moringa for wilting, discoloration, or signs of disease, such as unusual spots or decay. If symptoms appear, isolate the plant and seek plant-specific treatments with antifungal or antibacterial properties to mitigate stress and disease.
Common Pruning Mistakes with Moringa
Excessive or Improper Cuts Stunting Growth
Pruning too aggressively can hinder moringa's growth or fail to encourage branching. Removing more than one-third of a branch or cutting too close to the main trunk can be harmful.
Jagged Cuts Leading to Infections and Pests
Making cuts that are uneven or tearing the bark can result in infections and pest issues. Clean cuts are vital for the moringa's healing process.
Overlooking Dead or Diseased Branches
Ignoring dead or diseased limbs can negatively impact the overall health of moringa. Such branches should always be the first to be removed during pruning.
Not Disinfecting Tools Spreading Disease
Failing to use sterilized pruning tools can introduce or spread diseases to moringa. It's crucial to disinfect tools before and after use.
Leaving Stubs Hinders Plant Healing
Leaving stubs after pruning can impede the healing process and attract pests and disease. Always prune back to a node or a main branch.
Common Pruning Tips for Moringa
Clean Angled Cuts Above Leaf Nodes for Growth
When pruning, make clean and angled cuts just above leaf nodes to stimulate new growth in moringa. The angle of the cut should allow water to drain, preventing rot.
Thinning Canopy Increases Air and Light
Regular thinning of the canopy can improve air circulation and light penetration, which is beneficial for the growth and flowering of moringa.
Pinch Back Shoot Tips for Bushier Growth
To promote a denser growth habit or to maintain the desired shape and size of moringa, regularly pinch back the growing tips of young shoots.
Sharp Tools for Precise Cuts Prevent Damage
Use sharp and clean pruning tools to make precise cuts. Dull tools can cause damage and create large wounds that are harder for moringa to heal.
Removing Old Stems Rejuvenates Multi-stemmed Plants
In multi-stemmed moringa, removing some of the older stems to ground level can revitalize the plant and encourage vigorous new growth.


