How to Propagate Stag's-horn clubmoss?
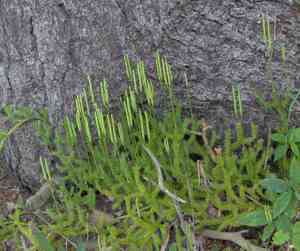
Lycopodium clavatum, a persistent clubmoss, excels in propagation via layering, leveraging its inherent inclination to form roots along its stalk. To encourage development, a segment of the stalk ought to be anchored into the substrate while remaining connected to the original specimen. Ideally, choose robust stalk portions that can be carefully curved to the earth and fastened, facilitating root formation. After rooting, these segments can be detached from the primary plant and relocated to their intended spot, guaranteeing minimal disruption for effective integration.
Optimal Period for Propagating Stag's-horn Clubmoss
Propagation Method
Cutting
Propagation Period
Spring,Summer
Tools Utilized for Stag's-horn Clubmoss Propagation
Sharp Pruning Shears
These are vital for making clean cuts on stag's-horn clubmoss sections for propagation. A precise cut helps prevent infection and damage to the parent plant, improving the success rate of rooting in the cuttings.
Rooting Hormone
This chemical promotes root development from stag's-horn clubmoss cuttings. Applying rooting hormone to the cut end of the cutting before planting enhances the likelihood of the cuttings taking root.
Sterile Potting Mix
Employing a sterile potting mix prevents disease and supports robust root growth. For stag's-horn clubmoss, a well-draining mix, possibly enhanced with sand or perlite, encourages aeration and moisture regulation around newly forming roots.
Humidity Dome or Plastic Wrap
Maintaining elevated humidity around stag's-horn clubmoss cuttings is essential during root formation. A humidity dome or loosely placed plastic wrap over the planting container helps retain moisture and warmth, mimicking a mini-greenhouse environment.
Small Pots or Trays
Suitable for individual or multiple small cuttings, these containers should offer good drainage. They provide a dedicated space for each stag's-horn clubmoss cutting, allowing for easier monitoring and care during the rooting phase.
Procedure for Propagating Stag's-horn Clubmoss
Propagation Difficulty
Easy
Post-Propagation Care for Your Stag's-horn Clubmoss
Post-Propagation Care for Your Stag's-horn Clubmoss
Once stag's-horn clubmoss cuttings have established roots, gradually introduce them to less humid conditions before relocating them permanently. Keep the soil moist, but avoid waterlogging, and provide partial shade to prevent intense direct sunlight. Regularly inspect for pests or diseases, treating as needed to ensure healthy development.
Common Errors to Avoid When Propagating Stag's-horn Clubmoss
Overwatering
Excessive watering is a critical error with stag's-horn clubmoss, as it is prone to root rot. Too much moisture around the roots can lead to fungal infections, severely hindering plant growth and propagation.
Deep planting
Gardeners often mistakenly plant stag's-horn clubmoss's spores too deeply. Stag's-horn clubmoss requires shallow planting to ensure that spores receive adequate light and air for effective germination.
Ignoring humidity requirements
Stag's-horn clubmoss thrives in moist conditions. Failing to maintain the necessary humidity can result in desiccation and poor spore germination.
Advice for Propagating Stag's-horn Clubmoss
Maintain high humidity
Keeping the humidity high promotes better spore germination and growth for stag's-horn clubmoss. Use humidity trays or mist the area regularly to maintain the required atmospheric moisture.
Surface sowing
Spores of stag's-horn clubmoss should be sown on the surface of a well-draining substrate. This allows them to access sufficient light, which is vital for their germination.
Regular misting
Frequent misting helps maintain soil moisture without over-saturating it. It is especially crucial for stag's-horn clubmoss during the initial stages of spore germination.


