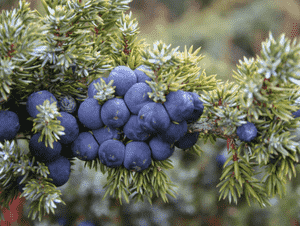
How to Propagate Common juniper?
Juniperus communis is most effectively multiplied via cutting and layering techniques in the spring and summer seasons. Its propagation presents a moderate challenge. The emergence of new shoots and the formation of roots signify successful propagation. Maintaining steady hydration and adequate drainage are crucial elements for achieving positive outcomes.
Optimal Period for Propagating Common Juniper
Propagation Method
Cutting
Propagation Period
Spring,Summer
Tools Required for Common Juniper Propagation
Pruning shears
These are crucial for accurately taking cuttings from the parent common juniper, minimizing damage. A sharp, clean cut maximizes the cutting's rooting potential, as jagged cuts can lead to disease and poor development.
Rooting hormone powder or gel
This item is vital for boosting root growth in common juniper cuttings. Applying the hormone stimulates root formation on the cutting, significantly increasing the likelihood of successful propagation.
Propagation tray with dome
The tray offers a controlled environment for common juniper cuttings to root. The clear dome maintains high humidity, which is essential for common juniper cuttings to prevent dehydration before root establishment.
Sterilizing agent (e.g., alcohol, bleach solution)
Sterilizing tools before and after use prevents disease transmission to common juniper cuttings. Clean cuts are less susceptible to infection, contributing to the overall health and viability of new plants.
Potting mix or perlite
A well-draining medium like perlite promotes aeration and moisture retention, creating an ideal rooting environment for common juniper cuttings. It also reduces the risk of rot and fungal growth, which can harm new cuttings.
Watering can with a fine rose or misting bottle
Gentle watering or misting is necessary to keep cuttings moist without dislodging or damaging them. A fine rose or misting bottle delivers water delicately, suitable for common juniper cuttings.
Labels and a marker
Labeling cuttings with the date and details allows for tracking the propagation process. This aids in organizing and monitoring the growth progress of each common juniper cutting to effectively assess their health and development.
Post-Propagation Care for Your Common Juniper
Post-Propagation Care for Your Common Juniper
Once roots are established, carefully move the common juniper cutting to a larger container or into the ground in a location with full sun to partial shade. Keep the soil moist as the young plant establishes, being careful not to overwater. After full establishment, common juniper will require less water and is drought tolerant. Prune sparingly to shape the plant and encourage denser growth. Monitor for pests and diseases and treat accordingly to ensure the overall health of the plant.
Common Errors to Avoid When Propagating Common Juniper
Excessive watering of cuttings
Too much moisture can lead to root rot for common juniper cuttings, hindering successful rooting.
Using overly mature cuttings
More mature common juniper cuttings may not root as easily as semi-hardwood ones, impeding propagation.
Failing to provide adequate drainage
Insufficient drainage can result in waterlogged soil, which is detrimental to common juniper's rooting process.
Planting seeds too deeply
Common juniper seeds buried too deep in the soil may fail to germinate due to insufficient access to sunlight and air.
Ignoring seed pre-treatment
Not stratifying common juniper's seeds before planting can lower their germination rates because it mimics the necessary winter conditioning.
Advice for Propagating Common Juniper
Semi-hardwood cuttings selection
Utilize semi-hardwood cuttings from common juniper for improved rooting success rates and vigorous growth.
Moderate watering practice
Provide consistent but moderate watering to common juniper cuttings to maintain humidity without causing rot.
Soil drainage ensuring
Ensure the soil has good drainage to prevent water accumulation and protect common juniper from root diseases.
Optimal seed depth maintenance
Plant common juniper's seeds at a shallow depth to facilitate proper germination and access to light.
Cold stratification of seeds
Simulate winter conditions by stratifying common juniper's seeds, which promotes successful germination by breaking seed dormancy.


