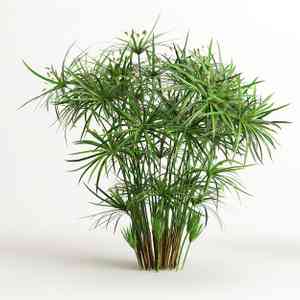
How to Propagate Umbrella Sedge?
Umbrella Sedge is most effectively multiplied by separating its clumps in the prime periods of spring and fall. This technique is quite straightforward, and indicators of success include the emergence of fresh shoots. Ensure the growing medium remains damp to foster a robust root structure.
Optimal Period for Umbrella Sedge Propagation
Propagation Method
Separation
Propagation Period
Spring, Autumn
Tools Required for Umbrella Sedge Propagation
Sharp garden scissors or shears
These are crucial for making clean cuts through roots and rhizomes during division. Sharpness minimizes plant tissue damage, aiding faster recovery and reducing disease risk.
Sterilizing agent
Applying a sterilizing agent such as rubbing alcohol or a bleach solution to clean cutting tools before use helps prevent pathogen introduction that could impact umbrella Sedge health during and after propagation.
Watering can with a fine rose attachment
This implement is used for gently irrigating umbrella Sedge post-propagation. It delivers even, soft watering vital for the establishment of newly divided plants without disturbing soil or roots.
Growing medium
A well-draining and nutrient-rich substrate is essential for the successful establishment of umbrella Sedge divisions. It should retain moisture while allowing excess water to drain, preventing rot.
Plant pots with drainage holes
These containers are necessary for individually planting umbrella Sedge divisions. Drainage holes prevent waterlogging, to which umbrella Sedge is particularly sensitive.
Gloves
Wearing gloves protects the propagator's hands when handling sharp tools and keeps umbrella Sedge divisions clean, reducing potential disease transmission.
Labeling tags and waterproof marker
These assist in identifying umbrella Sedge divisions, especially with multiple plants or propagation dates. Proper labeling is important for tracking growth and development.
How to Propagate Umbrella Sedge?
Propagation Type
Division
Difficulty Level
Easy
Caring for Your Newly Propagated Umbrella Sedge
Caring for Your Newly Propagated Umbrella Sedge
Post-propagation, ensure new umbrella Sedge plants receive bright, indirect light and temperatures between 60-75°F (15-24°C). Keep soil consistently moist but not waterlogged. For enhanced growth, fertilize with a balanced, water-soluble feed every 4-6 weeks during the active growing season. Mist leaves regularly to maintain higher humidity, mimicking umbrella Sedge's native tropical environment. Repot umbrella Sedge when it outgrows its container or roots become crowded, typically every 2-3 years.
Common Mistakes to Avoid When Propagating Umbrella Sedge
Overwatering
Excessive watering of umbrella Sedge can lead to root rot, as it prefers balanced moisture. This error can cause roots to suffocate and make the plant vulnerable to diseases.
Using drenched soil
Propagating umbrella Sedge in overly saturated soil can hinder proper rooting, as cuttings require well-draining soil to establish a healthy root system.
Incorrect cutting
Taking cuttings that are too short or from weak parts of umbrella Sedge may not root effectively or at all, decreasing the likelihood of successful propagation.
Ignoring cleanliness
Failing to sterilize tools or containers can introduce pathogens to umbrella Sedge cuttings, potentially leading to infections and propagation failure.
Tips For Propagating Umbrella Sedge
Adequate hydration
Provide umbrella Sedge with consistent moisture but avoid excess water. Using a spray bottle to mist the soil can help keep it moist without overwatering.
Well-draining medium
Utilize a light, airy propagation medium for umbrella Sedge that allows for proper drainage and aeration around the roots to prevent rot.
Proper cutting size
Select healthy and robust stems for cutting, ensuring they are at least 3-4 inches long to increase the chance of rooting for umbrella Sedge.
Sanitation
Always use clean, sterilized tools and containers when propagating umbrella Sedge to minimize the risk of disease transmission.


