How to Propagate Alpine bellflower?
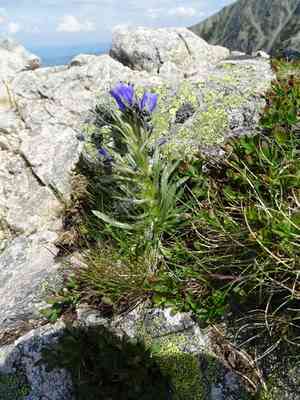
Campanula alpina is an attractive, compact perennial distinguished by its campanulate blue blossoms. For propagation, obtain semi-hardwood cuttings and place them in a substrate that drains effectively. Ensure the cuttings remain damp, yet not saturated, and expose them to filtered light to stimulate root formation.
Optimal Time for Alpine Bellflower Propagation
Propagation Method
Cutting
Propagation Period
Spring,Summer
Tools Required for Alpine Bellflower Propagation
Sharp Secateurs or Pruning Shears
Crucial for making clean, precise cuts on alpine bellflower. Clean cuts minimize disease risk and encourage faster root formation.
Rooting Hormone
Promotes root development in cuttings, boosting the success rate for alpine bellflower propagation. This aids in the robust growth of new roots.
Sterile Potting Mix
A premium, well-draining potting medium offers an ideal environment for alpine bellflower cuttings to root. Sterility prevents pathogens from harming delicate new growth.
Propagation Trays
These containers secure cuttings and maintain the perfect humidity and moisture levels needed for alpine bellflower's root growth.
Clear Plastic Dome or Propagation Mat
Helps establish a controlled humid environment, vital for the moisture-sensitive alpine bellflower cuttings. This tool reduces water loss through evaporation, enhancing rooting conditions.
Gentle Watering Can or Fine Mist Sprayer
Delivers even moisture to cuttings without disturbing them, ensuring hydration without waterlogging.
Heating Mat
Maintains a consistent soil temperature, accelerating root growth in alpine bellflower cuttings, especially in cooler climates.
Labeling Supplies
Ensures each alpine bellflower cutting is correctly identified and dated, aiding in progress tracking and preventing confusion with other species.
How to Propagate Alpine Bellflower?
Propagation Type
Easy
Caring for Your Newly Propagated Alpine Bellflower
Caring for Your Newly Propagated Alpine Bellflower
Once the cutting is planted, position it in an area with bright, indirect light, avoiding direct sun exposure. Maintain consistent soil moisture without overwatering, and remove the plastic cover after a few weeks when new growth appears. Gradually introduce alpine bellflower to a typical outdoor setting by increasing its sunlight exposure over several days. Regularly check for pests or diseases, and lightly fertilize with a balanced fertilizer once the plant is established. Prune as needed to encourage bushier growth and more blooms.
Common Propagation Mistakes to Avoid with Alpine Bellflower
Overwatering
Excessive moisture can lead to root rot and fungal issues. Alpine bellflower prefers well-drained soil.
Improper Soil Mix
Using dense or clay-rich soil can impede root development and cause poor drainage.
Too Much Sunlight
Exposing alpine bellflower to excessive sun can result in leaf scorching and plant stress.
Neglecting Soil pH
Ignoring the soil's pH can lead to nutrient deficiencies that hinder growth.
Crowded Plantings
Planting too closely can restrict airflow, increasing susceptibility to diseases.
Tips For Propagating Alpine Bellflower
Well-Draining Soil
Utilize a potting mix with good drainage, such as a blend of peat, perlite, and sand.
Moderate Watering
Water moderately, allowing the soil to dry slightly between waterings to prevent root rot.
Partial Shade
Place alpine bellflower in an area with partial shade to prevent leaf burn and stress.
Correct pH
Ensure the soil has a slightly alkaline to neutral pH for optimal nutrient absorption.
Sufficient Spacing
Space plants adequately to ensure proper airflow and reduce disease risk.


