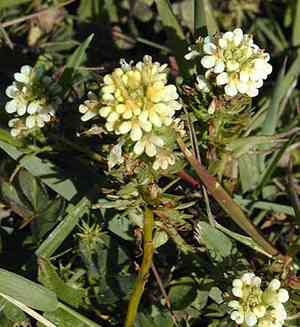
San francisco owl's-clover (Triphysaria floribunda)
Also known as: Santa Cruz Island ends-in
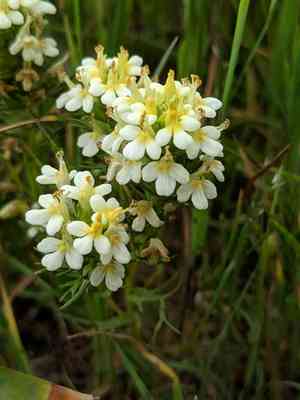
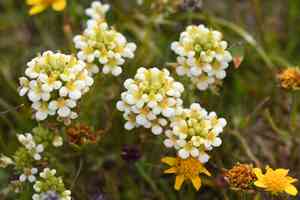
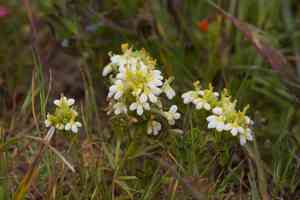
The San Francisco owl's-clover (Triphysaria floribunda) features vibrant, clustered flowers that vary in color from yellow to purple. This small annual herb often inhabits moist grasslands and coastal prairies. Its flowers have a unique, beak-like shape, giving them an owl-like appearance. The plant is adapted to serpentine soils, which are low in essential nutrients and contain toxic heavy metals, making them difficult for many species to tolerate. Additionally, it is hemiparasitic, meaning it can attach itself to the roots of other plants to obtain water and nutrients, aiding its survival in these challenging environments.
In This Article
Attributes of San francisco owl's-clover
Lifespan
Annual
Plant Type
Herb
Plant Height
10-30 cm
Spread
N/A (herbaceous plant with no crown)
Leaf Color
Green
Flower Size
1-2 cm
Flower Color
Yellow
Images of San francisco owl's-clover
Quickly Identify San francisco owl's-clover
1
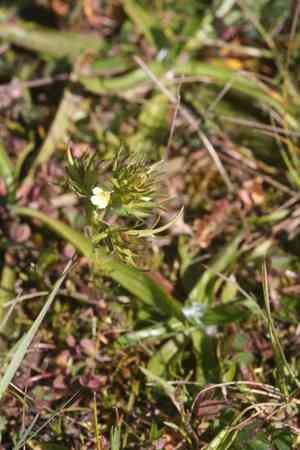
Look for a herbaceous plant with yellowish-green stems and bright yellow flowers. The leaves are deeply lobed and the plant tends to grow in nutrient-poor soils, often alongside other species it parasitizes.
Scientific Classification of San francisco owl's-clover
Phylum
Vascular plants
Class
Dicotyledons
Order
Lamiales
Family
Broomrape
Genus
Owl's-clovers
Species
San francisco owl's-clover
Planting and Growing of San francisco owl's-clover
Care Difficulty
Moderate
Watering Schedule
Every 3 days
Sunlight Requirements
Partial sun
Sunshine Duration
4-8 hours
Ideal Temperature
60-75℉
Soil Type
Potting Mix, Peat Mix
Soil pH
6.5-7.5
Fertilizer Type
Balanced
Pruning Season
Spring, Summer
Pruning Area
Branches, Leaves
Pruning Frequency
2 times a year
Repotting Season
Spring
Pot Type
Plastic, Ceramic
 How to Water San francisco owl's-clover?
When watering Triphysaria floribunda, it's crucial to ensure that the soil is evenly moist but not waterlogged. This plant benefits from deep watering, approximately 200 ml per session, allowing the water to reach the root zone thoroughly. It's essential to see that the water is absorbed well, without leaving any excess in the saucer or pot bottom.
What are the symptoms of an underwatered San francisco owl's-clover?
›
What should I do if my San francisco owl's-clover is not getting enough water?
›
What are the symptoms of an overwatered San francisco owl's-clover?
›
How to save an overwatered San francisco owl's-clover?
›
 What Are the Sunlight Requirements for San francisco owl's-clover?
Triphysaria floribunda prefers partial sun. Proper light enhances its photosynthesis, leading to healthy growth and vibrant blooming.
What is the best lighting condition for Triphysaria floribunda?
›
How can I ensure Triphysaria floribunda gets optimal light?
›
What are the benefits of providing ideal light for Triphysaria floribunda?
›
 What Is the Ideal Temperature Range for San francisco owl's-clover?
The ideal temperature range for Triphysaria floribunda is between 60°F and 75°F. Within this range, the plant can perform most of its physiological processes optimally, leading to healthy growth and blooming. This moderate temperature range simulates the conditions of its native habitat and helps ensure steady development.
 What Soil is Best for San francisco owl's-clover?
Triphysaria floribunda thrives in well-drained soil to prevent root rot. This requirement ensures the plant's roots are not submerged in water, promoting better nutrient uptake and healthier growth. This plant prefers soil with moderate fertility. Too much organic matter can lead to excessive foliage growth with fewer flowers. Moderate fertility balances growth and flowering for visual appeal. Aerated soil allows Triphysaria floribunda to breathe, facilitating vital gas exchange. This process boosts root health and enhances the plant's overall resilience against environmental stress.
 How to Fertilize San francisco owl's-clover?
For Triphysaria floribunda, a moderate amount of fertilizer is ideal. Use approximately 1 tablespoon of liquid fertilizer per gallon of water, ensuring the solution is well mixed. For slow-release fertilizers, apply about 2 tablespoons per square foot in early spring.
 How to Prune San francisco owl's-clover?
Begin pruning in early spring as new growth starts to emerge. Focus on removing dead or damaged stems to encourage healthier growth. Cut back leggy branches to about one-third of their length to promote a fuller appearance. Ensure each cut is made at a 45-degree angle above a healthy bud or branch junction, fostering optimal recovery. During summer, prioritize thinning out crowded areas within the plant. This allows for better air circulation, minimizing disease risk and fostering an environment for superior flower production. Remove any crossing branches that may hinder sunlight penetration, and make prudent cuts to open up the plant's center.
More About Pruning Techniques→
 How to Propagate San francisco owl's-clover plant?
1
Collect ripe seeds from Triphysaria floribunda plants. Ensure that the seeds are fully mature by checking for a dry and darkened appearance.
2
Sow the seeds evenly over the surface of moistened potting soil in the seed trays. Lightly press down to ensure contact between seeds and the soil.
3
Keep the soil consistently moist but not waterlogged. Water the seeds gently to avoid displacing them, using either a misting spray or a watering can with a fine rose.
 How to Repot San francisco owl's-clover plant?
1
The ideal time to repot Triphysaria floribunda is when you notice roots emerging from drainage holes, or the growth seems stunted, indicating the plant has outgrown its pot. It's crucial to choose a season like spring or autumn, where the plant isn't in its peak growth or dormancy, facilitating easier transition and minimizing stress.
2
Select a pot slightly larger than the current one, made of breathable material like terracotta. This ensures adequate air circulation for roots, reducing the risk of rot. The pot must have drainage holes to prevent waterlogging, which can lead to root rot. A balanced pot size allows roots to grow without water stagnation, promoting healthy growth.
3
Opt for well-draining, nutrient-rich soil that retains moisture yet prevents waterlogging, catering to the plant's natural preference. A sandy loam or a mix formulated for Mediterranean plants often works best, ensuring the plant receives enough nutrients for vigorous growth while avoiding issues from excessive water retention.



