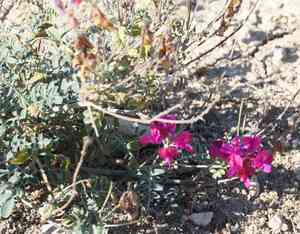
Hedysarum tauricum (Hedysarum tauricum)
Also known as: Taurian Sweetvetch
Hedysarum tauricum features vibrant clusters of pink to purple flowers atop its leafy stalks. Adapted to rocky terrains, it has a deep root system that allows it to thrive in dry conditions. The plant's pinnate leaves reflect its membership in the Fabaceae family, embodying a touch of natural beauty.
In This Article
Attributes of Hedysarum tauricum
Lifespan
Perennial
Plant Type
Herb
Plant Height
60-90 cm
Spread
Not typically measured in terms of crown diameter.
Leaf Color
Green
Flower Size
1-2 cm
Flower Color
Pink to purplish
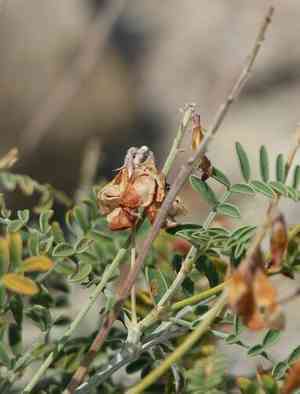
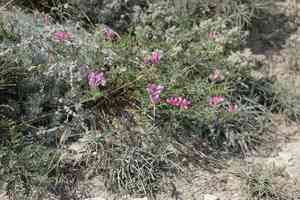
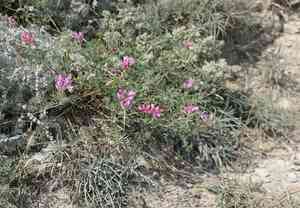
Images of Hedysarum tauricum
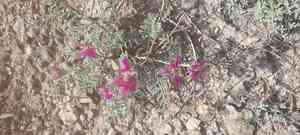
Quickly Identify Hedysarum tauricum
1
Hedysarum tauricum can be identified by its tall stems, compound leaves with multiple leaflets, and clusters of pea-like flowers that are typically pink or purplish in color. The plant also produces distinct seed pods.
Scientific Classification of Hedysarum tauricum
Phylum
Vascular plants
Class
Dicotyledons
Order
Fabales
Family
Legume
Genus
Sweetvetches
Species
Hedysarum tauricum
Planting and Growing of Hedysarum tauricum
Care Difficulty
Moderate
Watering Schedule
Every 2 days
Sunlight Requirements
Full sun
Sunshine Duration
6-10 hours
Ideal Temperature
60-75℉
Soil Type
Potting Mix, Peat Mix
Soil pH
6.5-7.5
Fertilizer Type
Balanced
Pruning Season
Spring, Summer
Pruning Area
Branches, Leaves
Pruning Frequency
2 times a year
Repotting Season
Spring
Pot Type
Plastic, Ceramic
 How to Water Hedysarum tauricum?
For Hedysarum tauricum, the ideal watering amount should balance moisture and drainage. Aim to moisten the soil without it becoming waterlogged—around 200 ml each time should be adequate. This ensures the roots receive sufficient hydration while minimizing the risk of root rot.
What are the symptoms of an underwatered Hedysarum tauricum?
›
What should I do if my Hedysarum tauricum is not getting enough water?
›
What are the symptoms of an overwatered Hedysarum tauricum?
›
How to save an overwatered Hedysarum tauricum?
›
 What Are the Sunlight Requirements for Hedysarum tauricum?
Hedysarum tauricum thrives in a range of full sun to partial sun conditions. Ideally, providing it with 6-8 hours of sun boosts vigor and blooming capacity, enhancing its aesthetic appeal and overall health.
What is the best location for planting?
›
How to ensure optimal sunlight in seasons with varying daylight?
›
What benefits can the plant receive from ideal lighting?
›
 What Is the Ideal Temperature Range for Hedysarum tauricum?
Maintaining the ideal temperature range of 60°F to 75°F is crucial for Hedysarum tauricum as it supports optimal growth and metabolic functions. At these temperatures, photosynthesis occurs efficiently, allowing the plant to produce enough energy for growth. Additionally, this range helps prevent temperature-induced stress that could lead to reduced vigor and susceptibility to disease.
 What Soil is Best for Hedysarum tauricum?
Hedysarum tauricum thrives in well-draining soil. Adequate drainage prevents root rot and other moisture-related issues, ensuring healthy growth and vibrant blooms. This plant benefits from slightly fertile soils with balanced nutrients, supporting robust growth and enhancing its nitrogen-fixing abilities for surrounding plants. While drainage is important, the soil should still retain some moisture. This ensures the plant stays hydrated during dry spells, promoting consistent growth.
 How to Fertilize Hedysarum tauricum?
The fertilization amount for Hedysarum tauricum should be modest, as it prefers not to be over-fertilized. Use a balanced liquid fertilizer at a concentration of 1/2 strength every two weeks during the growing season. For slow-release fertilizers, about a tablespoon per plant annually is sufficient.
 How to Prune Hedysarum tauricum?
Gently work your way from the outside of the plant towards the center, trimming any overgrown or overcrowded branches. This promotes better air circulation and sunlight penetration, leading to a more vibrant plant. Trim back to just above a healthy pair of leaves to encourage bushier growth. This technique helps the plant grow more densely and prevents legginess. Be gentle and do not take off more than one-third of the plant's size at one time. Shape the plant as desired, maintaining symmetry and balance. This is especially important for ornamental uses. A well-shaped Hedysarum tauricum can be the highlight of your garden with its graceful form. After pruning, give the plant a gentle rinse with water to remove any loose debris and dust. Ensure adequate watering to help the plant recover from the pruning process and encourage new growth.
More About Pruning Techniques→
 How to Propagate Hedysarum tauricum plant?
1
Collect seeds from mature plants and sow them in seed trays filled with a well-draining seed starting mix. Cover lightly with soil and water gently.
2
Take healthy cuttings from a mature plant, ensuring each has multiple nodes. Dip in rooting hormone and place them in a moist growing medium.
3
Carefully dig up a mature plant in early spring, gently separate the root system ensuring each part has roots and shoot, then replant in desired location.
 How to Repot Hedysarum tauricum plant?
1
Hedysarum tauricum shows clear signs when it's time to repot. If roots are protruding through the drainage holes, it's a definite signal. Additionally, if growth seems stunted despite proper care, a tight root environment might be the culprit. Spring or autumn is best as these seasons offer moderate temperatures aiding in smooth transition.
2
Select a pot one size larger than the current one that provides ample drainage. Use a pot that complements the root ball size but doesn't overwhelm it. A ceramic or terracotta pot can regulate moisture effectively, resulting in healthier root systems. Opting for pots with drainage holes prevents waterlogging and root rot.
3
Opt for well-draining loamy soil which ensures balanced moisture retention and drainage. Adding a bit of sand or perlite improves aeration, preventing the dense nature that can lead to water buildup. This type of soil promotes a healthier root system, vital for plant stability and nutrient absorption.
Learn More About Hedysarum tauricum Diseases
Anthracnose
Bacterial Leaf Spot
Bacterial Wilt
Crown Gall
Cyst Nematode
Damping-off
Downy Mildew
Drought Stress
Fusarium Wilt
Gray Mold
Leaf Curl
Leaf Spot
Mosaic
Nutrient Deficiency
Nutrient Toxicity
Powdery Mildew
Root Rot
Root-knot Nematode
Rusts
Sooty Mold
Spider Mites
Temperature Stress
Thrips Damage
White Mold
Chemical Injury



