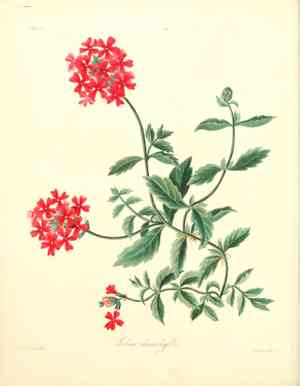
Peruvian mock vervain (Glandularia peruviana)
Also known as: Peruvian mock vervein
Peruvian mock vervain is a hardy perennial that thrives in sunny locations with well-drained soil. It features clusters of vivid trumpet-shaped flowers, typically in purple or violet, which bloom abundantly from spring to fall. The plant has densely packed foliage with fine hairs covering the leaves and stems, providing a soft, velvety feel. It is drought-tolerant, making it a great choice for low-water gardens.
In This Article
Attributes of Peruvian mock vervain
Lifespan
Perennial
Plant Type
Herb
Plant Height
30 cm
Spread
60 cm
Leaf Color
Green
Flower Size
1-2 cm (0.4-0.8 inches)
Flower Color
Red Pink
Images of Peruvian mock vervain
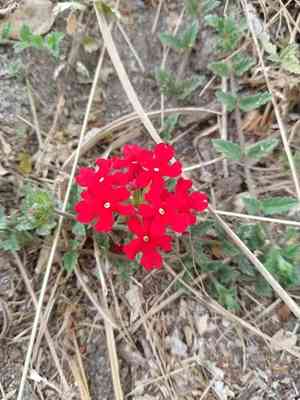
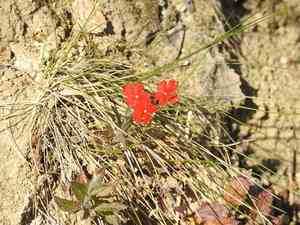
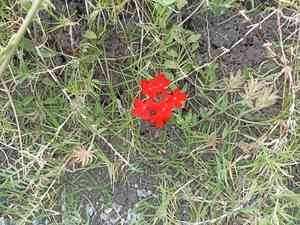
Quickly Identify Peruvian mock vervain
1
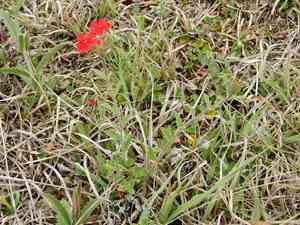
To identify Glandularia peruviana, look for its characteristic flower clusters that are typically red or pink in color. The leaves are somewhat thick and hairy, with a toothed margin. The plant has a sprawling growth habit and can often cover a wide area, especially in garden settings.
Scientific Classification of Peruvian mock vervain
Phylum
Vascular plants
Class
Dicotyledons
Order
Lamiales
Family
Verbena
Genus
Mock vervain
Species
Peruvian mock vervain
Planting and Growing of Peruvian mock vervain
Care Difficulty
Easy
Watering Schedule
Every 3 days
Sunlight Requirements
Full sun
Sunshine Duration
4-8 hours
Ideal Temperature
65-75℉
Soil Type
Potting Mix, Peat Mix
Soil pH
6.5-7.5
Fertilizer Type
Balanced
Pruning Season
Spring, Summer
Pruning Area
Branches, Leaves
Pruning Frequency
2 times a year
Repotting Season
Spring
Pot Type
Plastic, Terracotta
 How to Water Peruvian mock vervain?
Glandularia peruviana requires you to water it until the soil is evenly moist. Aim for about 300 milliliters of water, but ensure that excess water drains away from the pot. The key is to maintain consistent moisture without waterlogging the roots.
What are the symptoms of an underwatered Peruvian mock vervain?
›
What should I do if my Peruvian mock vervain is not getting enough water?
›
What are the symptoms of an overwatered Peruvian mock vervain?
›
How to save an overwatered Peruvian mock vervain?
›
 What Are the Sunlight Requirements for Peruvian mock vervain?
This plant enjoys light ranging from full sun to partial sun, offering multiple adaptation benefits. Ideal sunlight boosts bloom intensity, leading to a lush and colorful display.
What kind of sunlight is best?
›
How can I provide ideal lighting?
›
What benefits arise from ideal lighting?
›
 What Is the Ideal Temperature Range for Peruvian mock vervain?
Glandularia peruviana thrives best in temperatures ranging from 65°F to 75°F. Within this range, the plant can effectively photosynthesize, grow, and produce vibrant blooms. Ensuring this temperature helps in maintaining the plant's metabolic functions and overall vitality. Consistent temperatures in this range also prevent stress and promote optimal health.
 What Soil is Best for Peruvian mock vervain?
Glandularia peruviana thrives in nutrient-rich soil that supports its vibrant blooms and foliage. A well-balanced mix with essential nutrients encourages healthy plant growth and robust flower production. This plant demands well-draining soil, which prevents root rot and facilitates the movement of oxygen through the soil. Proper drainage ensures healthy roots and reduces the risk of disease. Maintaining moderate soil moisture without allowing the soil to become waterlogged is crucial. Consistent moisture supply supports steady growth and helps maintain the plant's overall vigor.
 How to Fertilize Peruvian mock vervain?
For Glandularia peruviana, use a balanced fertilizer diluted to half of its recommended strength. This plant does not require excessive nutrients, so moderate amounts are best to promote healthy growth without causing harm to its delicate roots.
 How to Prune Peruvian mock vervain?
Begin by inspecting the plant for any dead or diseased stems or leaves. Remove these parts first to prevent the spread of disease and improve the plant’s health. Trim overgrown branches to shape the plant. Focus on achieving a balanced form, cutting just above a node to encourage new growth from that point and enhance the plant's structure. For Glandularia peruviana, maintaining height and controlling sprawling stems is key. Trim long stems to encourage lateral branching and a more compact shape.
More About Pruning Techniques→
 How to Propagate Peruvian mock vervain plant?
1
Start by soaking the seeds in lukewarm water for 24 hours to soften the seed coats, which can speed up germination. Ensure the seed tray is filled with a well-draining seed-starting mix.
2
Select healthy, non-flowering stems from the parent plant. Cut a 4-6 inch section just below a node with a sharp knife. Remove the lower leaves and dip the cut end in rooting hormone.
3
Carefully remove the parent plant from its pot and gently separate the root ball into smaller sections using your hands or a knife. Each section should have a good mix of roots and shoots.
 How to Repot Peruvian mock vervain plant?
1
Glandularia peruviana shows it needs repotting when you notice roots growing out of the drainage holes or if the plant's growth has become stunted. These signs often indicate that the plant has outgrown its current pot, limiting its root expansion and nutrient absorption. Early spring is optimal, as the plant will have a full season to establish itself in the new potting environment.
2
Select a pot that is 2 inches larger in diameter than the current one. Ensure it has ample drainage holes to prevent waterlogging, which can cause root rot. The slight increase in size prevents the plant from becoming root-bound while promoting healthy root and overall plant growth. Terra cotta pots are excellent due to their breathability.
3
Opt for well-draining, sandy loam soil that allows excess water to escape easily while providing necessary nutrients. This mixture supports robust root health by mimicking the plant's natural habitat, reducing the risk of root rot, and ensuring the roots have access to the necessary air circulation and moisture levels.
Learn More About Peruvian mock vervain Diseases
Anthracnose
Bacterial Leaf Spot
Bacterial Soft Rot
Bacterial Wilt
Black Spot
Chemical Injury
Crown Gall
Cyst Nematode
Damping-off
Downy Mildew
Drought Stress
Fusarium Wilt
Gray Mold
Leaf Curl
Leaf Spot
Mosaic
Nutrient Deficiency
Nutrient Toxicity
Powdery Mildew
Root Rot
Root-knot Nematode
Rusts
Sooty Mold
Spider Mites
Temperature Stress
Thrips Damage
White Mold



