Desmodium dillenii(Desmodium dillenii)

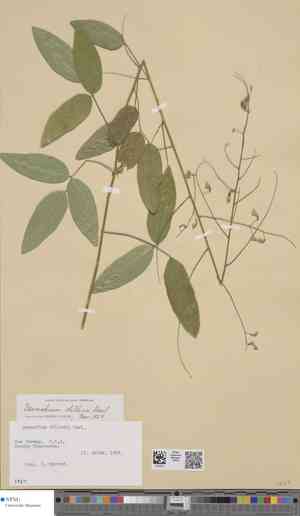
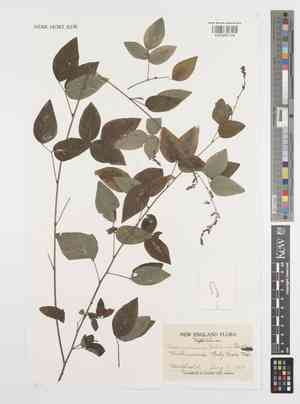
Desmodium dillenii (Desmodium dillenii)

Also known as: tick clover, Dillenius' desmodium

Desmodium dillenii is a plant of notable importance both ecologically and culturally. Its colorful flowers and graceful leaves add aesthetic value to gardens and wild areas. Ecologically, it plays a crucial role by attracting pollinators like butterflies and bees, which aids in pollination. This leguminous plant also enriches soil by fixing nitrogen, thereby boosting soil fertility. Culturally, Desmodium dillenii is valued in traditional medicine for treating various ailments, demonstrating its practical applications beyond mere beauty. Additionally, its hardy nature makes it an excellent choice for ecological restoration and erosion control projects.

Attributes of Desmodium dillenii

Lifespan
Perennial
Plant Type
Herb
Plant Height
0.3 - 1 meter
Spread
0.3 - 0.9 meters
Leaf Color
Green
Flower Size
1 - 1.5 cm
Flower Color
Pink to purple

ForwardPlant - Identify plants with a snap

Identify and diagnose plants, get toxicity alerts, and explore safety guides for all types of fungi.

Try for Free

Images of Desmodium dillenii

Desmodium dillenii(Desmodium dillenii)

Quickly Identify Desmodium dillenii

1
Desmodium dillenii can be recognized by its trifoliate leaves, small pink to purple flowers, and flat, segmented seed pods that stick to clothing and animal fur.

Scientific Classification of Desmodium dillenii

Phylum
Vascular plants
Class
Dicotyledons
Order
Fabales
Family
Legume
Genus
Tick clover
Species
Desmodium dillenii

Planting and Growing of Desmodium dillenii

Care Difficulty
Moderate
Watering Schedule
Every 2 days
Sunlight Requirements
Partial sun
Sunshine Duration
6-10 hours
Ideal Temperature
68-77℉
Soil Type
Potting Mix, Peat Mix
Soil pH
6.5-7.5
Fertilizer Type
Balanced
Pruning Season
Spring, Summer
Pruning Area
Branches, Leaves
Pruning Frequency
2 times a year
Repotting Season
Spring
Pot Type
Plastic, Ceramic

water icon How to Water Desmodium dillenii?

When watering Desmodium dillenii, aim to provide approximately 250 ml of water each time. This amount ensures the roots have enough moisture to absorb without causing waterlogging. The goal is to keep the soil moderately moist but not saturated, allowing the top inch to dry out between watering intervals.
What are the symptoms of an underwatered Desmodium dillenii?
What should I do if my Desmodium dillenii is not getting enough water?
What are the symptoms of an overwatered Desmodium dillenii?
How to save an overwatered Desmodium dillenii?

sunlight icon What Are the Sunlight Requirements for Desmodium dillenii?

Sunlight Requirements: Partial sun, Full sun
Duration of light: 4 to 6 hours
Desmodium dillenii requires partial to full sun, approximately 4 to 6 hours per day. This balance helps the plant maintain healthy photosynthesis and generate energy for growth and blooming.
Optimal Light Environment
Solutions for Adequate Lighting
Benefits of Ideal Sunlight

temperature icon What Is the Ideal Temperature Range for Desmodium dillenii?

Ideal Temperature: 68 ~ 77℉
For optimal growth, Desmodium dillenii thrives best within a temperature range of 68°F to 77°F. This range ensures the plant maintains its metabolic activities at a comfortable and efficient level, promoting healthy foliage and flower production.

soil icon What Soil is Best for Desmodium dillenii?

Soil type: Sandy soil, Loam, Sandy loam
Soil PH: 6.5 ~ 7.5
Desmodium dillenii thrives in well-draining soil that prevents waterlogging. Adequate drainage ensures the roots get just the right amount of water and nutrients, preventing rot and promoting healthy growth. The plant does well in moderately fertile soils, benefiting from balanced nutrient availability. This fosters vigorous growth and enhances the aesthetic appeal of your Desmodium dillenii. Good soil aeration is vital for Desmodium dillenii, as it promotes root respiration and nutrient uptake. Aerated soil prevents compaction, allowing roots to spread out and access necessary resources efficiently.

fertilize icon How to Fertilize Desmodium dillenii?

Fertilizer type: Balanced
Desmodium dillenii benefits from a moderate fertilization approach. Use about half the recommended amount stated on the fertilizer package for similar plants, as overdosing can harm this delicate species. Adjust according to plant response and soil fertility.

prune icon How to Prune Desmodium dillenii?

Pruning Time: Spring, Summer
Start by identifying any dead or damaged stems, as these should be removed first. Look for stems that are crossing or rubbing against each other, and determine points to cut them back. This reduces the risk of disease and allows more light and air to reach the inside of the plant. Use clean, sharp pruning shears and make cuts at a roughly 45-degree angle to encourage new growth. When trimming, aim for a spot just above a set of healthy leaves or a growth node to promote bushier growth. This technique helps redirect the plant's energy to more vital areas. To maintain the desired shape of Desmodium dillenii, make strategic cuts to guide the plant's overall structure. Start with gradual shaping cuts while avoiding too much thinning at one time, which could stress the plant.

propagate icon How to Propagate Desmodium dillenii plant?

Propagate Time: Late spring, Early summer
1
To improve germination rates, soak the seeds in warm water for 12 hours before planting, which helps soften the seed coat for easier germination.
2
Select healthy stem tips of around 4-6 inches, cut just below a node, and remove leaves from the lower half to minimize water loss and infection risk.
3
Gently remove the plant from the pot, shake off excess soil, and use a sharp knife to divide root clumps, ensuring each section has roots and several stems.

repot icon How to Repot Desmodium dillenii plant?

Repotting frequency: Every 2-3 years
1
Desmodium dillenii requires repotting when its roots overrun the drainage holes, or the growth appears stunted. Spring and autumn are ideal because the milder temperatures allow the plant to recover without the stress of extreme weather.
2
A pot that is one size larger than the current one with excellent drainage is recommended. Clay pots can help with moisture regulation, allowing excess moisture to evaporate, making them a good choice for this species.
3
Choose a well-draining, loamy soil mix to prevent waterlogging. This type of soil allows for sufficient aeration and root expansion, which supports the plant's healthy development.

ForwardPlant - Identify plants with a snap

Find the best spots for them to optimize their health, simply using your phone.

Try for Free