Cicer (Cicer) (Cicer)
Also known as: Chickpea, Garbanzo
Among the various species of Cicer, Cicer arietinum, commonly known as chickpeas, is the most widely cultivated for its edible seeds. This annual plant thrives in semi-arid regions and is not well-suited to heavy rainfall. While primarily grown for food, chickpeas can also serve as fodder or be processed into dye. The plant typically has an upright growth habit.
In This Article
Attributes of Cicer (Cicer)
Lifespan
Annual
Plant Height
20-50 cm
Spread
N/A
Leaf Color
Green
Flower Size
1.5-2 cm
Flower Color
White, Light Purple
Images of Cicer (Cicer)
Quickly Identify Cicer (Cicer)
1
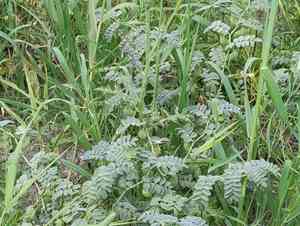
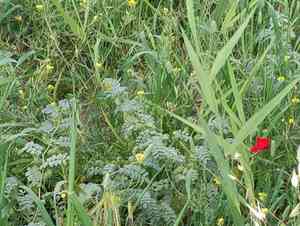
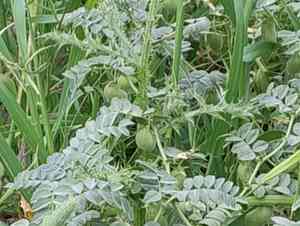
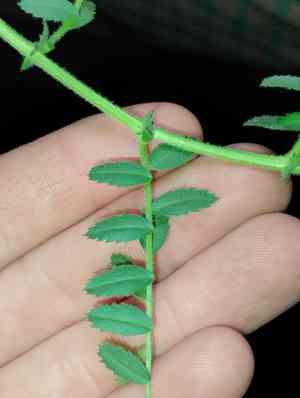
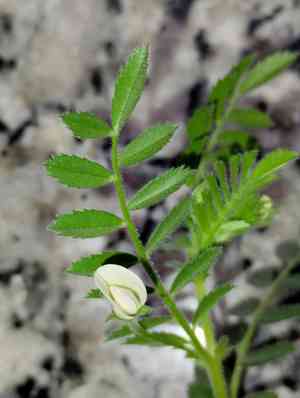
Chickpea plants can be identified by their small, feathery leaves on either side of the stem. The plant produces white or slightly purplish flowers which develop into pods containing one or two seeds.
Scientific Classification of Cicer (Cicer)
Phylum
Angiosperms
Class
Magnoliopsida
Order
Fabales
Family
Fabaceae
Genus
Cicer
Planting and Growing of Cicer (Cicer)
Care Difficulty
Moderate
Watering Schedule
Every 2 days
Sunlight Requirements
Full sun
Sunshine Duration
6-10 hours
Ideal Temperature
65-77℉
Soil Type
Potting Mix, Peat Mix
Soil pH
6-8
Fertilizer Type
Balanced
Pruning Season
Spring, Summer
Pruning Area
Branches, Leaves
Pruning Frequency
2 times a year
Repotting Season
Spring
Pot Type
Plastic, Terracotta
 How to Water Cicer (Cicer)?
The Cicer plant prefers a moderate watering approach. You should aim to water it with about 500 milliliters per session, ensuring the soil is moist but never waterlogged. Let the top inch of soil dry out between sessions to maintain optimal moisture levels for healthy growth.
What are the symptoms of an underwatered Cicer (Cicer)?
›
What should I do if my Cicer (Cicer) is not getting enough water?
›
What are the symptoms of an overwatered Cicer (Cicer)?
›
How to save an overwatered Cicer (Cicer)?
›
 What Are the Sunlight Requirements for Cicer (Cicer)?
Chickpeas prefer full sunlight settings and can tolerate partial sun. An ideal light environment ensures enhanced photosynthesis, better growth trajectories, and increased resilience to pests and diseases, optimizing the plant’s overall life cycle and yield.
Ideal Location
›
Sunlight Management
›
Seasonal Adjustments
›
 What Is the Ideal Temperature Range for Cicer (Cicer)?
What is the ideal temperature range for Cicer plants? The ideal temperature range for Cicer plants, commonly known as chickpeas, is between 65°F and 77°F. Within this range, the plants can thrive and maintain optimal growth and development. Maintaining this temperature ensures that physiological processes such as photosynthesis and nutrient uptake occur efficiently.
 What Soil is Best for Cicer (Cicer)?
Cicer species thrive in well-drained soils because they prevent root rot and allow sufficient oxygenation. Ensuring proper drainage improves plant growth and pod development. These plants require moderately fertile soils rich in organic matter to support their nutrient needs. Organic matter enhances microbial activity, which improves nutrient uptake. Loamy soils with adequate moisture retention help Cicer withstand dry conditions without waterlogging. This quality is crucial during flowering and pod-filling phases.
 How to Fertilize Cicer (Cicer)?
For Cicer plants, the amount of fertilizer applied depends on their growth stage and soil fertility. During active growth, it's crucial to provide a balanced nutrient supply. A typical recommendation is to apply liquid fertilizer at half the usual plant dose, around 5-10 ml per liter of water.
 How to Prune Cicer (Cicer)?
Begin pruning chickpea plants by sterilizing your shears to prevent the spread of any potential pathogens. Inspect the plant for any dead or diseased branches and carefully cut these away at the base. Focus on removing any branches that appear weak or are growing towards the center of the plant, as these can hinder airflow and light penetration. Always make your cuts just above a lateral branch or bud to encourage branching outwards, which will help light reach more parts of the plant. During spring, look for signs of new growth and trim away any overly dense areas to improve airflow. This will ready your plant for a productive flowering season. If your chickpea plant is becoming too tall, you can also pinch back the tops to encourage bushier growth that will support larger quantities of chickpea pods.
 How to Propagate Cicer (Cicer) plant?
1
Choose high-quality seeds from a trusted source to ensure genetic viability. Pre-soak the seeds in water for 12-24 hours to break dormancy and speed up germination. This step is crucial for softening the seed coat, allowing quicker sprouting.
2
Fill seedling trays with moistened potting mix and sow seeds at a depth twice their size. Ensure even spacing to prevent seedlings from competing for sunlight and nutrients. Lightly cover the seeds with more potting mix and mist to settle.
3
After germination, gradually expose seedlings to more sunlight to strengthen them. Monitor for adequate moisture levels, neither too dry nor waterlogged. When seedlings have at least two true leaves, they are ready for transplantation into larger pots or garden beds.
 How to Repot Cicer (Cicer) plant?
1
Repot your Cicer plants when you notice increased root density, roots growing out of drainage holes, or when the potting mix deteriorates. Choose a period in spring or early summer, as the plants would be in active growth, aiding a smoother transition.
2
Select a pot that’s one size larger than the current one, and ensure it has adequate drainage holes. This size offers enough space for root expansion without waterlogging, groups that can happen with oversized pots.
3
Opt for a rich, well-draining potting mix. This type of soil prevents water stagnation around roots, offers vital nutrients, and maintains the necessary aeration to promote healthy plant growth.

