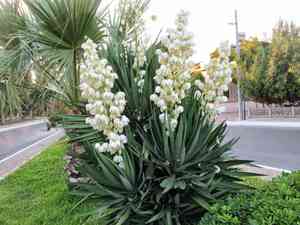
How to Transplant Spanish dagger?
The optimal time for relocating spanish dagger is from early to mid-summer or late autumn through late winter, as these intervals foster robust root establishment. To achieve superior outcomes, select a bright spot with soil that drains effectively. Bear in mind, a delicate approach when managing spanish dagger roots can contribute to a successful transplantation!
What Preparations are Needed Before Transplanting Spanish Dagger?
What is the Ideal Time for Transplanting Spanish Dagger?
The optimal period for relocating spanish dagger spans from early to mid-summer, or late autumn through late winter. This timeframe allows spanish dagger sufficient opportunity to settle before extreme temperatures. Moving spanish dagger during these seasons encourages root development, thereby improving overall plant vitality. It minimizes transplant shock, ensuring spanish dagger flourishes in its new spot. You'll be pleased with how well spanish dagger performs when moved at the opportune moment!
How Much Space Should You Leave Between Spanish Dagger Plants?
When relocating spanish dagger, ensure ample room for their growth. Position the plants approximately 3-5 ft. (0.9-1.5 m) apart to provide sufficient area for root expansion and prevent overcrowding.
What is the Best Soil Mix for Spanish Dagger Transplanting?
For spanish dagger, a soil that drains effectively is vital for robust development. Incorporate some organic material or compost to enrich the soil, and consider adding a slow-release fertilizer to give your plants an excellent start.
Where Should You Relocate Your Spanish Dagger?
Select a site for your spanish dagger that receives abundant sunlight â at least 6 to 8 hours daily. This will help ensure your plant grows strong and produces beautiful blooms. Confirm the area drains well to prevent waterlogged roots.
What Equipments Should You Prepare Before Transplantation Spanish Dagger?
Gardening Gloves
To safeguard your hands while handling soil and spanish dagger.
Shovel or Spade
To excavate the planting hole and extract the plant from its initial position.
Garden Fork
To loosen the earth within the transplant cavity.
Trowel
To create a smooth and appropriately shaped hole.
Pruning Shears
To trim the spanish dagger's roots if necessary.
Watering Can
To irrigate the spanish dagger after relocation.
Wheelbarrow
If you are moving a larger spanish dagger, a wheelbarrow will facilitate transportation.
How Do You Remove Spanish Dagger from the Soil?
How Do You Remove Spanish Dagger from the Soil?
From Ground: First, moisten the spanish dagger plant to dampen the soil. This will not only ease digging but also help the plantâs roots remain intact. Then, use your spade or shovel to create a wide circle around the plant, 6 to 12 inches from the base, depending on the plant's size. Carefully work the spade beneath the root ball and gently lift the plant from its original spot.From Pot: Water the spanish dagger plant thoroughly. After the water drains, tilt the pot sideways and gently pull the spanish dagger by its base while tapping the pot's bottom to release the plant.From Seedling Tray: If you're relocating seedlings, be sure to handle them carefully by their leaves, not their stems. Use a small tool or even a spoon to lift them from their tray, ensuring to include all roots and as much soil as possible.
Step-by-Step Guide for Transplanting Spanish Dagger
Preparation
Once the spanish dagger is removed from its initial location, prepare the new site by digging a hole that is twice as wide and the same depth as the spanish dagger's root ball. Use the garden fork to loosen the soil at the bottom of the hole.
Positioning
Gently place the spanish dagger into the hole. Ensure it stands upright and is at the same level it was growing previously. Adjust the soil beneath the root ball if needed.
Planting
Fill the hole with the soil previously excavated. Lightly compact the soil around the base of the spanish dagger to secure it in place.
Watering
After backfilling the hole, water the plant thoroughly. The water will help settle the soil around the roots and lessen the shock of transplantation.
Monitoring
Keep a close watch on the spanish dagger, especially during the first few days after transplanting. If it appears wilted or droopy, it may require more water.
How Do You Care For Spanish Dagger After Transplanting?
Monitoring
Observe the spanish dagger closely for the subsequent few weeks. If the leaves begin to yellow or wilt, it might indicate plant stress. Ensure it is adequately watered, but not overwatered.
Pruning
If any leaves or branches become discolored or start to perish, trim them back to aid the plant's recovery.
Preventing Diseases
To avert transplant shock or post-transplant ailments, try to avoid transplanting during the hottest part of the day, and refrain from splashing water on the leaves, which can lead to fungal infections.
Weather Consideration
If feasible, transplant spanish dagger on overcast days or in the late afternoon or early morning, as this reduces the stress caused by heat and intense sunlight.
Patience
Remember, it will take some time for the spanish dagger to recover after being moved. Be patient and allow it time to adapt to its new environment!
Troubleshooting Common Issues with Spanish Dagger Transplantation.
When is the best time to transplant my spanish dagger?
It's optimal to transplant your spanish dagger from early to mid-summer, or late fall to late winter. Following this cycle ensures the best growth and survival.
What should be the ideal spacing between the spanish dagger plants?
Aim for a spacing of about 3-5 ft (approximately 0.9-1.5 m). This gives each spanish dagger ample space to grow and flourish without competition.
How deep should the hole be when transplanting the spanish dagger?
Dig a hole twice as wide and as deep as the root ball. This gives your spanish dagger plenty of room to establish its roots in its new home.
What kind of soil is best for transplanting the spanish dagger?
Spanish dagger thrives in well-draining soil. A mixture of sand and organic, fertile soil provides the best environment for your plant's new roots.
How often should I water the spanish dagger after transplanting?
Water your spanish dagger thoroughly after transplanting, then regularly but not excessively. Overwatering can lead to root rot - a common plant killer.
Would it be helpful to add some fertilizer during the spanish dagger transplanting process?
Fertilizer can boost growth, but it's not necessary during transplanting. Once the spanish dagger has settled, a slow-release granular fertilizer can be beneficial.
What precautions should I take to avoid damaging the spanish dagger during transplanting?
Handle the spanish dagger gently. Avoid damaging the stem and roots, and place it in the hole without compacting the soil too much around it.
How to properly transplant my spanish dagger in a pot?
Use well-draining soil, place some at the pot's bottom, position the plant, fill the pot with remaining soil, water well, and place it in proper light.
Should I prune my spanish dagger before or after transplanting?
Pruning before transplanting is a good practice. Remove dead or unhealthy parts to reduce shock, allowing your spanish dagger to focus on root establishment.
How long will it take for the spanish dagger to establish after transplanting?
Generally, it may take a few weeks for your spanish dagger to establish in the new location. However, giving it proper care will speed up this process.


