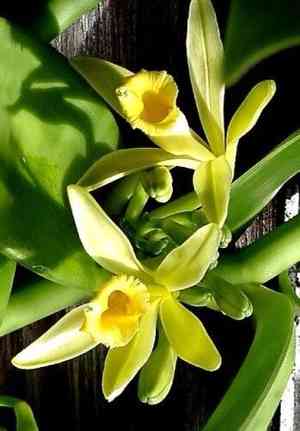
How to Transplant Flat-leaved vanilla?
The most suitable period for relocating flat-leaved vanilla is during the robust phase of early to mid-spring, as its root system revitalizes. Provide a warm environment with ample, diffused illumination to replicate flat-leaved vanilla's native conditions. Careful manipulation is crucial for safeguarding its fragile roots.
Preparations Required Before Relocating Flat-leaved Vanilla
Optimal Period for Relocating Flat-leaved Vanilla?
The ideal period for moving flat-leaved vanilla is during the lively days of mid-to-late spring. This timeframe provides milder temperatures, which promote robust root development before the intense heat of summer. Rehousing flat-leaved vanilla in this season means leveraging the gentle weather and extended daylight hours that support vigorous growth. Shifting flat-leaved vanilla during this prime window allows the plant to adapt smoothly, ensuring it flourishes in its new spot well before any stress from hotter months.
Recommended Spacing Between Flat-leaved Vanilla Plants?
First, let's aim to provide ample room for each flat-leaved vanilla to thrive. Maintain a distance of approximately 3 to 6 feet (about 1 to 2 meters) between each plant. This will facilitate air circulation and minimize disease risk. A friendly reminder: measuring tapes are a gardener's essential tool!
Best Soil Mixture for Flat-leaved Vanilla Relocation?
Next, flat-leaved vanilla thrives in rich, well-draining soil. You might want to prepare a foundational fertilizer mix of compost and soil beforehand. This supplies essential nutrients and will encourage healthy development. Don't forget to blend it thoroughly!
Where to Replant Your Flat-leaved Vanilla?
Finally, location is crucial! Select a site that receives partial sunlight daily. Excessive sun can scorch flat-leaved vanilla's leaves, while insufficient light may impede growth. Ideally, a spot with morning sun and afternoon shade works best. Remember: our plant companions appreciate their sun in moderation!
Equipment to Prepare Before Transplanting Flat-leaved Vanilla
Sturdy Gardening Gloves
To safeguard your hands while handling soil and the flat-leaved vanilla plant.
Shovel or Trowel
To excavate a suitable hole for the flat-leaved vanilla and extract its root ball from its original position.
Pruning Shears
To trim any damaged roots or foliage of the flat-leaved vanilla plant prior to transplanting.
Organic Compost
To supply nutrients to the flat-leaved vanilla and encourage root growth.
Robust Trellis or Pole
To support the climbing habit of the flat-leaved vanilla plant.
Mulch
To help retain soil moisture and regulate soil temperature.
Watering Can
To provide the newly transplanted flat-leaved vanilla with adequate hydration.
How to Extract Flat-leaved Vanilla from the Soil?
How to Extract Flat-leaved Vanilla from the Soil?
From Ground: First, thoroughly water the flat-leaved vanilla plant to soften the earth. Proceed to dig a wide circle around it using your shovel, being careful to avoid harming the root ball. Once sufficiently loosened, slide the shovel beneath the root system and gently lift the plant.From Pot: Begin by watering the flat-leaved vanilla thoroughly to saturate the soil. Invert the pot and gently tap it to dislodge the plant. If the roots are too dense, you might need to break the pot to safely remove the plant.From Seedling Tray: Fill the tray with water to moisten the soil and roots of the flat-leaved vanilla. Carefully lift each seedling, ensuring their delicate roots remain undamaged.
Step-by-Step Guide for Relocating Flat-leaved Vanilla
Initial Preparation
Start by watering the flat-leaved vanilla generously a few hours before moving it. Trim any damaged parts of the plant using your pruning shears.
Hole Preparation
Dig a hole that is twice the width of the flat-leaved vanilla's root ball. Mix the excavated soil with some organic compost.
Planting
Once ready, place the flat-leaved vanilla in the hole, ensuring it sits level with the ground. Surround it with your soil-compost mixture and press down firmly.
Support
As a climbing plant, flat-leaved vanilla will require a trellis or similar structure for support. Install this and gently guide the plant towards it.
Watering
Saturate the base of the flat-leaved vanilla with a slow, steady stream from your watering can.
Mulching
Spread a layer of mulch around the plant, which helps maintain soil moisture and prevents weed growth.
Post-Transplant Care for Flat-leaved Vanilla
Watering
Water the flat-leaved vanilla consistently but ensure the soil is not waterlogged. If the soil dries out, this can stress the plant and hinder its development.
Pruning
Monitor for any browning or damaged leaves and prune these off to encourage healthier growth.
Support
Continue training the flat-leaved vanilla to your trellis or pole, guiding its growth in your preferred direction.
Inspection
Regularly check the flat-leaved vanilla for signs of pests or disease, and address these promptly to prevent their spread.
Resolving Common Issues with Flat-leaved Vanilla Transplantation.
When is the best time to move flat-leaved vanilla?
The optimal period to transplant the flat-leaved vanilla is during its mid or late developmental stages, also known as S2-S3.
What is the ideal spacing when planting flat-leaved vanilla?
Maintain a distance of 3-6 feet (approximately 1-2 meters). This provides them ample room for healthy and comfortable growth, preventing overcrowding.
What indicates that flat-leaved vanilla is ready for relocation?
When flat-leaved vanilla reaches a height of about 12 inches (30 cm), it typically signifies that the flat-leaved vanilla is mature enough for transplantation.
What should I do if flat-leaved vanilla wilts after being moved?
Wilting post-transplant may be due to transplant shock. Ensure you water flat-leaved vanilla thoroughly and place it in a shaded area, reducing sun exposure.
What soil type is suitable for transplanting flat-leaved vanilla?
Flat-leaved vanilla thrives in well-draining soil. You can blend garden soil with compost or a general-purpose potting mix to achieve this.
Why are the leaves of my relocated flat-leaved vanilla turning yellow?
Yellowing may occur due to excessive watering. Ensure your flat-leaved vanilla is not waterlogged. If your plant is not well-drained, consider improving soil conditions or reducing water amounts.
How large a pot should I use for transplanting flat-leaved vanilla?
Select a pot that is roughly twice the size of the one flat-leaved vanilla is currently in. This allows roots to spread, enhancing growth.
How deep should I plant flat-leaved vanilla during transplantation?
Transplant flat-leaved vanilla at the same depth it was in its original container. Too deep may cause stem rot, too shallow may expose roots.
What is the watering schedule for flat-leaved vanilla after transplanting?
Initially, water flat-leaved vanilla thoroughly to help it recover from transplant shock. Afterward, adjust water amounts as needed, avoiding water-logged soil.
What should I do if there's no new growth on the transplanted flat-leaved vanilla?
Patience is crucial after transplanting flat-leaved vanilla. Ensure it's receiving optimal conditions, but remember, new growth can take time to appear.


