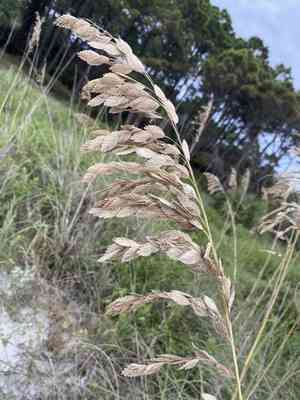
How to Transplant Sea oats?
The most favorable period for relocating sea oats is during nature's resurgence, generally at the commencement of the cultivation cycle, providing temperate conditions beneficial for root development. Select a site featuring permeable earth and exposure ranging from full sunlight to partial shade. During the transplantation process, confirm that the root system is adequately distributed to foster vigorous development.
Preparations Required Before Relocating Sea Oats?
Optimal Period for Transplanting Sea Oats?
The beginning of the growing season, typically marked by spring's gentle warmth, offers an excellent opportunity for moving sea oats. Why, you ask? This time benefits from moderate temperatures and sufficient rainfall, fostering conditions for sea oats to establish its roots strongly. By utilizing this period, you provide sea oats with a significant advantage for the upcoming year, ensuring robust growth with the sunshine and showers that spring generously provides. Furthermore, the welcoming soil of this season is perfect for new transplants like sea oats to settle in comfortably. Thus, by selecting this time for the relocation, you are setting the stage for a flourishing future. So let's get to work and welcome sea oats to its new home during this ideal transplanting window!
Recommended Spacing Between Sea Oats Plants?
When relocating sea oats, allow for ample room. Ideally, your plants should be spaced approximately 2-3 feet (60-90 cm) apart. This will enable them to grow freely and ensure optimal air circulation.
Best Soil Blend for Sea Oats Relocation?
For sea oats, a well-draining soil rich in organic matter is most suitable. Prepare the soil by incorporating a base fertilizer containing Nitrogen, Phosphorus, and Potassium. Mixing compost into the soil before planting will help improve its condition.
Where Should You Replant Your Sea Oats?
Select a location for sea oats where they will receive partial to full sun exposure. Remember, these plants can endure some shade, but they thrive with daily sunlight. Choose your spot with this in mind.
Equipment Needed Before Relocating Sea Oats?
Gardening Gloves
To safeguard your hands while handling the sea oats plant and soil.
Shovel or Garden Spade
For excavating the sea oats from its original spot and preparing the new planting hole in the ground.
Pruning Shears
For trimming any damaged or excessively long roots on the sea oats plant.
Garden Hose or Watering Can
For hydrating the sea oats plant before and after relocation.
Mulch
To apply around the base of the sea oats plant after transplanting. It helps to retain soil moisture and inhibit weed growth.
How to Extract Sea Oats from the Soil?
How to Extract Sea Oats from the Soil?
From Ground: Initially, thoroughly water the sea oats plant to prepare the surrounding soil. This aids in making the removal process simpler. Use your shovel to carefully dig a wide circle around the plant, being careful not to harm the roots. Dig deep enough to encompass all of the roots and then gently lift the sea oats plant from its current position.From Pot: Water the sea oats plant and gently shake the sides of the pot to loosen the soil and facilitate removal. Tilt the pot sideways, supporting the plant with your hand, and carefully slide it out.From Seedling Tray: Moisten the soil in the seedling tray to ease removal. Use a small gardening tool or your fingers to gently push the seedling from the bottom and carefully lift it out without damaging the delicate roots of sea oats.
Step-by-Step Guide for Relocating Sea Oats
Hydrating the sea oats
Water the sea oats in its initial location thoroughly 1-2 hours before commencing the transplant process.
Digging Hole
Excavate a hole in the new location that is twice the width and the same depth as the root ball of sea oats.
Preparing sea oats
Carefully remove sea oats from its original spot, keeping the root ball intact. Trim any damaged or elongated roots.
Planting
Position sea oats in the center of the hole. The top of its root ball should be level with or slightly above the ground surface. Backfill around the root ball with garden soil.
Watering
Thoroughly water sea oats after relocation.
Applying Mulch
Apply a layer of mulch around sea oats to conserve moisture and suppress weeds.
How to Care for Sea Oats After Relocation?
Watering
Ensure sea oats is watered consistently and deeply for the initial few weeks after transplant. This helps the plant establish itself in the new environment.
Pruning
Inspect sea oats for any dead or dying leaves and prune as needed to encourage healthy development.
Monitor Health
Keep an eye on sea oats's health. If leaves turn yellow or wilt, it suggests either watering or root problems. If sea oats does not appear to be thriving after a few weeks, seek advice from a local nursery or extension service.
Troubleshooting Common Issues with Sea Oats Relocation.
What is the ideal season to transplant sea oats?
The most favorable time to transplant sea oats is during S1. This helps ensure optimal growth and development.
What is the proper spacing when transplanting sea oats?
Ensure the sea oats seedlings are spaced about 2-3 feet (60-91 cm) apart. This prevents overcrowding and promotes ample growth.
Do I need to water sea oats immediately after transplanting?
Yes, thoroughly water sea oats immediately after transplanting. This facilitates establishment in the new terrain and promotes root growth.
What type of soil is best for transplanting sea oats?
Sea oats thrives in well-drained soils. It can also tolerate a range of soil types, including sandy or slightly clayey soils.
Do I need to prepare the transplant site beforehand?
Absolutely! Prior preparation of the site by removing weeds and aerating the soil aids in successful transplanting of sea oats.
How deep should I plant sea oats when transplanting?
When transplanting, ensure sea oats is buried to the same depth as it was in its previous setting, not deeper.
How do I care for sea oats after transplanting?
Apply a layer of mulch, water frequently but avoid overwatering and check regularly to keep pests and diseases at bay.
Can transplant shock affect sea oats and how can it be mitigated?
Yes, like most plants, sea oats can experience transplant shock. Mitigate this by watering adequately and transplanting during S1, when it's less strenuous.
Can I use fertilizers after transplanting sea oats?
In the weeks following transplanting, you can apply a slow-release fertilizer to sea oats. This can promote growth, but avoid over-fertilization.
Can I transplant sea oats from a container into the garden?
Absolutely. Just maintain the 2-3 feet (60-91 cm) spacing rule, ensure the soil is well-prepared, and water immediately after.


