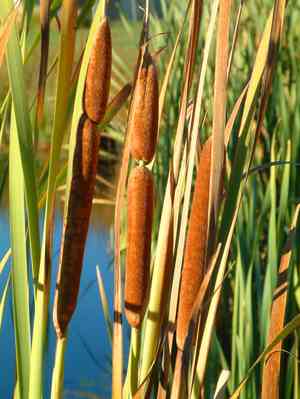
How to Transplant Eastern bulrush?
The most favorable period for relocating eastern bulrush is upon the return of warmer temperatures and the resumption of development, generally spanning from the latter part of spring through midsummer. Choose a site that provides ample sunlight to moderate shade. Transfer the specimen exclusively when it is actively growing to facilitate a seamless adjustment.
What Preparations are Needed Before Transplanting Eastern Bulrush?
What is the Ideal Time for Transplanting Eastern Bulrush?
The best time to relocate eastern bulrush is from early spring through mid-summer. Moving them during this period promotes strong development, giving eastern bulrush a significant advantage. By transplanting eastern bulrush at this time, you leverage longer days and warmer temperatures, which are perfect for root establishment and plant vitality. This timing ensures eastern bulrush will be well-rooted before winter, leading to a healthier, more robust plant. Envision your garden flourishing with the vigor of eastern bulrush following a timely transplant â truly the essence of successful gardening!
How Much Space Should You Leave Between Eastern Bulrush Plants?
When preparing to rehome eastern bulrush, it's advisable to position them approximately 24-36 inches (61-91 cm) apart. This provides each plant ample room to thrive and absorb sunlight!
What is the Best Soil Mix for Eastern Bulrush Transplanting?
For thriving eastern bulrush, prepare a soil mixture that is rich and retains moisture effectively, yet also drains exceptionally well. Incorporating compost is like offering eastern bulrush a warm welcome. A balanced, slow-release fertilizer will set them up for success!
Where Should You Relocate Your Eastern Bulrush?
Eastern bulrush enjoys soaking up the sun, so let's choose a location where the sunlight can warmly embrace them. Full sun or partial shade will allow these perennials to flourish. Consider where you'd enjoy relaxing on a sunny day â eastern bulrush will too!
What Equipments Should You Prepare Before Transplantation Eastern Bulrush?
Gardening Gloves
To safeguard your hands while handling soil and plants.
Shovel or Spade
For digging around and lifting the plant.
Wheelbarrow or Garden Cart
To move the plant and soil.
Watering Can or Hose
To hydrate the plant before and after relocation.
Mulch
To maintain moisture and prevent weeds around the new planting area.
Measuring Tape
To correctly space plants and determine hole depth.
Pruning Shears
To remove any damaged roots or leaves prior to transplanting.
How Do You Remove Eastern Bulrush from the Soil?
How Do You Remove Eastern Bulrush from the Soil?
From Ground: First, water the eastern bulrush plant to make the soil easier to manage. Using a shovel or spade, dig a wide trench around the plant, keeping a generous distance to avoid cutting into the root system. Gently work the tool beneath the plant to loosen the root ball, then carefully lift it out of the ground, trying to keep as much soil around the roots as possible.From Pot: Water the eastern bulrush plant in its container to ensure the soil is damp, which will facilitate removal. Turn the pot on its side and tap the edges to loosen the soil. If the plant doesn't come out easily, you can gently pull it by the base of its stems or invert the pot and let gravity assist. Be careful not to harm the stems or roots during this process.From Seedling Tray: Moisten the soil in the seedling tray before beginning. Use a spoon or a small gardening tool to carefully lift individual eastern bulrush seedlings by their leaves, not stems, as stems are easily damaged. Ensure you extract as much of the root system as possible when removing them from the tray.
Step-by-Step Guide for Transplanting Eastern Bulrush
Prepare the New Site
Choose an appropriate spot for the eastern bulrush plant that offers room for growth. Clear the area of any weeds, rocks, or debris.
Dig the Hole
Excavate a hole that is twice the width of your eastern bulrush plant's root ball and of similar depth. This allows the roots to spread out.
Plant Positioning
Carefully place the eastern bulrush plant in the center of the hole. Ensure the plant stands upright and at the correct depth, with the top of the root ball level with the ground.
Backfill the Hole
Refill the hole around the plant with soil, gently but firmly compacting it to remove air pockets. Be sure not to bury the plant deeper than it was previously growing.
Water Thoroughly
After planting, water the eastern bulrush extensively to settle the soil around the roots and help eliminate air gaps.
Apply Mulch
Spread a layer of mulch around the base of the eastern bulrush, keeping it away from the stems to prevent rot. Mulch helps conserve moisture and suppresses weeds.
How Do You Care For Eastern Bulrush After Transplanting?
Immediate Watering
Water the eastern bulrush generously right after transplanting to settle the soil and provide essential moisture.
Regular Watering
For the initial few weeks, water the eastern bulrush consistently to maintain evenly moist soil and aid root establishment.
Mulching
Maintain a layer of mulch to help retain soil moisture and regulate soil temperature for the eastern bulrush.
Monitoring
Observe the eastern bulrush for indications of transplant shock, such as wilting or discolored leaves, and respond by providing shade or additional water as needed.
Pruning
Trim any dead or damaged foliage to help the eastern bulrush direct its energy towards developing new roots.
Troubleshooting Common Issues with Eastern Bulrush Transplantation.
What's the best time of year to transplant eastern bulrush?
Choose late spring to mid-summer, when the weather is mild, to allow eastern bulrush ample time to establish itself.
How far apart should I space eastern bulrush when transplanting?
Space eastern bulrush approximately 24-36 inches (61-91 cm) apart to ensure they have adequate room to grow and flourish.
Why are my transplanted eastern bulrush wilting?
Wilting after transplanting often signals water stress. Ensure sufficient moisture and initially avoid direct sunlight.
What soil conditions favor successful eastern bulrush transplant?
Utilize fertile, well-draining soil and plant eastern bulrush at the same depth they were originally growing.
Can I transplant eastern bulrush in rainy weather?
While eastern bulrush appreciates moisture, overly wet conditions can be harmful. Wait for overcast but dry weather.
How should I prepare the eastern bulrush for transplanting?
Before transplanting eastern bulrush, water thoroughly and carefully dig it up, preserving as much of the root system as possible.
How much sunlight do transplanted eastern bulrush need?
Transplanted eastern bulrush prefer full sun to partial shade. Gradually acclimate them to sun if they were previously shaded.
When should I water eastern bulrush after transplanting?
Immediately water eastern bulrush after transplanting to settle the soil around the roots and assist in recovery.
The leaves of eastern bulrush have brown tips after transplanting. Why?
Brown tips could indicate transplant shock. Keep the soil moist and provide shade for a few days.
Should I fertilize eastern bulrush after transplanting?
Refrain from fertilizing immediately after transplanting to prevent root burn. Wait several weeks.


