How to Transplant Painted trillium?
The optimal period for transplanting painted trillium is during nature's revival; early spring is ideal because of the temperate climate and damp ground. Choose a shaded location with well-drained, acidic earth, and minimize root disruption for superior outcomes.
Essential Preparations Before Relocating Painted Trillium?
When is the Best Time to Move Painted Trillium?
The perfect period for relocating painted trillium is during the revitalizing spring season. This timing is ideal because moderate temperatures and increased moisture aid root establishment, ensuring painted trillium flourishes in its new spot. Moving painted trillium in spring allows it to adjust before summer's heat and benefits from the season's growth surge. This guarantees a healthy transition for painted trillium, with the friendly advice to align this step with nature's awakening for optimal outcomes.
How Much Space Should Be Left Between Painted Trillium Plants?
Firstly, for painted trillium, aim for a transplanting distance of 1-2 feet (30-60 cm). Ensure each plant has ample room to grow. Remember, they appreciate proximity, but not excessive closeness.
What is the Optimal Soil Mix for Transplanting Painted Trillium?
Next, choose a well-draining, humus-rich soil. For painted trillium, a slightly acidic pH is perfect. Incorporate a base fertilizer into the soil before planting for a healthy start for painted trillium.
Where Should You Replant Your Painted Trillium?
Finally, select a location for painted trillium that offers ample shade. These plants prefer dappled sunlight or partial shade. Direct sun exposure can scorch the leaves, so avoid overly bright areas.
What Tools Are Necessary Before Transplanting Painted Trillium?
Gardening Gloves
To safeguard your hands while handling soil and painted trillium.
Shovel or Spade
For excavating a hole in the ground and carefully removing the painted trillium from its original spot. Ensure it's sharp for clean root cuts if needed.
Pruning Shears
Crucial for trimming any damaged roots or shoots, promoting healthier development.
Watering Can
For hydrating your transplanted painted trillium, vital for its establishment in the new location.
Garden Trowel
Useful for managing the soil around the root system.
Gardening Fork
To assist in loosening the soil surrounding the roots.
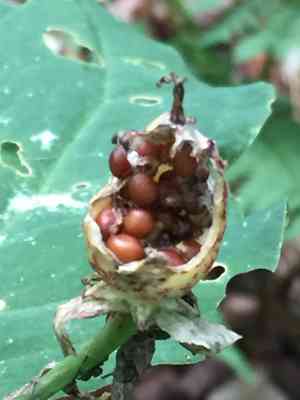
How to Extract Painted Trillium from the Ground?
How to Extract Painted Trillium from the Ground?
From Ground: First, it's essential to moderately water the painted trillium plant to moisten the soil. Afterward, carefully and slowly, dig a wide circle around the plant with a shovel or spade, ensuring its root ball remains intact. Use the spade to lift the plant from the ground, taking great care to keep all roots secure.From Pot: Begin by watering the painted trillium plant to facilitate easier removal. Then gently tilt the pot on its side and slowly slide the plant out while carefully supporting the root base. Avoid harsh tugging or pulling on the stems/leaves.From Seedling Tray: Once the seedling has developed sufficient leaves (indicating maturity), water it and then gently ease it out from the tray. Try to keep as much of the root structure and surrounding soil secure as possible.
Step-by-Step Guide for Relocating Painted Trillium
Preparation
Begin by watering the painted trillium plant at its current location a few hours prior to the move to reduce stress and simplify extraction.
Digging
Next, using your shovel, excavate a hole that is approximately twice as wide and of equal depth as the root ball of your painted trillium.
Placement
Position the painted trillium in the hole, ensuring the top of the root ball is flush with the surrounding soil.
Backfill
Then, carefully backfill the hole with soil. Gently pat it around the base of the painted trillium to secure it, but avoid compacting it too tightly.
Watering
Thoroughly water the painted trillium plant. A deep soak helps settle the soil and ensures good contact with the roots. This step is vital for the plant's recovery and growth.
Post-Transplant Care for Painted Trillium
Monitoring
Observe the painted trillium closely for the initial weeks following transplantation. Look for wilting or weak growth, which could signal an issue.
Watering
It's crucial to maintain a consistent watering schedule, keeping the soil moist but not waterlogged. Excessive watering can lead to root rot.
Pruning
Trim any dead or weak branches to encourage new growth. Be cautious not to over-prune immediately after transplanting, as this can increase transplant shock.
Protecting
Shield your painted trillium from severe weather conditions. A bit of afternoon shade or a windbreak can be beneficial in the early stages while your plant is still acclimating.
Pest Control
Regularly inspect for any pests or diseases. Early detection can help manage the problem before it significantly harms your newly transplanted painted trillium.
Resolving Common Issues with Painted Trillium Transplantation.
When is the optimal time to move painted trillium?
You should transplant painted trillium from early spring to early summer – that's the period from season 1 (S1) to season 3 (S3). An early start aids in better root establishment.
What is the recommended spacing between painted trillium plants?
For healthy development, allow a distance of 1-2 feet (30-60 cm) between your painted trillium plants. This ensures they have ample space to thrive without competing for resources.
Is immediate watering necessary after transplanting painted trillium?
Absolutely! Watering painted trillium immediately after transplantation ensures the soil settles around the roots and also helps in reducing transplant shock.
Should I prune painted trillium before transplantation?
Yes, trim painted trillium before replanting. Pruning helps the plant focus its energy on developing robust root systems instead of maintaining extensive foliage.
What if the painted trillium wilts during the initial days post-transplant?
Don't be concerned if the painted trillium wilts right after transplanting. It's typically a symptom of transplant shock which should recover over time with proper care.
Is it essential to enrich the soil before transplanting painted trillium?
Definitely! Enrich your soil with organic matter or compost before transplanting painted trillium. This will provide the necessary nutrients your plant needs to flourish.
What is the correct depth to plant painted trillium?
The painted trillium should be planted at the same depth as it was in its original pot. Planting at the right depth ensures proper growth.
How can I prevent pest damage?
Regularly check painted trillium for any indications of pests or disease, especially after transplanting. Use organic pest control methods if any damage is detected.
After transplantation, should I stake the painted trillium?
Generally, painted trillium is a sturdy plant and does not require staking. However, in certain windy environments, you may need to provide some support.
What should I do if the leaves of painted trillium turn yellow after transplantation?
Yellow leaves might indicate overwatering or insufficient nutrients. Adjust watering based on soil moisture levels and consider applying a balanced fertilizer.


