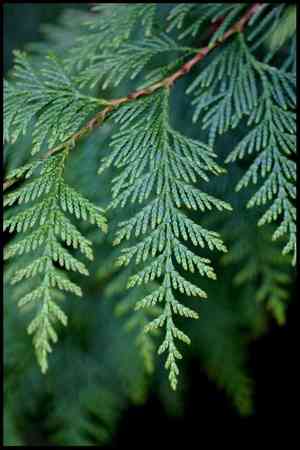
How to Transplant Arborvitae?
The ideal period for relocating arborvitae spans from late spring through mid-summer, providing sufficient time for root systems to become established prior to the colder months. For optimal development, arborvitae needs a site with good drainage and exposure to full sunlight or partial shade. During the transplanting process, guarantee adequate room for its eventual dimensions and supply regular hydration to encourage robust growth.
What Preparations are Needed Before Transplanting Arborvitae?
What is the Ideal Time for Transplanting Arborvitae?
The optimal period to relocate arborvitae is during late spring to early summer, facilitating superior root development. Moving arborvitae at this time ensures a healthier, more robust plant capable of thriving in its new spot.
How Much Space Should You Leave Between Arborvitae Plants?
When moving arborvitae, we recommend placing them 10-15 feet (3-4.5 meters) apart. This provides ample room for growth and helps maintain plant health.
What is the Best Soil Mix for Arborvitae Transplanting?
Prior to transplanting arborvitae, prepare the soil by selecting well-draining, fertile ground, ideally enriched with organic matter. A nutrient-rich, all-purpose mix will offer a strong foundation for your plant.
Where Should You Relocate Your Arborvitae?
To locate the perfect site for transplanting arborvitae, seek an area that receives full sunlight (6 to 8 hours daily), or partial shade (approximately 4 hours daily) in particularly warm regions. This will guarantee optimal development.
What Equipments Should You Prepare Before Transplantation Arborvitae?
Gardening Gloves
To safeguard your hands while handling soil and arborvitae.
Shovel or Spade
For excavating holes and lifting the arborvitae's root ball.
Garden Trowel
To assist in digging small holes and manipulating soil around the roots.
Garden Fork
For loosening the soil surrounding the root ball, especially when extracting the plant from the ground.
Garden Shears
To trim any damaged branches or roots prior to transplanting.
Watering Can
To hydrate the plant before and after the relocation process.
Wheelbarrow or Plant Dolly
To transport the plant, particularly if it is large or heavy.
How Do You Remove Arborvitae from the Soil?
How Do You Remove Arborvitae from the Soil?
- From Ground:First, water the arborvitae plant to moisten the soil. Then, excavate a wide trench around the plant using a shovel or spade, ensuring the plant's root ball remains intact. Carefully work the spade beneath the root ball to lift the plant from its original position.- From Pot:Water the arborvitae plant to moisten the soil. Invert the pot onto its side, gently tapping and rolling it to loosen the plant's root ball. Carefully extract the plant, taking care not to harm the roots.- From Seedling Tray:Gently compress the sides of the seedling cell and push the bottom to release the arborvitae seedling with its root ball. Be cautious not to damage the roots during removal.
Step-by-Step Guide for Transplanting Arborvitae
Site Selection
Choose a location with adequate sunlight and room for your arborvitae plant to reach its mature size.
Prepare the Soil
Aerate the soil in the planting area using a garden fork, incorporating amendments if necessary to create a thriving environment for your arborvitae.
Dig the Hole
Create an excavation larger than the root ball of your arborvitae plant, allowing space for the roots to expand.
Prepare the Plant
Examine the root ball and use garden shears to prune any damaged roots or branches.
Planting
Carefully position the arborvitae's root ball into the hole, ensuring that the top of the root ball is level with the surrounding soil. Backfill the hole, gently compacting the soil to eliminate air pockets and support the plant.
Water
Thoroughly irrigate the arborvitae plant to help settle the soil and establish the plant.
Mulch
Apply a layer of mulch around the base of the plant, ensuring it does not touch the trunk, to help retain moisture and inhibit weed growth.
How Do You Care For Arborvitae After Transplanting?
Watering
Maintain consistent moisture in the soil around the arborvitae, avoiding sogginess, for the initial weeks post-transplant to aid in strong root development.
Pruning
After transplanting, monitor the plant's growth and trim any dead or damaged branches to encourage healthy development.
Fertilizing
Wait at least 6 weeks before applying any fertilizer to allow roots to establish and prevent burning. Use a slow-release fertilizer specifically for arborvitae.
Monitoring
Observe your transplanted arborvitae to ensure it is adapting well to its new surroundings. Signs of stress include leaf drop, wilting, or stunted growth. Address any issues promptly to ensure the plant's health and success.
Troubleshooting Common Issues with Arborvitae Transplantation.
When is the best time to transplant arborvitae?
The optimal period to relocate arborvitae is from late spring to mid-summer, allowing it to establish before winter.
How much space should I leave between arborvitae plants?
Spacing arborvitae plants 10-15 feet (3-4.5 meters) apart will provide sufficient room for their mature size.
What type of soil is best for transplanting arborvitae?
Arborvitae thrives in well-draining, moist soil with a pH range of 6.0-8.0. Improve soil conditions if necessary before planting.
How deep should the planting hole be for arborvitae?
Excavate the hole twice the width of the root ball and deep enough so that the root collar rests at ground level.
How often should I water arborvitae after transplanting?
Water arborvitae deeply every 3-4 days for the first 2-3 weeks, then gradually extend intervals to once a week.
What is the optimal sunlight exposure for transplanting arborvitae?
Arborvitae will grow best with full sun to partial shade. Select a location that receives 4-6 hours of sunlight daily.
How can I protect the newly transplanted arborvitae?
Apply 2-3 inches (5-7.6 cm) of mulch to conserve moisture, suppress weeds, and regulate soil temperature.
When should I fertilize the transplanted arborvitae?
Fertilize arborvitae 4-6 weeks after transplanting, using a slow-release, balanced fertilizer, and adhere to package instructions.
What should I do about damaged or dead branches on my arborvitae?
Prune damaged or dead branches after transplanting, ensuring clean cuts to encourage healthy regrowth.
How do I ensure straight and stable growth of arborvitae after transplanting?
Use stakes or supports for larger transplants if needed, and avoid overcrowded areas to promote straight growth.


