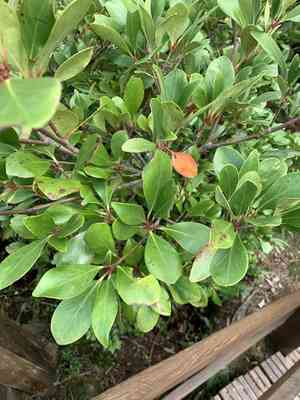
How to Transplant Japanese ternstroemia?
The ideal period for relocating japanese ternstroemia spans from the end of spring to the middle of summer, since elevated temperatures foster robust root growth. To ensure flourishing specimens, select a site featuring rich, well-draining earth and dappled sunlight. Bear in mind, a delicate approach is crucial when managing these sensitive long-lived plants during their relocation.
What Preparations are Needed Before Transplanting Japanese Ternstroemia?
What is the Ideal Time for Transplanting Japanese Ternstroemia?
For japanese ternstroemia, the optimal period for relocation is from late spring to mid-summer. This transitional phase provides suitable conditions for japanese ternstroemia to flourish. Moving it during this season increases survival rates as the plant has ample time to establish before winter. This ensures your japanese ternstroemia will experience robust, steady development, making your gardening efforts rewarding!
How Much Space Should You Leave Between Japanese Ternstroemia Plants?
When relocating your japanese ternstroemia, aim for a spacing of 1-2 m (3.3-6.6 ft) between them. This ensures they have adequate room to grow and thrive.
What is the Best Soil Mix for Japanese Ternstroemia Transplanting?
For a thriving japanese ternstroemia, prepare well-draining soil consisting of loam and humus. Incorporate a slow-release balanced fertilizer before planting to supply essential nutrients.
Where Should You Relocate Your Japanese Ternstroemia?
Select a new location that offers your japanese ternstroemia at least partial sun – ideally, an area receiving filtered sunlight throughout the day. Excessive direct sun exposure might hinder its growth.
What Equipments Should You Prepare Before Transplantation Japanese Ternstroemia?
Shovel or Spade
For excavating holes and extracting the japanese ternstroemia from its original spot. Ensure it's sharp to easily cut through soil and roots.
Gardening Gloves
To safeguard your hands while handling soil and the plant.
Garden Trowel
Useful for digging smaller holes and removing smaller japanese ternstroemia plants.
Watering Can
For hydrating the new planting site before and after the transfer.
Organic Matter (Compost)
This helps supply nutrients post-transplant.
Wheelbarrow
To effortlessly move the plant from one place to another.
Bucket or Sack
If removing japanese ternstroemia from the ground, you might need a temporary container for the root ball.
Plant Label and Marker
To correctly identify the japanese ternstroemia after relocation, preventing future confusion.
How Do You Remove Japanese Ternstroemia from the Soil?
How Do You Remove Japanese Ternstroemia from the Soil?
From Ground: Begin by thoroughly watering the japanese ternstroemia to minimize transplant shock. Then, using a shovel or spade, dig a trench around the plant, wide and deep enough to encompass most of its root system. Exercise caution to avoid damaging the plant. Go beneath the root system and gently lift it from its original position. Place it in a bucket or sack to protect the roots.From Pot: Water the japanese ternstroemia generously a few hours before moving it. This facilitates easier removal from its container. Invert the pot and hold the plant at its base. Tap the bottom of the pot lightly to allow the plant and its root system to slide out. If the plant is root-bound, you'll need to cut the pot away.From Seedling Tray: If the japanese ternstroemia is a seedling, ensure it's the appropriate size for transplanting. It's best to have at least two to three sets of leaves before relocation. Pushing from the cell's bottom or using a tool like a spoon or fork can help remove the seedling without harm.
Step-by-Step Guide for Transplanting Japanese Ternstroemia
Prepare the New Location
Before beginning the transplanting process, ensure the new site is ready. Dig a hole that's twice as wide and nearly the same depth as the japanese ternstroemia's root ball. This ensures the transplanted roots have access to loose soil, promoting root expansion.
Plant Removal
Execute the removal procedure as previously described, based on the plant's original location.
Transplanting
Position the japanese ternstroemia in the center of the hole. Ensure the top of the root ball is level with the surrounding soil. Adjust the soil beneath the root ball to raise it if needed. Then, backfill the soil, gently tamping it around the base of the japanese ternstroemia to ensure firm establishment.
Watering
Once planted, water the japanese ternstroemia generously to settle the soil around its roots.
Add Organic Matter
Apply a layer of compost on top for additional nourishment.
How Do You Care For Japanese Ternstroemia After Transplanting?
Watering
Consistent watering is crucial for the japanese ternstroemia to establish itself. Frequency depends on weather, but typically it's once or twice weekly. Remember not to overwater and avoid directly wetting the foliage.
Pruning
If the japanese ternstroemia shows noticeable wilting after transplant, it might be due to water stress. Consider reducing the plant's size by one-third to one-half.
Inspecting
Regularly check the japanese ternstroemia for signs of disease or pests. Early detection can prevent significant damage.
Mulching
Spread a 2 to 3-inch layer of mulch around the plant, but not touching the trunk, to prevent water loss and protect it from extreme temperatures.
Troubleshooting Common Issues with Japanese Ternstroemia Transplantation.
What is the best time to transplant japanese ternstroemia?
The optimal period to move japanese ternstroemia is from late spring to mid-summer, when it has the highest chance of root establishment.
How far apart should I space japanese ternstroemia when transplanting?
A recommended spacing for japanese ternstroemia is between 1-2 meters or approximately 3-6 feet apart to allow for optimal growth.
What soil conditions are best for transplanting japanese ternstroemia?
Japanese ternstroemia thrives in well-drained soil and can tolerate a pH range from slightly acidic to slightly alkaline. Enrich the soil with organic matter before transplanting.
How do I prepare my japanese ternstroemia for transplant?
Water the japanese ternstroemia deeply the day before transplanting. This moistens the root ball, making it easier to remove from its current location.
How deep should I plant japanese ternstroemia when transplanting?
Plant japanese ternstroemia at the same depth it was previously growing. Planting too deeply can lead to root diseases and stunted growth.
How do I handle [N's] roots when transplanting?
[N's] roots require careful handling during transplanting. Trim any damaged roots and spread them out in the hole before covering with soil.
How much water should japanese ternstroemia receive after transplanting?
Water japanese ternstroemia thoroughly after transplanting to settle the soil, and maintain consistent moisture for the initial few weeks while it establishes.
What should I do if my transplanted japanese ternstroemia shows signs of stress?
Yellowing leaves or wilting may indicate transplant shock. Ensure consistent watering and consider a balanced slow-release fertilizer to aid recovery.
Can japanese ternstroemia be transplanted in a pot?
Absolutely! Ensure the pot is sufficiently large for japanese ternstroemia's root system and has good drainage. Always use high-quality potting soil.
How do I care for japanese ternstroemia after transplanting?
Maintain regular watering, provide partial shade, and prune for shape in early spring. Monitor for any pests or diseases and address them promptly.


