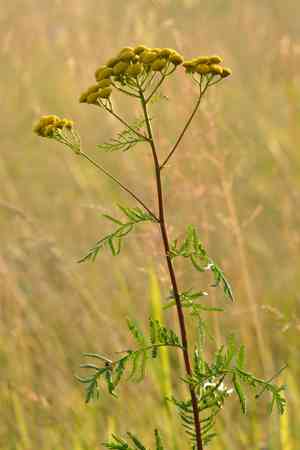
How to Transplant Common tansy?
For optimal outcomes, relocate common tansy from mid-spring through late summer, or from early to late winter. Select a site that receives full sun or partial shade, featuring soil that drains effectively. To facilitate the transplanting process, thoroughly hydrate the plant prior to its relocation and take care not to disrupt its root structure.
What Preparations are Needed Before Transplanting Common Tansy?
What is the Ideal Time for Transplanting Common Tansy?
The optimal period to carefully move common tansy to a new garden spot spans from mid-spring through late-summer or early-winter to deep-winter. This timing is crucial for common tansy, as these schedules promote root development before the active growth season. Transplanting common tansy precisely during these windows will result in lush, green foliage and vibrant, fragrant blooms. Indeed, a small effort in caring for common tansy can greatly enhance your garden's beauty.
How Much Space Should You Leave Between Common Tansy Plants?
To provide common tansy plants ample room for development, position them approximately 12 inches (30 cm) apart during transplantation. This spacing ensures they have adequate area to flourish and avoid nutrient competition.
What is the Best Soil Mix for Common Tansy Transplanting?
For your common tansy plants, it's best to prepare soil that drains well with a slightly acidic to neutral pH (6.0-7.0). Incorporating compost or aged manure as a foundational fertilizer will boost soil fertility and encourage robust growth.
Where Should You Relocate Your Common Tansy?
Your common tansy plants will thrive in a location receiving full sun to partial shade. Be sure to select a spot with at least 6 hours of direct sunlight daily for optimal growth and blooming.
What Equipments Should You Prepare Before Transplantation Common Tansy?
Gardening Gloves
To shield your hands from soil and any sharp objects while handling the earth and common tansy.
Gardening Shovel or Spade
Essential for excavating holes and for the initial digging phase.
Watering Can
You'll need this to hydrate your common tansy both before and after the relocation.
Paper Towel or Cloth
To cleanse any exposed roots and safely manage the plant.
Gardening Trowel
For loosening the soil around the common tansy and facilitating precise work.
Measuring Tape
To ensure the new planting site has the correct depth and width.
How Do You Remove Common Tansy from the Soil?
How Do You Remove Common Tansy from the Soil?
From Ground: Start by thoroughly watering the area around the common tansy to ease its removal, reducing stress on the plant. Using your spade or shovel, begin digging a few inches away from the plant's base to prevent root damage. Create a circular trench around the common tansy, then gently lift the root ball with the spade.From Pot: If your common tansy is currently in a container, water it well first. Turn the pot sideways, supporting the common tansy's base and stem. Tap the pot's rim in a couple of spots to loosen it. Carefully slide the common tansy out of the pot while protecting the stem.From Seedling Tray: For transplanting common tansy seedlings, water the tray initially. Then, using a dibber or your fingers, push up from the bottom of the cell or pot, gently lifting out the seedling by holding its leaves, not the stem.
Step-by-Step Guide for Transplanting Common Tansy
Stabilizing
Place common tansy in a shaded, wind-protected area for a few hours post-removal to aid its recovery from shock.
Preparing the Hole
The hole for the common tansy should be twice as wide and as deep as its root ball. The top of the root ball should be level with the ground. Use your measuring tape for optimal results.
Placing the Plant
Lower the common tansy into the hole, ensuring it stands upright.
Backfilling
Use the excavated soil to fill in around the root ball. Gently compact the soil to eliminate air pockets, but avoid suffocating the plant.
Watering
Finally, thoroughly water the common tansy after planting. This helps the soil settle around the plant's roots.
How Do You Care For Common Tansy After Transplanting?
Watering
Common tansy requires consistent watering, especially during the initial weeks post-transplant. However, avoid excessive watering to prevent root waterlogging and plant damage.
Mulching
A layer of mulch spread around the plant's base (but not touching the stem) can help retain moisture.
Inspecting
Regularly check your newly transplanted common tansy for typical signs of transplant shock, such as wilting or discolored leaves. If these appear, increase your care frequency.
Pruning
Remove any dead or withered leaves to help common tansy direct energy towards new growth. However, be gentle and avoid heavy pruning.
Troubleshooting Common Issues with Common Tansy Transplantation.
When should I transplant common tansy?
The ideal period to transplant common tansy is from mid-spring to late summer or early to late winter.
How much space should I allocate for common tansy to grow when transplanting?
Common tansy needs approximately 12 inches (30 cm) of space between each plant for optimal growth.
What should I do if the common tansy wilts after transplanting?
Wilting is a common symptom of transplant shock. Ensure adequate watering, protect from extreme temperatures, and shield from direct midday sun for a few days.
What to do if my common tansy isn't growing at all after transplanting?
Ensure your common tansy receives sufficient sunlight and nutrients. Consider using a slow-release fertilizer and verify efficient soil drainage.
Help! The leaves of my common tansy are turning yellow. What might be the issue?
Yellowing leaves can indicate over-watering. Allow the soil to dry completely before re-watering your common tansy and ensure proper drainage.
How deeply should I plant common tansy when transplanting?
Plant your common tansy at the same depth it was in its previous container to prevent root exposure, which can cause harm.
How to handle root damage when transplanting common tansy?
Trim off damaged roots with a sharp, clean tool. This will encourage new root growth after the common tansy has been transplanted.
What type of soil suits best for transplanting common tansy?
Rich, well-drained soil is ideal for common tansy. Adding compost or organic matter to the transplant site can improve soil fertility.
Can I transplant common tansy during its flowering stage?
It's best to transplant common tansy when it's not flowering, as the process might stress the plant, leading to dropped buds and flowers.
What to do if my common tansy is showing signs of disease after transplanting?
Isolate the plant to prevent disease spread. Trim affected areas, avoid over-watering, and consider a fungicide if the condition doesn't improve.


