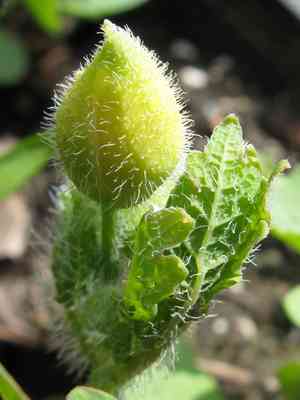
How to Transplant Celandine poppy?
The ideal period for relocating celandine poppy is in the invigorating spring season, particularly from early to mid-spring. Choose a spot with partial shade and soil that drains effectively. After transplanting, guarantee steady hydration to foster strong root development.
What Preparations are Needed Before Transplanting Celandine Poppy?
What is the Ideal Time for Transplanting Celandine Poppy?
The best time to move celandine poppy is from early to mid-spring. This period aligns with the plant's natural growth cycle, promoting strong development. Transplanting celandine poppy during this season allows it to emerge from dormancy and establish itself fully before winter arrives.
How Much Space Should You Leave Between Celandine Poppy Plants?
For celandine poppy, aim for a spacing of approximately 1-2 feet (30.5-61 cm) between each plant. This ensures ample room for unrestricted growth, preventing overcrowding. Proper spacing is crucial for healthier plants!
What is the Best Soil Mix for Celandine Poppy Transplanting?
Prepare well-drained soil enriched with organic matter for celandine poppy. Incorporating a phosphorus-rich base fertilizer will aid in boosting their growth. A small amount of compost or aged manure can also be very effective!
Where Should You Relocate Your Celandine Poppy?
When selecting a new spot for your celandine poppy, choose an area that receives partial to full shade. They thrive in filtered sunlight but require protection from intense afternoon sun. Happy transplanting!
What Equipments Should You Prepare Before Transplantation Celandine Poppy?
Gardening Gloves
To protect your hands from soil and potential irritants.
Shovel or Spade
Essential for digging up celandine poppy from its original spot and preparing the new planting hole.
Hand Trowel
Useful for removing celandine poppy from containers or trays and for detailed work in smaller areas.
Pruning Shears
For trimming any damaged roots or leaves during the transplanting process.
Watering Can or Hose
Needed for hydrating celandine poppy before and after the transplant.
Garden Fork
Helpful for loosening the soil around the plant without harming its roots.
Wheelbarrow
For moving the plant and any compost or soil to the new location.
How Do You Remove Celandine Poppy from the Soil?
How Do You Remove Celandine Poppy from the Soil?
From Ground: Begin by thoroughly watering celandine poppy several hours before transplanting; this softens the soil, making it easier to work with. Next, use a garden fork to gently loosen the soil around the plant, estimating the root system's width and digging accordingly. It's vital to avoid root damage, so proceed slowly. Once the plant feels loose, carefully lift it, preserving as much of the root ball as possible.From Pot: Water celandine poppy well and wait a few minutes. Turn the pot on its side, hold the plant gently by its base, tap the bottom of the container, and it should slide out easily. If the plant is root-bound (roots tightly coiled), gently untangle them before planting.From Seedling Tray: Water the tray, then gently hold the celandine poppy seedling by its leaves (not the stem) and push the bottom of its cell; it should come out easily. If it resists, use a pencil or similar item to push it from below.
Step-by-Step Guide for Transplanting Celandine Poppy
Prior Hydration
Water celandine poppy at its current location a day before transplanting to minimize shock.
Prepare the New Hole
Dig a hole in the new spot that is twice as wide and the same depth as the root ball of your celandine poppy.
Transfer
Gently place celandine poppy in the hole, ensuring the top of the root ball is level with the surrounding soil surface. Backfill the hole with soil, gently firming it around the plant's base.
Watering
After celandine poppy is in place, water it immediately. This helps settle the soil, eliminate air pockets, and provide moisture to your plant.
How Do You Care For Celandine Poppy After Transplanting?
Watering
Water celandine poppy generously right after transplanting and keep the soil consistently moist until new growth appears, indicating establishment in the new location. Afterward, you can reduce watering, allowing the top inch of soil to dry between waterings.
Pruning
If celandine poppy shows signs of stress, such as wilting or dropping leaves, consider trimming it back to aid recovery. You can also remove dead, diseased, or damaged stems at any time.
Monitoring
Keep a close watch on your newly transplanted celandine poppy for signs of pests or diseases, and take prompt action to ensure its healthy development.
Troubleshooting Common Issues with Celandine Poppy Transplantation.
When is the best time to transplant celandine poppy?
The optimal time to transplant celandine poppy is between early to mid-spring, often referred to as 'S1-S2' in some climate guides.
What should be the ideal spacing between each celandine poppy plant during transplant?
Aim for a distance of 1-2 feet (30-60 cm) between each plant. This provides sufficient space for growth without resource competition.
What's the ideal soil for transplanting celandine poppy?
Celandine poppy plants thrive in rich, well-draining soil that retains some moisture. Adding compost during transplanting can enhance soil health.
How to avoid damaging the roots during celandine poppy transplantation?
Handle the roots gently when digging up and moving the plant. It's best to keep a good amount of the original soil around the roots during transplanting.
Can I transplant celandine poppy in a container?
Yes, you can! Just ensure you provide 1-2 feet (30-60 cm) of space around the plant in the container. The container should also have adequate drainage.
What level of sunlight does celandine poppy need after transplanting?
Celandine poppy prefers partial shade to full sun. Try to select a location that offers these light conditions to ensure the health of your transplanted plants.
How often should I water celandine poppy after transplanting?
Water celandine poppy immediately after transplanting and consistently in the subsequent weeks. However, avoid waterlogging, as it prefers moist but well-drained soil.
Should I use fertilizer when transplanting celandine poppy?
Fertilizer is not strictly necessary, but a mild slow-release fertilizer can benefit the plant during its initial establishment in the new location.
How long does celandine poppy take to establish after transplanting?
Celandine poppy should begin to establish and show new growth within 3-6 weeks of transplanting. However, ensure it receives proper hydration and care during this period.
What should I do if my transplanted celandine poppy starts to wilt?
Wilting can indicate stressâexcessive sun, insufficient water, or root damage during transplanting. Address these issues and monitor for improvement.


