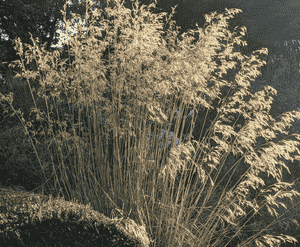
How to Transplant Golden oats?
The ideal period for relocating golden oats is in the pleasant stretch from early to mid-spring, enabling the root system to settle prior to the summer warmth. Position them in a bright location with soil that drains effectively; steer clear of areas prone to winter dampness. Handle golden oats with care during transplantation.
What Preparations are Needed Before Transplanting Golden Oats?
What is the Ideal Time for Transplanting Golden Oats?
The optimal period for relocating golden oats is the revitalizing phase of early to mid-spring. This season promotes strong root development prior to the summer heat. Moving golden oats now takes advantage of the moist soil and cooler temperatures, fostering a vigorous recovery for these elegant plants. Seize this perfect opportunity for your golden oats to flourish!
How Much Space Should You Leave Between Golden Oats Plants?
When moving golden oats, ensure each plant has ample room to expand. Ideally, maintain a spacing of approximately 1.5-2 feet (45-60 cm) between them. This allows for unhindered growth and prevents competition for resources.
What is the Best Soil Mix for Golden Oats Transplanting?
Before relocating golden oats, prepare the ground. This plant thrives in soil that drains well. Incorporate a foundational fertilizer rich in organic matter to give the plant an excellent start. A balanced, slow-release granular fertilizer is often a good choice.
Where Should You Relocate Your Golden Oats?
Golden oats prefers ample sunlight and thrives in a spot that receives full sun to partial shade. When transplanting, select a location that gets at least 6 hours of direct sunlight daily. This will contribute to a healthy, robust plant.
What Equipments Should You Prepare Before Transplantation Golden Oats?
Shovel or Garden Spade
Crucial for digging holes, loosening soil, and extracting the plant from its original spot.
Gardening Gloves
To safeguard and protect your hands while handling the golden oats and its root system.
Garden Trowel
Useful for leveling and cultivating soil, and applying smaller amounts of soil or compost.
Garden Hose or Watering Can
Essential for hydrating the golden oats both before and after its relocation.
Wheelbarrow
Helpful for moving the golden oats from its initial position to the new site, especially over longer distances.
Mulch
Assists in retaining soil moisture after the transplant.
How Do You Remove Golden Oats from the Soil?
How Do You Remove Golden Oats from the Soil?
From Ground: First, thoroughly water the golden oats plant to make the surrounding soil moist and easier to dig. Using a shovel or garden spade, dig a wide circle around the plant, taking care not to harm the root system. Once you've confirmed the root ball is intact, slide your shovel beneath it and lift the plant from the soil.From Pot: Water the pot thoroughly until water exits the bottom. Turn the pot on its side and gently pull the golden oats by its base. If it resists, tap the pot's sides to loosen it.From Seedling Tray: Water the seedlings well a few hours before moving them. Push the golden oats up and out of its cell from the bottom. Hold it by its leaves to prevent damage to the stem and roots.
Step-by-Step Guide for Transplanting Golden Oats
Preparation
Ensure the new site is ready before you extract the golden oats from its current position. The hole should be twice as wide as the golden oats root ball, and its depth should match the root ball's height.
Transplanting
Transport the golden oats to the new spot using a wheelbarrow. Position it in the hole, making sure the top of the root ball is level with the surrounding soil. Backfill around the golden oats with soil, firming it with your hands as you proceed.
Watering
Water the golden oats thoroughly immediately after transplanting. The soil should be saturated, but not waterlogged. This aids in settling the soil around the roots.
Mulching
Apply a layer of mulch around the golden oats to help maintain soil moisture.
How Do You Care For Golden Oats After Transplanting?
Watering
The golden oats requires consistent and deep watering for the initial weeks following transplanting until it has established itself in its new location. Insufficient watering can cause the roots to dry out and the plant to weaken.
Weeding
Keep the area around the golden oats free of weeds, which can compete with it for nutrients and water.
Protection
In the first few days after transplanting, consider providing the golden oats with some shade or wind protection, if the weather is harsh, using a portable shade cloth or a wind-break.
Troubleshooting Common Issues with Golden Oats Transplantation.
When is the optimal season to transplant golden oats?
The best time for relocating golden oats is during the two primary growth periods, S1-S2. This allows the plant to establish itself before the onset of more severe seasons.
How far apart should golden oats be spaced when transplanting?
For ideal growth, golden oats should be moved with a minimum spacing of 1.5 feet (45 cm) to a maximum of 2 feet (60 cm) between them. This promotes proper air circulation and development.
Should I fertilize golden oats before transplanting?
Yes, enriching the soil with organic compost or a slow-release fertilizer a few weeks prior to relocation can create an ideal environment for golden oats to thrive.
What are ideal soil conditions for transplanting golden oats?
Golden oats prefers soil that drains very well. Before transplanting, mix some compost into the soil to ensure adequate nutrients. If the soil is too dense, loosen it for proper root penetration.
How deep should I plant golden oats during transplantation?
Dig a hole deep enough so that golden oats sits at the same level it was growing at previously. Its roots should be fully covered, but the stems should remain above the soil line.
Is it necessary to water golden oats immediately after transplanting?
Yes, watering golden oats right after transplanting is vital. It helps settle the soil around the roots and reduces transplant shock. However, avoid overwatering, as it could lead to root rot.
What signs of distress should I watch for after transplanting golden oats?
Look for signs such as wilting, yellowing or dropping leaves, or stunted growth. These might indicate transplant shock, root rot, or other problems. Adjust care accordingly and consult a local nursery if needed.
Why is golden oats wilting after transplanting?
Wilting after moving golden oats could be a symptom of transplant shock. Keep the soil consistently moist, shield the plant from extreme temperatures, and avoid direct sunlight until it recovers.
Can I prune golden oats after transplanting?
Yes, moderate pruning after relocation can be beneficial. Remove any damaged or dead stems and leaves, which will allow golden oats to redirect its energy to new growth.
How can I ensure efficient growth of golden oats post-transplant?
Providing consistent moisture, monitoring for pest infestations, watching for signs of stress, and occasional feeding with a slow-release fertilizer can help ensure steady growth for golden oats after transplant.


