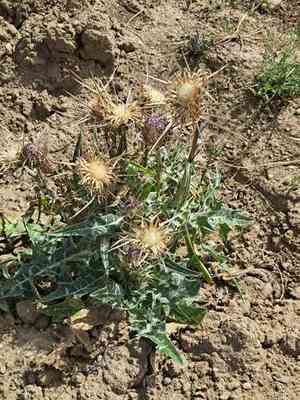
How to Transplant Silver milk thistle?
Silver milk thistle flourishes when relocated between early and late spring, as mild, temperate conditions foster robust root establishment. To achieve optimal outcomes, select a bright spot with soil that drains effectively. Take care to disturb the root structure as little as possible.
What Preparations are Needed Before Transplanting Silver Milk Thistle?
What is the Ideal Time for Transplanting Silver Milk Thistle?
The optimal period for relocating silver milk thistle spans from early to late spring, allowing the plant to establish its root system prior to summer's heat. This timing ensures silver milk thistle benefits from moderate temperatures and sufficient rainfall, promoting vigorous development. Early spring transplantation prevents shock and leverages prime growing conditions for this biennial plant.
How Much Space Should You Leave Between Silver Milk Thistle Plants?
When transplanting silver milk thistle, ensure a spacing of 24-36 inches (60-90 cm) between plants. This provides adequate room for unhindered growth, facilitating better air circulation and fostering healthier plants overall.
What is the Best Soil Mix for Silver Milk Thistle Transplanting?
Prepare well-draining soil with a neutral pH for silver milk thistle. Incorporate some organic compost or a balanced, slow-release fertilizer to enrich the soil. This will aid your plants in developing strong roots and getting a successful start.
Where Should You Relocate Your Silver Milk Thistle?
Select a site that receives full sunlight, ideally 6-8 hours daily, for transplanting silver milk thistle. Sufficient sunlight encourages more robust growth and stronger plants.
What Equipments Should You Prepare Before Transplantation Silver Milk Thistle?
Gardening Gloves
To safeguard your hands while handling soil and plants.
Shovel or Spade
For digging and preparing the ground, as well as lifting the plant.
Trowel
To assist with excavating around smaller plants or more delicate root systems.
Watering Can or Hose
To hydrate the plant before and after relocation.
Garden Fork
To help loosen the soil at the new planting location.
Gardening Kneepads
For comfort when working close to the ground.
How Do You Remove Silver Milk Thistle from the Soil?
How Do You Remove Silver Milk Thistle from the Soil?
From Ground: First, moisten the silver milk thistle plant to dampen the soil. Next, excavate a wide trench around the plant using a shovel or spade, ensuring the plant's root ball remains intact. Carefully work the spade beneath the root ball to lift the plant from its original spot.From Pot: Begin by watering the silver milk thistle plant to make the soil easier to manage. Gently turn the pot on its side and tap the base to loosen the soil. Carefully slide the plant out, taking care not to harm the roots. If the roots are pot-bound, gently separate them to encourage spreading once transplanted.From Seedling Tray: Ensure the seedling tray's soil is damp. Use a trowel or your fingers to gently lift each silver milk thistle seedling, making sure to support the roots as you raise it. Be careful not to damage the delicate stems or roots during this process.
Step-by-Step Guide for Transplanting Silver Milk Thistle
Planting Hole
Dig a planting hole at the new site that is twice as wide and as deep as the silver milk thistle plant's root ball. This will provide ample space for the roots to expand.
Soil Preparation
Improve the soil in the hole with compost to supply nutrients and ensure proper drainage.
Plant Placement
Position the silver milk thistle plant in the center of the hole. Ensure the top of the root ball is level with the ground's surface.
Backfilling
Fill the hole with soil, gently pressing down to eliminate air pockets around the roots.
Watering
Thoroughly water the newly transplanted silver milk thistle plant to settle the soil around its roots.
How Do You Care For Silver Milk Thistle After Transplanting?
Mulching
Apply a layer of mulch around the base of the silver milk thistle plant to retain moisture and regulate soil temperature.
Monitoring
Observe the plant closely for the initial few weeks, looking for any indications of stress or transplant shock.
Pruning
If necessary, lightly trim any damaged leaves or stems to help the plant direct its energy towards root establishment.
Troubleshooting Common Issues with Silver Milk Thistle Transplantation.
When is the best time to transplant silver milk thistle?
Relocate silver milk thistle from early spring to late spring for optimal growth conditions and success.
How far apart should I space silver milk thistle plants?
Space silver milk thistle plants 24-36 inches (61-91 cm) apart for proper air circulation and growth.
How do I prepare the soil for transplanting silver milk thistle?
Ensure the soil is well-drained and enriched with compost to support silver milk thistle's growth.
What should I do if silver milk thistle wilts after transplanting?
Water it thoroughly but avoid overwatering. Ensure it's in a low-stress environment until it recovers.
How deep should I plant silver milk thistle seedlings?
Plant silver milk thistle seedlings at the same depth they were in their original container.
What is the ideal soil pH for transplanting silver milk thistle?
A slightly acidic to neutral pH (6.0 to 7.0) is ideal for silver milk thistle.
Should I fertilize silver milk thistle after transplanting?
Fertilize lightly after transplanting with a balanced, all-purpose fertilizer to support initial growth.
How much sun does silver milk thistle need?
Ensure silver milk thistle receives full sun, around 6-8 hours daily, for healthy development.
How often should I water silver milk thistle after transplanting?
Keep the soil consistently moist but not waterlogged immediately after transplanting silver milk thistle.
What should I do if silver milk thistle develops yellow leaves?
Check for proper drainage and soil pH balance. Adjust watering and amend soil if needed.


