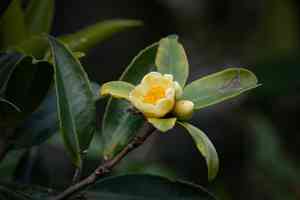
How to Transplant Common tutcheria?
For common tutcheria, the ideal period for relocation is from the onset of late spring's warmth through the early part of summer, allowing roots to firmly establish prior to the fall season. Select a site that replicates its native, shaded environment to facilitate successful adaptation. Careful handling during the transfer aids common tutcheria's adjustment.
Necessary Preparations Before Relocating Common Tutcheria?
When is the Best Time to Move Common Tutcheria?
The prime period for moving common tutcheria is at the start of spring, extending into early summer. This timing allows roots to settle in warmer ground, promoting better development. Shifting common tutcheria as the earth awakens offers the benefit of longer days and mild temperatures, ideal for root establishment. This gentle season encourages common tutcheria to thrive, facilitating a smooth transition from its current spot to a new location.
What is the Recommended Spacing Between Common Tutcheria Plants?
When getting ready to transplant your common tutcheria, ensure each plant has ample room to flourish. Aim to space them 5-10 feet apart (approximately 1.5-3 meters). This will provide each plant sufficient area to expand its root system and grow vigorously!
What is the Optimal Soil Blend for Transplanting Common Tutcheria?
For a thriving common tutcheria, prepare a welcoming environment with well-draining, fertile soil. Incorporate a balanced, slow-release fertilizer to nourish your plants. This initial boost aids in establishing strong roots for a healthy beginning.
Where Should You Place Your Common Tutcheria?
Select a location where your common tutcheria can enjoy partial to full sunlight. This means choosing a spot that receives several hours of gentle sun exposure daily. Too much shade? Your common tutcheria might not be as vibrant!
What Tools Should You Prepare Before Transplanting Common Tutcheria?
Gardening Gloves
To safeguard your hands while handling soil and plants.
Shovel or Spade
For excavating the plant and preparing the new planting site.
Garden Fork
To loosen the soil for easier extraction and to aerate the soil at the new location.
Pruning Shears
To trim any damaged or excess roots and foliage.
Wheelbarrow or Garden Cart
For transporting the plant and soil.
Watering Can or Hose
To irrigate common tutcheria during and after transplantation.
Mulch
To help maintain soil moisture and regulate soil temperature after transplant.
Measuring Tape
To ensure correct spacing between transplanted specimens.
Plant Support Stakes
To help common tutcheria remain upright if needed.
How to Extract Common Tutcheria from the Soil?
How to Extract Common Tutcheria from the Soil?
From Ground: First, thoroughly water common tutcheria to moisten the soil, making it easier to manage. Next, mark a perimeter several inches beyond the plant's drip line and carefully dig down with a shovel to prevent root damage. Once a sufficient trench is created around it, gently slide the shovel beneath the root ball to lift common tutcheria from the soil.From Pot: Begin by watering the plant to loosen the soil. Turn the pot on its side and gently tap the bottom and sides to dislodge the root ball. Gradually slide common tutcheria out of the pot, taking care not to pull forcefully on the stems or leaves.From Seedling Tray: Moisten the soil in the tray to facilitate common tutcheria removal. Use a small tool or your fingers to gently lift the plant by its leaves, supporting the root ball to prevent it from breaking apart.
Step-by-Step Guide for Relocating Common Tutcheria
Preparation
Ensure all necessary tools and materials are ready for a smooth transplanting process.
Plant Removal
Follow the appropriate removal method for common tutcheria, depending on whether it's in the ground, a pot, or a seedling tray.
Transport
Carefully move common tutcheria to the new planting area, using a wheelbarrow or garden cart if necessary to avoid damaging the plant.
Hole Preparation
Dig a hole in the new location that is twice as wide as the root ball and equally deep. Use the garden fork to loosen the soil at the bottom for improved root growth.
Plant Placement
Position common tutcheria in the center of the hole, ensuring the top of the root ball is level with the surrounding ground. Fill around the root ball with soil, gently tamping down to eliminate air pockets.
Watering
Thoroughly water common tutcheria immediately after planting to settle the soil and help reduce transplant shock.
Mulching
Apply a layer of mulch around the base of common tutcheria to conserve moisture and suppress weed growth, being careful not to let it touch the stem or leaves.
Support
If common tutcheria needs support to stay upright, carefully insert stakes around the plant and loosely tie the plant to them.
How to Care for Common Tutcheria After Relocation?
Consistent Watering
Water common tutcheria regularly to maintain consistent soil moisture; adjust based on weather conditions to prevent over or under-watering.
Monitoring
Inspect common tutcheria daily for signs of transplant shock such as wilting or discolored leaves, and address issues as needed.
Protection
Provide shade or windbreaks for the initial few days if extreme weather conditions are anticipated.
Staking
Adjust the plant support stakes as common tutcheria grows to ensure stability without harming the stem or hindering natural development.
Addressing Common Issues During Common Tutcheria Transplantation.
What's the ideal time to transplant common tutcheria?
The best time for common tutcheria transplantation is during the sweet spot of late spring to early summer.
How much space should I leave between common tutcheria when transplanting?
Allow common tutcheria ample room to thrive by giving them a generous distance of 5-10 feet (1.5-3 meters) apart.
What type of soil does common tutcheria require for successful transplanting?
Transplant common tutcheria into well-draining soil enriched with organic matter for optimal growth.
How deep should I plant common tutcheria during transplantation?
Plant common tutcheria with the root ball level with the soil surface, ensuring roots are spread out.
How much should I water common tutcheria after transplanting?
Water common tutcheria generously right after transplanting, then maintain consistent moisture without overwatering.
Should I fertilize common tutcheria immediately after transplanting?
Refrain from fertilizing right away; allow common tutcheria to establish in their new location first. Fertilize after a few weeks.
How do I know if common tutcheria isn't receiving enough sunlight after transplant?
If common tutcheria exhibits weak growth or pale leaves, it might be craving more sun. Choose a sunnier spot.
Can I transplant common tutcheria on a hot day?
It's best to transplant common tutcheria on a cool, overcast day to minimize transplant shock and water loss.
How should I handle common tutcheria's roots when transplanting?
Carefully untangle common tutcheria's roots to prevent circling, and spread them in the planting hole.
When can I expect common tutcheria to fully recover from transplant shock?
Typically, common tutcheria may take a few weeks to several months to bounce back. Provide consistent care and monitor progress.


