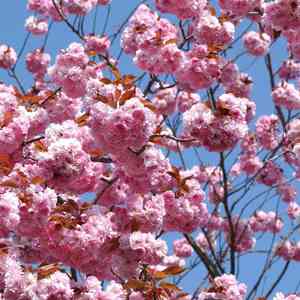
How to Transplant Japanese cherry?
The ideal period for relocating japanese cherry falls between the close of spring and the middle of summer, since the elevated temperatures foster root establishment and expansion. Select a site that drains effectively and receives abundant solar exposure. Bear in mind, a careful approach is crucial when tending to this fragile perennial.
Necessary Preparations Before Relocating Japanese Cherry?
Optimal Period for Moving Japanese Cherry?
The best time to move japanese cherry is from late spring through midsummer. This period offers suitable temperatures and warmer soil, fostering robust root development and rapid growth. You'll soon see abundant foliage and beautiful blossoms!
Required Distance Between Japanese Cherry Plants?
When relocating japanese cherry, ensure a spacing of approximately 15-25 feet (4.5-7.6 meters) between plants. This distance allows them ample room to grow and flourish without competing.
Ideal Soil Mixture for Japanese Cherry Relocation?
For optimal soil conditions, japanese cherry thrives in well-draining, loamy soil with a pH of 6.0-7.5. Incorporating organic material, such as compost, and a slow-release fertilizer can create a nutrient-rich environment for the plant's development.
Where to Replant Your Japanese Cherry?
Select a site for relocating japanese cherry that receives full sun to dappled shade. Four to six hours of daily sunlight is perfect for this plant. Also, ensure it's shielded from strong winds, which can harm its delicate blooms.
Equipment Needed Before Relocating Japanese Cherry?
Gardening Gloves
To safeguard your hands while handling soil and the plant.
Shovel or Spade
For digging the new planting hole and extracting the plant from its original spot.
Pruning Shears
To trim any damaged or unnecessary branches prior to relocation.
Measuring Tape
To ensure correct spacing between plants.
Watering Can or Hose
To hydrate the plant before and after its move.
Mulch
To help maintain soil moisture and inhibit weed growth around the plant.
Stakes or Supports
To offer additional stability for the plant, if required.
How to Extract Japanese Cherry from the Ground?
How to Extract Japanese Cherry from the Ground?
- From Ground:First, moisten the japanese cherry plant's soil. Then, use a shovel or spade to dig a wide trench around the plant, ensuring the root ball remains intact. Carefully work the spade beneath the root ball to lift the plant from its initial location.- From Pot:Gently water the japanese cherry plant to moisten the soil. Turn the pot on its side and tap the rim to loosen the soil. Carefully slide the plant out of the pot, keeping the root ball intact and minimizing root disturbance.- From Seedling Tray:Water the japanese cherry seedlings to dampen the soil. Use a small gardening tool or your fingers to carefully lift each seedling from the tray, striving to keep the roots as intact as possible.
Step-by-Step Guide for Relocating Japanese Cherry
Site Preparation
Prepare the planting area by loosening the soil to a depth of about 12-18 inches to encourage root growth and improve drainage.
Dig the Hole
Excavate a hole twice the width and the same depth as the japanese cherry plant's root ball. This provides ample space for root expansion and establishment.
Inspect the Roots
Gently examine the root ball, trimming any damaged or excessively long roots with clean pruning shears.
Position the Plant
Carefully place the japanese cherry plant in the hole, ensuring it's not planted deeper than its original position. Verify the plant is upright and properly aligned with its surroundings.
Backfill the Hole
Refill the hole with the excavated soil, gently working it around the plant's roots to eliminate air pockets.
Water Thoroughly
Water the japanese cherry plant thoroughly to settle the soil, ensuring the root ball is adequately moistened.
Mulch and Stake
Apply a 2-4 inch layer of mulch around the plant's base to help retain moisture and suppress weeds. If needed, install stakes or supports at this time to provide additional stability for the plant.
Post-Relocation Care for Japanese Cherry?
Watering
Maintain consistently moist, but not waterlogged, soil around the japanese cherry for the initial few weeks after relocation to aid in strong root establishment.
Pruning
Trim any dead or damaged branches during the first year post-relocation to promote healthy growth and shape the plant.
Frost Protection
Cover the japanese cherry with a frost protection material if temperature drops are anticipated during the first year after its move.
Pest and Disease Management
Regularly inspect the japanese cherry for signs of pests or diseases, treating them promptly with appropriate control methods to maintain the plant's health and vigor.
Resolving Common Issues with Japanese Cherry Relocation.
When is the best time to move japanese cherry?
The ideal time to move japanese cherry is late spring to mid-summer, allowing maximum establishment before winter.
What is the ideal spacing for relocating japanese cherry?
Space japanese cherry trees 15-25 feet (4.5-7.6 m) apart to provide ample room for growth and prevent overcrowding.
How deep should I dig the hole for relocating japanese cherry?
Dig a hole twice as wide and as deep as the root ball of japanese cherry, ensuring the tree is planted at the same soil depth as before.
What kind of soil is best for relocating japanese cherry?
Japanese cherry prefers well-drained, fertile soil with a slightly acidic pH. Loosen the soil and amend with organic matter if necessary.
How much water does japanese cherry need after relocating?
After relocating, water japanese cherry thoroughly and consistently, ensuring the soil stays evenly moist but not waterlogged.
Should I stake japanese cherry after relocating?
Staking japanese cherry is optional but can help support the tree, especially in its first year. Remove the stake once the tree is stable.
How to choose a planting site for japanese cherry?
Choose a site with full sun to partial shade, good air circulation, and enough space for japanese cherry to grow without obstruction.
What should I do if my relocated japanese cherry starts wilting?
Wilting after relocating can be normal; keep the soil moist, and trim back damaged branches to encourage new growth. Monitor for pests and diseases.
How to prevent relocation shock in japanese cherry?
To minimize shock, keep the root ball moist, trim any damaged roots, and water consistently without overwatering during the establishment period.
Do I need to fertilize japanese cherry after relocating?
Wait until japanese cherry has shown new growth before fertilizing. Use a slow-release, balanced fertilizer following the label instructions for proper application.


