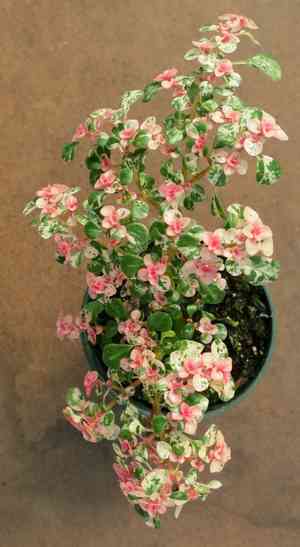
How to Transplant Artillery plant?
The ideal period for relocating artillery plant is amidst the warmth of summer, providing prime conditions for development. Select a spot with ample, diffused light and guarantee effective water runoff. Carefully position artillery plant in its new environment for successful integration.
What Preparations are Needed Before Transplanting Artillery Plant?
What is the Ideal Time for Transplanting Artillery Plant?
The optimal season for relocating artillery plant is during the warmth of summer. This period offers perfect temperatures that encourage roots to quickly settle in their new spot. Moving artillery plant now utilizes the longer days and increased sunlight, fostering robust growth and enhancing plant resilience. A friendly tip: early summer mornings are an excellent time for this task, as the mild temperatures reduce stress on artillery plant, ensuring a smoother transition to its new location.
How Much Space Should You Leave Between Artillery Plant Plants?
For artillery plant, begin by preparing your planting area with ample room. Ideally, each plant should have approximately 9-12 inches (22-30 cm) of space. This allows them to spread out and develop without competing for nutrients and light.
What is the Best Soil Mix for Artillery Plant Transplanting?
Before planting artillery plant, prepare your soil. It thrives in well-draining soil. Incorporate some peat moss or compost to enhance drainage and fertility. A balanced fertilizer, such as a 10-10-10 (NPK), can be used to strengthen the soil base.
Where Should You Relocate Your Artillery Plant?
Artillery plant performs well in partially shaded areas. Therefore, try to transplant it to a location that receives a mix of sunlight and shade. Too much direct sun might scorch the leaves, but complete shade can hinder growth. Balance is crucial!
What Equipments Should You Prepare Before Transplantation Artillery Plant?
Gardening Gloves
These will safeguard your hands from dirt or injury from any sharp or broken pieces while working with the plant and soil.
Shovel or Trowel
Essential for excavating holes in the ground where the plant will be moved.
Garden Pruner
Useful for removing dead sections of the plant prior to transplanting.
A Pot/Containter
When the plant is taken from its original spot, you might need a pot to temporarily hold it.
Watering Can
To hydrate the plant before and after transplantation.
How Do You Remove Artillery Plant from the Soil?
How Do You Remove Artillery Plant from the Soil?
From Ground: To extract artillery plant from the ground, first ensure the surrounding soil is moist by watering it. Then, dig a wide circle around the plant with a shovel to avoid damaging the root ball. Gently work your shovel beneath the rootball and lift the plant out of the ground.From Pot: If artillery plant is in a pot, you should first water it to facilitate removal. You can then tilt the pot sideways and carefully pull the plant by its base. If the plant is stuck, you can tap the bottom of the pot to loosen it.From Seedling Tray: If the plant is a seedling, make sure to water the tray before attempting to remove it. Gently hold the plant by its leaves (not the stem) and use a dibber or a pencil to push the seedling out from the bottom.
Step-by-Step Guide for Transplanting Artillery Plant
Preparation
Begin by preparing the new planting site. Dig a hole that is twice as wide as the plant's root ball and of the same depth. Break up any compacted soil at the bottom of the hole.
Inspection
Examine the plant before placing it in the hole, removing any dead or damaged roots with a garden pruner.
Placement
Gently place artillery plant in the hole. Ensure the plant is at the same depth as it was previously. The top of the root ball should be level with the ground.
Backfill
Refill the hole with soil, pressing it gently around the base of the plant.
Watering
Finally, thoroughly water the plant to settle the soil around the roots.
How Do You Care For Artillery Plant After Transplanting?
Monitoring
Regularly check the artillery plant for the initial few weeks to ensure it's adapting to its new surroundings. Keep the immediate area free of weeds that could compete for resources.
Watering
Maintain moderately moist soil to aid in root establishment. If the leaves of artillery plant begin to wilt, it could indicate the plant requires more water.
Pruning
Remove any part of the plant that shows signs of disease or stress. This will redirect the plant's energy to new growth.
Avoid fertilization for a few weeks
Allow the plant to acclimate to its new location first and refrain from adding fertilizer until you observe new growth.
Troubleshooting Common Issues with Artillery Plant Transplantation.
What's the best season to transplant artillery plant?
The ideal period to transplant artillery plant is during late summer to early fall (S4-S6). This provides the plant ample time to establish roots before the colder weather arrives.
How far apart should artillery plant be planted?
Artillery plant requires adequate space for optimal growth. Plant them approximately 9-12 inches (23-30 cm) apart to allow sufficient room for roots and foliage to develop.
Do I need a special type of soil for transplanting artillery plant?
Artillery plant isn't overly particular about soil. However, it will thrive best in well-draining soil. This helps prevent waterlogging which can negatively impact the plant's health.
How deep should I plant artillery plant during transplantation?
When transplanting, completely bury the artillery plant's roots in the soil, but ensure the stem's base is level with the soil surface. This allows the plant to establish itself quickly.
What care should I provide for artillery plant post-transplant?
Post-transplant, water artillery plant thoroughly to encourage root growth and eliminate any air pockets in the soil. Continue to provide frequent watering and ensure it's exposed to indirect sunlight.
Why are my transplanted artillery plant leaves turning yellow?
Yellowing leaves can indicate overwatering or poor drainage. Verify that the soil drains well and reduce watering if the soil appears overly saturated.
How do I prevent transplant shock in artillery plant?
To minimize transplant shock in artillery plant, try to disturb the roots as little as possible during the process. After transplanting, provide sufficient water and initially shade the plant.
Why is my transplanted artillery plant wilting?
Wilting post-transplant could be due to shock or insufficient water. Ensure artillery plant is adequately watered and protected from harsh weather conditions or direct sunlight during the first few days.
My transplanted artillery plant isn't growing. What could be wrong?
Poor growth can result from inadequate soil, insufficient water, or the plant being overcrowded. Ensure the proper 9-12 inches (23-30 cm) spacing is maintained and that the plant is receiving appropriate care.
How soon can I expect artillery plant to bloom post-transplant?
With proper care, transplanted artillery plant should adapt to its new location and begin blooming within a few weeks. However, this can vary depending on the plant's overall health and environmental conditions.


