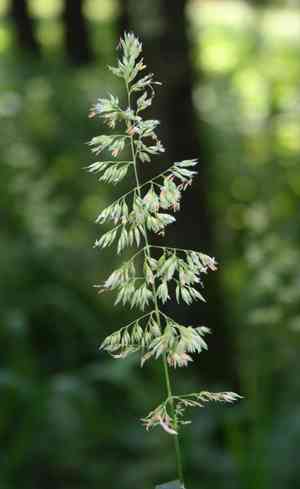
How to Transplant Reed canary grass?
Relocate reed canary grass from early to mid-spring or from late autumn to early winter, coinciding with its active growth phase. Choose a site featuring adequately drained earth and exposure to full sunlight or partial shade. For optimal establishment, irrigate consistently following transplantation and uphold steady hydration.
What Preparations are Needed Before Transplanting Reed Canary Grass?
What is the Ideal Time for Transplanting Reed Canary Grass?
The best time to move reed canary grass is from early spring to mid-spring, or from late autumn to early winter. Relocating reed canary grass during these periods supports seamless growth, as cooler temperatures and ample moisture aid root development. Your reed canary grass will thrive in its new home when transplanted at such an opportune moment! This approach helps reed canary grass establish with fewer difficulties and a stronger root system. Always remember, a good start leads to a successful finish!
How Much Space Should You Leave Between Reed Canary Grass Plants?
When relocating reed canary grass, it's essential to provide adequate room for growth. Ideally, maintain a distance of approximately 18-24 inches (45-60 cm) between each plant. This allows them to flourish while still being in close proximity.
What is the Best Soil Mix for Reed Canary Grass Transplanting?
To prepare the soil for reed canary grass, ensure it is rich in organic matter and drains well. To boost its fertility, incorporate a slow-release granular fertilizer before planting. This will supply your reed canary grass with vital nutrients needed for robust growth.
Where Should You Relocate Your Reed Canary Grass?
Select a location with full sun or partial shade for reed canary grass's new spot. This plant adapts well to various light conditions and prefers sunlight, but can also tolerate less exposure. Choosing the correct transplanting site will help your reed canary grass grow strong and tall.
What Equipments Should You Prepare Before Transplantation Reed Canary Grass?
Gardening Gloves
To safeguard your hands while handling soil and plants.
Shovel or Spade
To excavate a hole for transplanting and remove the plant from its original spot.
Trowel
For more precise digging and adjusting soil around reed canary grass's roots.
Watering Can
To hydrate the plant before and after relocation.
Pruning Shears
To trim any damaged or excess growth prior to transplanting.
Wheelbarrow or Garden Cart
To move the plant to its new site if it is too heavy to carry.
How Do You Remove Reed Canary Grass from the Soil?
How Do You Remove Reed Canary Grass from the Soil?
From Ground: First, moisten the reed canary grass plant to dampen the soil. Then, dig a wide trench around the plant using a shovel or spade, ensuring the plant's root ball remains intact. Carefully work the spade beneath the root ball to lift the plant from its original location.From Pot: Hydrate the reed canary grass plant to moisten the soil. Gently invert the pot and tap the edges to loosen the root ball. Hold the plant firmly by its base and slide it out of the pot without disturbing the root system.From Seedling Tray: Water the reed canary grass seedlings to dampen the soil. Use a trowel or your fingers to gently loosen the soil around the roots. Hold the seedling by its base and carefully lift it from the tray, taking care not to harm the roots.
Step-by-Step Guide for Transplanting Reed Canary Grass
Transplant Timing
Move reed canary grass in spring or fall when temperatures are cooler to reduce stress on the plant.
Hole Preparation
Excavate a hole at the transplant site that is at least twice as wide and deep as the root ball. If moving from a pot, use the pot's dimensions as a guide.
Root Inspection
Examine the root system and trim any damaged, dead, or diseased roots using pruning shears.
Plant Placement
Position the reed canary grass into the hole, ensuring the root ball is level with the surrounding soil. Fill the hole halfway with soil, gently tamping it down to remove air pockets.
Watering
Slowly irrigate the plant until the water reaches the bottom of the hole. This will help the roots make good contact with the soil.
Finishing Touches
Fill the remainder of the hole with soil, and gently tamp it down to secure the plant in place. Create a slight depression around the base of the plant to help retain water.
How Do You Care For Reed Canary Grass After Transplanting?
Watering
Keep the soil around the reed canary grass consistently moist, but not waterlogged, for the initial few weeks after transplanting to help establish strong roots.
Pruning
Trim back any dead or damaged foliage to encourage healthy growth.
Mulching
Apply a layer of organic mulch around the base of the reed canary grass to help retain moisture, regulate soil temperature, and suppress weeds.
Monitoring
Observe the reed canary grass for signs of stress, such as wilting, yellowing leaves, or stunted growth. Address any issues promptly with appropriate care or by consulting a gardening expert.
Troubleshooting Common Issues with Reed Canary Grass Transplantation.
What's the best time of the year to transplant reed canary grass?
Gently move reed canary grass from its current spot to a new one during the transition from spring to summer or the start of winter. In other words, either early to mid-spring, or late fall to early winter is ideal.
How much space does reed canary grass need when transplanting?
Reed canary grass thrives with adequate room, so please maintain a gap of 18-24 inches (approximately 45-60 cm) between each plant.
How should I prepare the soil for transplanting reed canary grass?
Incorporate organic materials like compost or well-rotted manure into the top 8-10 inches (20-25 cm) of the soil to enhance fertility and improve drainage before relocating reed canary grass.
What level of sunlight do I need when relocating reed canary grass?
Although reed canary grass tolerates various conditions, it prefers full sun to partial shade. So choose a location that offers this balance for healthier growth.
After transplanting reed canary grass, how often should I water it?
Thoroughly hydrate reed canary grass after transplantation, ensuring the root zone is moist. After the initial soaking, water it regularly when the top few inches of soil feel dry to the touch.
What is an appropriate depth to dig the hole for reed canary grass during transplantation?
Dig a hole twice the size of the reed canary grass's root ball. Typically about 10 inches (25 cm) deep should suffice, allowing roots ample space to establish.
How can I ensure reed canary grass's roots don't suffer shock during transplantation?
Protect reed canary grass's roots by keeping them moist during the transplanting process. And once placed in the hole, carefully backfill with soil and press firmly to eliminate air pockets.
Can I transplant reed canary grass close to buildings or other structures?
Ensuring a minimum of 18-24 inches (45-60 cm) of space around reed canary grass, you can transplant it near buildings or other structures. However, consider potential shading effects of these structures on reed canary grass.
Should I trim or prune reed canary grass during transplantation?
Lightly prune reed canary grass after transplantation. This promotes bushier growth, encourages more flowers, and keeps the plant healthy. However, avoid heavy pruning at this time.
How should I care for reed canary grass just after transplantation?
After transplantation, keep the soil around reed canary grass consistently moist and apply a balanced slow-release fertilizer. Shield it from extreme weather and watch for any signs of stress.


