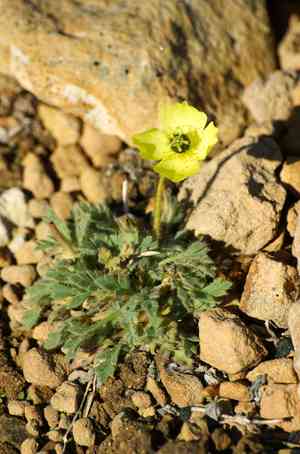
How to Transplant Arctic poppy?
Arctic poppy flourishes most effectively when relocated between the beginning and end of spring, providing sufficient opportunity for its root system to settle. Select a brightly lit location with soil that drains efficiently to guarantee peak development. Refrain from disrupting the roots and provide consistent watering after the transfer.
What Preparations are Needed Before Transplanting Arctic Poppy?
What is the Ideal Time for Transplanting Arctic Poppy?
The best time to move arctic poppy is from early spring through late spring. This schedule allows the plant to establish roots before summer's heat. Transplanting during this period promotes root development and adaptation, leading to strong growth. Early season relocation also lets arctic poppy benefit fully from good growing conditions.
How Much Space Should You Leave Between Arctic Poppy Plants?
When relocating arctic poppy, ensure each plant is spaced approximately 12-18 inches (30-45 cm) apart. This provides ample room for individual growth and prevents overcrowding.
What is the Best Soil Mix for Arctic Poppy Transplanting?
Arctic poppy prefers soil that drains well, such as sandy or gravelly types. Before transplanting, enrich the soil with a balanced, slow-release fertilizer to supply essential nutrients.
Where Should You Relocate Your Arctic Poppy?
Select a sunny location for moving arctic poppy. It thrives in full sun, requiring 6-8 hours of direct sunlight daily. This exposure helps it develop robustly and healthily.
What Equipments Should You Prepare Before Transplantation Arctic Poppy?
Gardening Gloves
To safeguard your hands while handling soil and plants.
Shovel or Spade
For digging and extracting the plant from its current spot.
Trowel
Useful for digging and relocating smaller plants or young seedlings.
Garden Fork
To loosen the soil and assist in removing the plant without harming its roots.
Watering Can
For hydrating the plant both before and after its relocation.
Mulch
To aid in retaining soil moisture and stabilizing ground temperature.
How Do You Remove Arctic Poppy from the Soil?
How Do You Remove Arctic Poppy from the Soil?
From Ground: First, hydrate the arctic poppy plant to moisten the soil. Next, excavate a wide trench around the plant using a shovel or spade, ensuring the root ball remains intact. Carefully maneuver the spade beneath the root ball to lift the plant from its original position.From Pot: Gently water the arctic poppy plant to loosen the soil. Incline the pot and tap it to slide the plant out, supporting the plant's base with your hand to keep the root ball whole. Use a trowel if necessary to ease the plant out if it's stuck.From Seedling Tray: Lightly water the seedlings to facilitate removal. Use your fingers or a small, blunt tool to carefully push the seedling out of the tray, taking care not to damage the roots. Handle by the leaves rather than the stem to avoid crushing the plant.
Step-by-Step Guide for Transplanting Arctic Poppy
Prepare the New Site
Aerate the soil in the new planting area and dig a hole twice as wide and as deep as the arctic poppy plant's root ball.
Remove the Plant
Carefully extract the arctic poppy plant from its initial spot by following the appropriate removal method for ground, pot, or seedling tray.
Plant the arctic poppy
Position the root ball in the prepared hole, ensuring it sits at the same depth as it was previously. Backfill the hole with soil and gently press to eliminate air pockets.
Water the Plant
Thoroughly water the arctic poppy plant after transplanting to help the soil settle around its roots.
Add Mulch
Apply a layer of mulch around the plant's base to conserve moisture and regulate soil temperature.
How Do You Care For Arctic Poppy After Transplanting?
Watering
Maintain consistent moisture in the soil around the arctic poppy, avoiding sogginess, for the initial weeks post-transplant to encourage strong root development.
Protect from Extreme Weather
If severe temperatures are anticipated, provide temporary shade or cover to shield the newly transplanted arctic poppy plant.
Monitor for Stress
Observe the plant for indications of transplant shock, such as wilting or yellowing foliage, and adjust care as needed.
Troubleshooting Common Issues with Arctic Poppy Transplantation.
When is the best time to transplant arctic poppy?
Early spring to late spring is ideal for relocating arctic poppy to ensure successful establishment.
How far apart should I space arctic poppy plants?
Space arctic poppy plants 12-18 inches (30-45 cm) apart for optimal growth and air circulation.
What kind of soil is best for arctic poppy transplants?
Arctic poppy thrives in well-draining soil with a slightly acidic to neutral pH for healthy development.
How often should I water newly transplanted arctic poppy?
Water arctic poppy regularly, keeping the soil consistently moist but not waterlogged, especially after transplanting.
How do I prepare the transplant site for arctic poppy?
Ensure the site has good drainage, is free of weeds, and is enriched with compost.
What should I do if arctic poppy shows transplant shock?
Provide shade, keep the soil moist, and avoid further disturbance to the plant to lessen transplant shock.
Can I use fertilizer when transplanting arctic poppy?
Use a balanced, slow-release fertilizer sparingly during transplanting to encourage establishment without over-fertilizing.
How deep should I plant arctic poppy transplants?
Plant arctic poppy at the same depth it was growing before to prevent stress and promote root settling.
How to protect arctic poppy from pests after transplanting?
Regularly check for pests and use organic controls like neem oil if necessary. Avoid harsh chemicals.
Why are the leaves of arctic poppy turning yellow after transplanting?
Yellow leaves can indicate overwatering or transplant shock. Adjust watering and provide care to support recovery.


