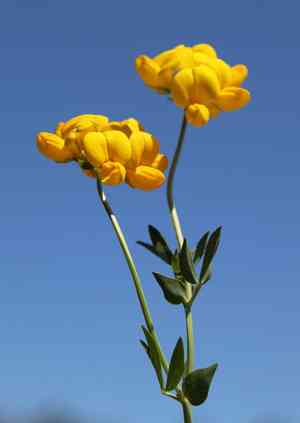
How to Transplant Common bird's-foot trefoil?
The peak of summer's heat provides the ideal period for relocating common bird's-foot trefoil, guaranteeing its successful integration. Choose a bright spot with soil that drains effectively; to achieve optimal outcomes, preserve the root system during the transfer. A favorable approach for vigorous development!
Preparations for Transplanting Common Bird's-foot Trefoil
Optimal Timing for Relocating Common Bird's-foot Trefoil
The perfect time to move common bird's-foot trefoil is during the pleasant warmth of early summer. This period allows common bird's-foot trefoil to establish its root system before colder weather arrives. Transplanting common bird's-foot trefoil when conditions are favorable ensures the plant has ample time to adjust and flourish, utilizing extended daylight for optimal growth. By selecting this ideal season, gardeners provide common bird's-foot trefoil with a strong foundation for vigorous development, enhancing its hardiness and floral display.
Recommended Spacing Between Common Bird's-foot Trefoil Plants
When transplanting common bird's-foot trefoil, allow them ample room to spread. Aim for approximately 1-2 feet (30-60 cm) of space between each plant. This provides sufficient area for growth without competition.
Best Soil Mixture for Common Bird's-foot Trefoil Transplanting
For common bird's-foot trefoil, ensure the soil is well-drained. It is not particular about soil type, thriving even in poor quality soils. However, enrich the soil with a phosphorus-rich base fertilizer to encourage strong root development from the start.
Choosing a New Location for Your Common Bird's-foot Trefoil
Remember, placement is crucial for common bird's-foot trefoil. Select a sunny spot, as it blooms best with plenty of sunlight exposure. However, partial shade is also acceptable, as common bird's-foot trefoil can adapt well.
Equipment Needed Before Transplanting Common Bird's-foot Trefoil
Gardening Gloves
To protect your hands while working with soil and the root system of common bird's-foot trefoil.
Hand Trowel
Useful for carefully lifting and moving common bird's-foot trefoil without causing significant harm.
Watering Can
To supply adequate moisture to common bird's-foot trefoil during and after transplantation.
Shovel or Spade
To assist in digging the new planting hole for common bird's-foot trefoil and for removing plants from the ground.
Organic Matter (e.g., compost or peat moss)
Beneficial for enriching the soil for common bird's-foot trefoil at its new site.
How to Extract Common Bird's-foot Trefoil from the Soil
How to Extract Common Bird's-foot Trefoil from the Soil
From Ground: Begin by watering the common bird's-foot trefoil plant to moisten the soil. This will facilitate easier removal. Next, using a shovel or spade, dig a wide circle around the common bird's-foot trefoil, taking care to avoid damaging the roots. Work the shovel/spade beneath the root ball, then gently lift the common bird's-foot trefoil from the ground.From Pot: First, ensure the soil is moist by watering the common bird's-foot trefoil. Turn the pot on its side, hold the common bird's-foot trefoil gently by its base, and pull lightly. If the plant doesn't release, tap the bottom of the pot gently.From Seedling Tray: Once common bird's-foot trefoil sprouts have reached a suitable height with a set of true leaves, they are ready for transplanting. Water the tray, then use a dibber or any pointed tool to gently push up from the bottom to extract the seedling with minimal damage.
Step-by-Step Guide for Transplanting Common Bird's-foot Trefoil
Preparation
Prepare the planting site by digging a hole twice the size of the common bird's-foot trefoil's root ball. Incorporate organic matter into the hole to improve soil fertility.
Transplanting
Position the common bird's-foot trefoil into the hole. Ensure the top of the root ball is level with the soil surface. Backfill the hole with soil, gently firming it around the base of the common bird's-foot trefoil.
Watering
After transplanting, water the common bird's-foot trefoil lightly but thoroughly to settle the soil around its roots.
Monitoring
Observe your common bird's-foot trefoil for signs of transplant shock, such as wilting or yellowing leaves, and provide additional water and care if needed.
Post-Transplanting Care for Common Bird's-foot Trefoil
Mulching
Applying a thin layer of organic mulch around your common bird's-foot trefoil can help retain moisture and suppress weeds.
Pruning
Lightly prune your common bird's-foot trefoil after transplanting to encourage bushier growth and reduce water loss.
Watering
Common bird's-foot trefoil will require consistent watering as it establishes in its new location, so water carefully to prevent oversaturation of the soil.
Disease and Pest Observation
Watch for pests or disease symptoms on your common bird's-foot trefoil and treat as necessary.
Troubleshooting Common Issues with Common Bird's-foot Trefoil Transplantation
Ideal Timeframe for Transplanting Common Bird's-foot Trefoil
The best time to transplant common bird's-foot trefoil is during the late spring to early summer period.
Appropriate Spacing for Transplanting Common Bird's-foot Trefoil
Maintain a distance of approximately 1-2 feet (30-60cm) between each common bird's-foot trefoil to promote healthy development.
Pre-Transplanting Preparations for Common Bird's-foot Trefoil
Prepare well-drained garden soil enriched with organic matter. Also, ensure the planting holes are sufficiently deep and wide for common bird's-foot trefoil roots.
Reasons for Wilting in Transplanted Common Bird's-foot Trefoil
Common bird's-foot trefoil may wilt due to transplant shock. Water it thoroughly, and keep it out of direct sun and heat for a few days.
Optimal Sunlight Conditions for Common Bird's-foot Trefoil
Common bird's-foot trefoil thrives in full sun to partial shade. Ensure it receives about 6 hours of sunlight daily after transplanting.
Causes of Yellowing Leaves in Transplanted Common Bird's-foot Trefoil
Yellowing leaves might indicate overwatering or a nutrient deficiency. Adjust your watering practices and consider applying a balanced fertilizer.
Transplanting Common Bird's-foot Trefoil into Containers
Certainly! Use a pot that is at least 12 inches (30cm) in diameter and has adequate drainage holes.
Addressing Non-Blooming in Transplanted Common Bird's-foot Trefoil
Lack of blooms can be due to insufficient sunlight or nutrients. Re-evaluate your common bird's-foot trefoil's placement and the fertilizer used.
Ideal Soil for Transplanting Common Bird's-foot Trefoil
Common bird's-foot trefoil prefers well-draining soil with a pH of approximately 6.5. Adding compost or aged manure can enhance soil fertility.
Watering Frequency for Newly Transplanted Common Bird's-foot Trefoil
Water common bird's-foot trefoil thoroughly after transplanting, then keep the soil consistently moist. Avoid soggy soil to prevent root rot.


